Brazing together bronze nuts

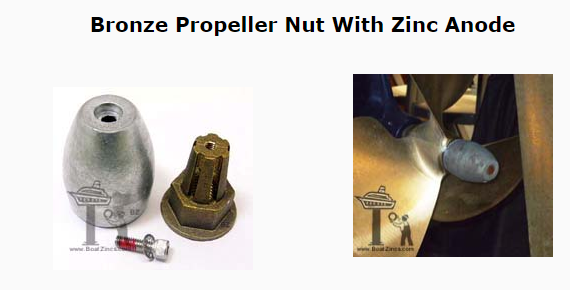
Other than the crazy price they get for them why not just use a "C" size prop nut and zinc? It's 3/4-10 thread. Typically the shaft is drilled for a cotter pin. View attachment 259535

http://www.boatzincs.com/prop_nut_s...MIkoCp8e6_2QIVxiSBCh1BtwX7EAQYASABEgL24PD_BwE
Answer: lack of clearance between the aft end of the prop and the leading edge of the rudder. And that's even after I enlarged the rudder aperture with a Sawzall, which was a somewhat terrifying activity. :)
 
Ok how about this:

The "Perry Nut Zinc"
http://www.boatzincs.com/p-3.html

That's what was on there before the current arrangement. It's far too little zinc for the job, and has to be replaced multiple times per summer, which involves extracting the cotter, loosening one nut, replacing the zinc, reinstalling the nut, snugging it up just enough for the cotter to fit again...all underwater holding my breath.

I don't want to seem ungrateful, but I really do know lots about boats -- just not much about machining, which is why I came to you folks. I appreciate the thinking-outside-the-box that lots of folks have done here, and I'll now go back and noodle a bit more, and maybe even include a picture or two next time, showing the current arrangement, etc.
 
Well....it's been 5 years, but I thought I'd go ahead and show what I eventually made, because when I see things like this, it pleases me to have closure on a project, so I thought I'd provide my own.

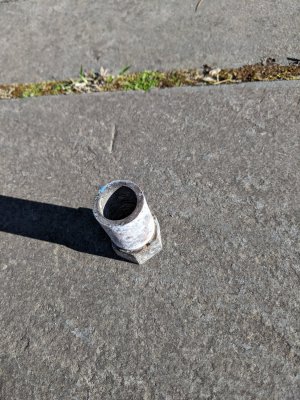
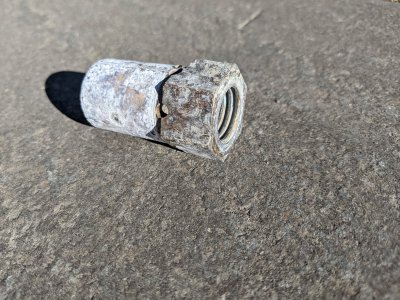
It's not pretty because it's got a bunch of marine growth on it, but you'll get the idea. As recommended, I chucked some hex bar in the lathe, drilled and bored it, and then tapped the threads, which was much easier than I'd expected, and not too expensive because our local shop folks had a tap I could use. The round part where the zinc clamps on gets brushed at the start of each season to give a good electrical connection, and the zincs disappear fast enough that I'm pretty sure it remains connected throughout the summer. The cotter pin is kinda jammed in between the zinc-area and the nut, and it all seems to work pretty well. The blue in the second picture is where I mistakenly got a little bit of bottom-paint on the assembly.

PXL_20240503_214216927.jpgPXL_20240503_214248067.jpg
 
TLDR
To stick three nuts together, drill two of them out to remove threads, then assemble on threaded rod with one more nut to hold them together. TIG weld with silicon bronze filler.
 
TLDR
To stick three nuts together, drill two of them out to remove threads, then assemble on threaded rod with one more nut to hold them together. TIG weld with silicon bronze filler.
You shoulda 'R' :grin::p

OP used hex rod, turned as much of the length down that he needed to and drilled and tapped (which makes sense as the simplest, most elegant way of getting the part he wanted).

Turns out he was a better machinist than he thought he was, so props to him and props to him for updating the thead too; it was a good read (including the posts where the OP very politely dismisses an apparent blowhard claiming authority). :)

And props to you for carefully and closely reading the OPs post and spotting that not all of the part's bore needed to be threaded (thus the thread removal to deal with the nuts not lining up when on the threaded rod); I love it when I see a question answered properly, it's kinda rare on the internet these days.

If you ever answer a question I've asked, I'm going to look at your suggestion first. ;)

Wish there were more people on the internet with the motivation to ensure their answer is actually relevant to the problem in hand. :):eagerness:
I was on my phone having lunch in a fast food joint. I should go back and read now that I'm on my laptop. Thanks for the props. I'm not the most skilled machinist around, but I seem to have a knack for seeing simple solutions to complex problems. Maybe because I'm just lazy.
 
I was on my phone having lunch in a fast food joint. I should go back and read now that I'm on my laptop. Thanks for the props. I'm not the most skilled machinist around, but I seem to have a knack for seeing simple solutions to complex problems. Maybe because I'm just lazy.
'Lazy' like a fox mate. ;)
 
Back
Top