Cleaning up a tired old carbide grinder

WobblyHand

H-M Supporter - Diamond Member
H-M Lifetime Diamond Member
Joined
Dec 18, 2019
Messages
6,441
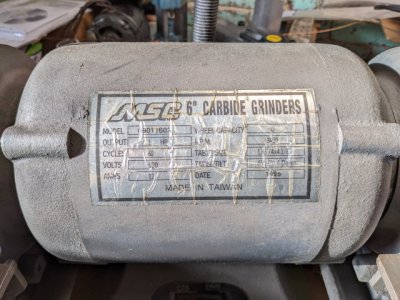
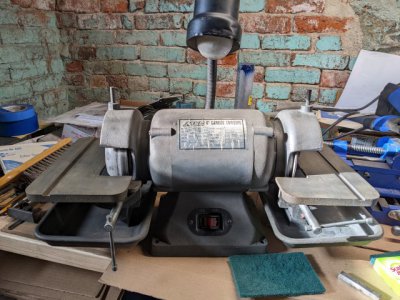
This week came home with a used MSC carbide grinder. Found it on the Market Place. Price was ok, but knew this was going to be a project. It is indeed looking like it will take a while to get it in shape. Has pretty good bearings, it takes quite a while to wind down, so much so that I asked the guy if it was still plugged in. I thought the power switch was broken or constant on. No, just a long coast down.

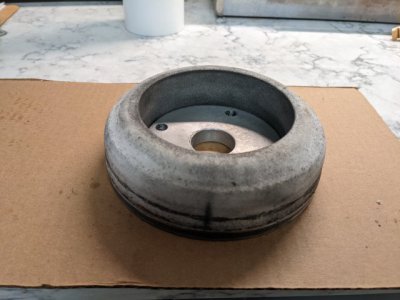
Got it home without much problem and started to look at it. Hmm, a little ugly. Some knucklehead had jammed in something, hitting the socket head cap screws on one side. The usual Allen wrenches wouldn't fit. The silicon carbide wheel was totally worn down, and the white alumina wheel was pretty worn, but I knew that when I first saw the listing. What did surprise me was how expensive new type 2 wheels were. I'll nearly double the value of the grinder by putting new wheels on.
PXL_20211207_151606206.jpgPXL_20211207_151623804.jpg
This grinder has been figuratively used and put away wet. I don't think it has ever been cleaned. There's crud, grease and carbide and alumina grit everywhere. So I have been cleaning this up. I used Krud Kutter to get out the bulk of the carbide dust, wetting it down and scraping and removing it. I've gone through quite a bit of paper towels doing this. I have cleaned the water trays, and the front side of the grinder.

Removing the wheels were a little tricky without air in the shop. The easy way would be to use an impact wrench. But I managed to eventually remove both the RH and LH threaded nuts. One wheel came off easy, the other wheel had the damaged SHC screws. I used a file and a piece of HSS to scrape out the steel that had be smeared into the hex recess. It wasn't quite enough, so for one of the screws I had to tap in an allen wrench with a hammer into the socket.
PXL_20211207_204146354.jpgPXL_20211210_185217116.jpg
Had an interruption in the form of a non-functional hot water heater interfere with this project. It's good to get back to this.

Ordered and received a diamond point tool. Now it appears I need to make a tool holder as it is pretty short. Think I can dress the white wheel.
 
so when you say put away wet , with water still in the tray?

I have a slow speed Delta water grinder, it's meant to only run in water. I made the mistake of leaving the water in the trough. BIG mistake.
the wheel swelled to one side.

If you leave the wheel sit for a long time it will dry out and hopefully lose its out of balance...

Before you replace the wheels, true them up a little, see if they are useable... You'd be surprised.
As far as wheels, try to find someone with surplus on ebay...
No, not literally put away wet. Just not well taken care of, most fasteners bunged up, really messy, broken (snapped off) switch on the light, and a bent angle lock. Don't know how to put this gently, but it was (ab)used by one or more ham hands who obviously hadn't purchased the tool with their own money. Guess I'm saying it wasn't gently used. Most of the stuff that Keith Fenner found in his video series is present in this grinder.

I expect the white wheel can be trued. There's only a 1/4" left at the thickest part of the green wheel, it is pretty sad looking. Having never trued a wheel, what exactly does one do?

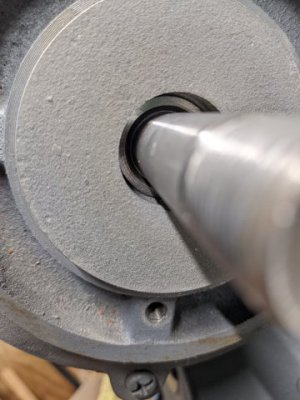
Managed to somehow get a tiny blob of grit in where the sleeve (bushing) contacts the bearing. I need to clean it out somehow. The gap is wider than a pipe cleaner (wire) and narrower than a cotton swab. However the folded pipe cleaner isn't getting it out. The blob has increased the right wheel runout to 0.010", originally it was under 0.002".
 
I true with 2 types of diamond tools.
I have a single point diamond in a long holder. I ordered the long holder shaft to be able to put a block of AL around it. it allows me to use the rests to true the stones straight across. I also have 2 T bars of diamond, one coarse, and one fine. I use those for roughing. it's less accurate since I can't control it as finely as the single shaft.

Never leave your stones in water, when you are done, remove the tray of water, or empty it. If you are going to keep coming back to it, I would let it run... that way you won't swell one side and forget to return... I'll let others chime in.

Truing a stone is truing a stone... it's a grinder, same as a bench grinder. I don't have a carbide grinder, I wish... I have diamonds that I use in various machines...
 
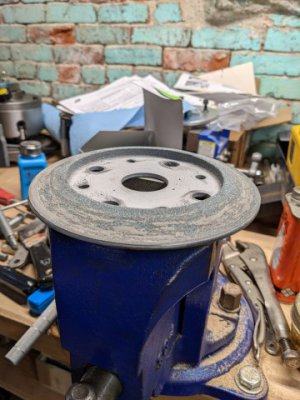
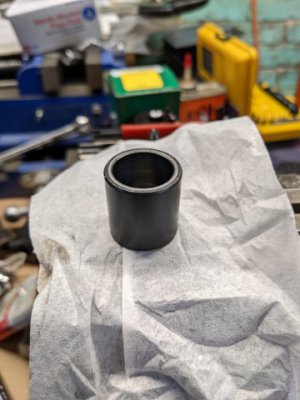
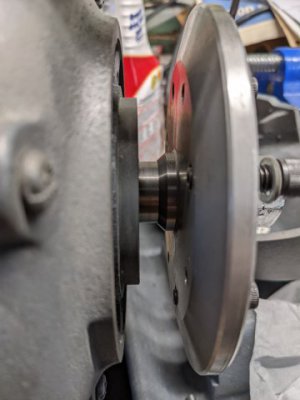
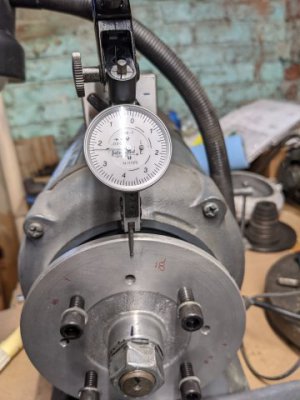
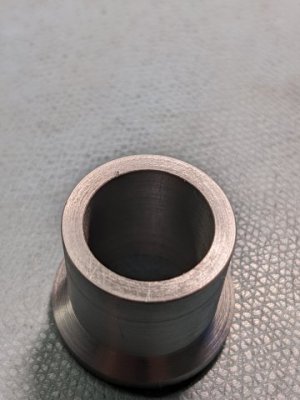
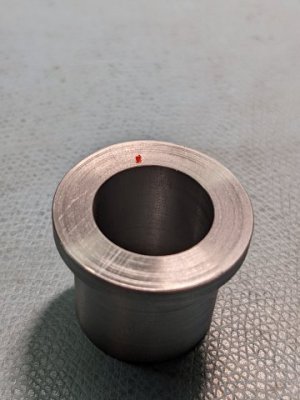
Got a chance to work on this some more. Trying to reduce the runout on the aluminum wheel. Best runout I could get was about 0.009" using the stock bushing in various rotational positions relative to the shaft and relative rotations of the wheel relative to the shaft. Here is the stock bushing.
PXL_20211214_185811958.jpg
The bushing fits over the motor shaft and rests on this inner surface.
PXL_20211214_184859919.jpg
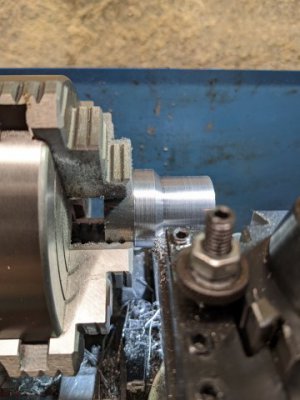
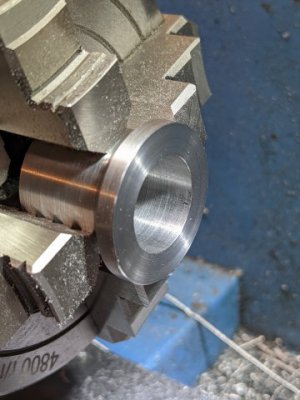
Decided to make a bushing with a tighter fit on the shaft and a bigger flange for the aluminum disk to rest on. If you have watched Keith Fenner's series on his carbide grinder rebuild, this is what he did to improve runout. Made my bushing from 1-1/4" (~32 mm) 1144 and bored it to a tight fit (18.98) mm to the motor shaft. Much less slop. 26 mm long, 25 mm minor diameter to avoid motor casting interference. At the aluminum disk end, left the diameter at 1-1/4, but took a skim coat to make it look nicer. Took me a while to go through all the permutations (shaft relative to wheel, shaft relative to bushing) but finally found a relative sweet spot of 0.0025" TIR. Marked it and reassembled that half of the grinder. I'm calling that side good.
PXL_20211214_185755615.jpg
PXL_20211214_190158675.jpg
Have to do the other side now. This is a lot more fun than fixing domestic hot water problems!
 
Do yourself a favor, buy good quality wheels.
This video is timely. I enjoyed it, I hope you can get something out of it.
 
Do yourself a favor, buy good quality wheels.
This video is timely. I enjoyed it, I hope you can get something out of it.
I've gone through Keith's whole video series on this. That's why I made the bushing. Have to say Keith made it look a lot easier than I've experienced. His MSC grinder was new, and mine, well, the grinder was messy. Wished he showed how to separate the case and access the bearings. Indicating my motor shaft shows runout, and there should be practically none. Keith mentioned possibly changing bearings, but didn't end up doing it (in the video series).
 
Looked at the left side wheel. It's best runout is 0.0055" with the stock bushing. The aluminum hub is ok. The shaft on the left side (with the left hand threads) is in better condition. Measured the runout of the left motor shaft and it is sub 0.0001" which is what I expected. The right shaft nut apparently wasn't tightened enough during its lifetime, resulting in the bushing rotating on the shaft and slightly marring it. I can see evidence of minor scoring inside both bushings. I will make a close fitting bushing for the left side tomorrow. Hope it will slightly improve the runout.

Overall, this is progressing ok. After reducing the runout, I will remount the existing wheels and spin it up. Then I will make a diamond point holder and attempt truing the wheel.

Been looking at CBN wheels to replace the worn SiC wheel. Is something like a Shars CBN wheel ok?
 
as long as you don't grind carbide with it, yes. CBN is excellent for grinding HSS, but won't grind carbide.

For carbide you can use :
Diamond
Silicon Carbide
and I believe ceramic (but not sure)
 
Made a second bushing, but it isn't reducing the runout. It actually made it worse. Made it in the four jaw chuck, kind of puzzling over this. When I parted the bushing off, it fell and got a burr on one of the precision surfaces. :( Of course it is on the side that is hard to hold. I tried stoning the burr, but just the bushing when installed against the motor is showing 0.0025 on the bushing flange face. The other bushing was much better.
PXL_20211215_192720196.jpgPXL_20211215_202556792.jpg
PXL_20211215_212353648.jpgPXL_20211215_212415433.jpg
Guess the first bushing was beginners luck. Don't know if this matters, the bore on this one is a tighter fit to the shaft, than the first one I made. TIR with this bushing and the left side aluminum platter is more than 0.012". Face finish isn't that good.
 
Back
Top