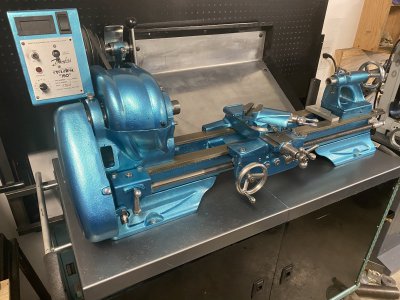
Economical way to level lathe

I made the plumb bob setup shown in the first video. About 2 ft tall. Worked pretty good. Used a Starrett 98-6 for a final check and I didn't change it. When I posted it, I was told it was a waste of time. There are people here who have used a carpenters level on their lathe and it worked. As stated above, level isn't all that important, but twist is. What ever method you use the level must look the same in all directions and locations. Different places along the bed and diagonals. I also noticed that when I placed my hand on the bed, the level read different. I said placed, not leaned on it. Several people said that was normal even for heavy cast iron lathes, let alone a 500 lb hobby lathe. Don't know about that. Later this year I'm going to redesign the whole lathe bench and see if it goes away. The headstock could be out of alignment, but it could also be the jaws in the chuck. They hold different diameters differently, crooked if you prefer, due to the deflection of the jaws and the body. lots and lots of posts on reboring the jaw faces to true them up. And the more you tighten them, the more they deflect. Think the last one I saw on this was ROBRENZ.

As has been reported a zillon times, a lathe on a rolling, pitching ship doesn't stay level. The way it is bolted to the deck eliminates the warping and twist of the bed.
 
Regarding the use of a plumb bob for lathe alignment: A Starrett 199 precision level has a sensitivity of .0005"/12" per division. For a 48" plumb bob to have the same sensitivity, you would have to be able to visually detect a change of .002". Parallax, line width, flex in the supporting bar, minute oscillations in the pendulum, etc. are all working against that objective.
A while ago I used the plumbbob method and combined it with a cheap digital microscope to detect small movements.

Worked well the only drawback was time as I had to wait hours for the thing to come to rest.

I wrote it all up here for anyone interested


Sent from my SM-S908E using Tapatalk
 
I have an old metal lathe that I have been tinkering with/setting up since January. Was missing some parts but now operational. It was missing the bolts and plates in the base to level it up. I made a setup this weekend and have 1/2 inch bolts setting on steel plates to level it. I used a carpenters lathe to get it as level as this will tell me. One leg of the base was not even touching the concrete floor because some previous owner welded the base to the frame. Hopefully this will stead up the rocking vibration I was getting. I just need a more precision level to get it closer. I see used Starett machinist levels in the $150 range plus shipping. I hate to pay that for a tool I will use once, for 30 minutes, and store in a toolbox. Is there a more economical way to do this?
I wouldn't worry much about it.
To begin with, unlike a cheap modern machine a vintage lathe will have some girth to the ways and won't twist so much.
Then, unless you are working in the .0001 range, which most of us can't achieve anyway, even a couple thou won't make much difference. That's what emery cloth is for.
I have mentioned here before how I spent 4years as a shipboard machinist in the Navy.
Ships are  Never level. They pitch and yaw according to the wind, sea and tides. They are constantly twisting and moving.
We had large (30"x 16') and small (12"x 20") lathes that we used every day and produced entirely satisfactory parts for other ships - including nuke submarines which are very precise machines.
I have a vintage 14.5" x 30" lathe.
It sits on the concrete slab in my garage.
Here in the frozen north that slab heaves and moves with the frost and cold.
Am I going to level it every day I use it?
Some guys with smaller lathes have them mounted on wooden benches.
That wood will shift, swell and contract depending on the humidity in the air.
Do they re level every time they use it?
I used a good carpenter's level when I installed my lathe 2+ years ago and got it pretty darned close.
And I haven't given it a thought since.
Save your money for tooling. That is what you really need.
 
A while ago I used the plumbbob method and combined it with a cheap digital microscope to detect small movements.

Worked well the only drawback was time as I had to wait hours for the thing to come to rest.

I made scratches down at the bottom maybe .020 apart and used an eye lope to see them. And it takes a while for it to stop swinging. I just did cleanup while waiting.
 
A while ago I used the plumbbob method and combined it with a cheap digital microscope to detect small movements.

Worked well the only drawback was time as I had to wait hours for the thing to come to rest.

I wrote it all up here for anyone interested


Sent from my SM-S908E using Tapatalk
The use of a microscope and possibly a micrometer stage will certainly help.

Finer points to consider are effects of drafts, and whether the plumb bob is truly concentric. I have several plumb bobs and the holes for the string are larger than the string diameter which means the suspension point is slightly off center. As an example, one of my plumb bobs has a string hole that is .093" in diameter. A typical string has a diameter of .020". This means the suspension point could be off the axis of the cylinder by as much as (.093 - .020)/2 = .036" The center of gravity is close to midway on the 4" length of the plumb bob which and the center of gravity will be on a vertical line with the suspension point. This means that the tip of the bob will be off the vertical by as much as .036" and the tip will actually be located on a circle .073" centered on the vertical. In use, this means that the uncertainty in locating the vertical can be off by as much as .036".

In typical use, this uncertainty is lost in the weeds but when trying to make measurements on the order of a few thousandths, it is significant. There are ways to mitigate this uncertainty. The obvious is making the suspension hole a close match to the sring diameter. Another approach is make a plumb bob where the center of mass is closer to the tip which will decrease the error proportionally. A witness line could be scribed on the bob and measurements only made when the the bob is rotated to a correct position.
 
. A witness line could be scribed on the bob and measurements only made when the the bob is rotated to a correct position.


This is exactly what I did, a sharpie line drawn on the plumbob and only measurements taken with that line facing me. I also ran my line as a V which itself prevented rotation of the plumbbob. Note that the swing of the plumbob would be orthogonal to the V (ie when standing infront of the lathe the V is seen from your perspective.

Another suggestion I did not try was to have the plumbob in a clear container of water. The water being there to damper the swing for quicker measurements.

That all being said I now own a Moore and Wright machinist level which I picked up at a Pawn broker for under $40 so my plumbbob has been retired. I do note that I did not need to change anything when I inspected my lathe with the machinist level, the plumb bob had gotten it pretty spot on.


Sent from my SM-S908E using Tapatalk
 
I wouldn't worry much about it.
To begin with, unlike a cheap modern machine a vintage lathe will have some girth to the ways and won't twist so much.
Then, unless you are working in the .0001 range, which most of us can't achieve anyway, even a couple thou won't make much difference. That's what emery cloth is for.
I have mentioned here before how I spent 4years as a shipboard machinist in the Navy.
Ships are  Never level. They pitch and yaw according to the wind, sea and tides. They are constantly twisting and moving.
We had large (30"x 16') and small (12"x 20") lathes that we used every day and produced entirely satisfactory parts for other ships - including nuke submarines which are very precise machines.
I have a vintage 14.5" x 30" lathe.
It sits on the concrete slab in my garage.
Here in the frozen north that slab heaves and moves with the frost and cold.
Am I going to level it every day I use it?
Some guys with smaller lathes have them mounted on wooden benches.
That wood will shift, swell and contract depending on the humidity in the air.
Do they re level every time they use it?
I used a good carpenter's level when I installed my lathe 2+ years ago and got it pretty darned close.
And I haven't given it a thought since.
Save your money for tooling. That is what you really need.
I'd say that depends on the "vintage" lathe.

My Atlas TH42 can certainly be thrown "out of twist" if mounted incorrectly. But it's a simple matter of shimming to bring it back true. Once set up though, I haven't had to touch it. Every now and then i drop my Starrett level on it to confirm it's still good. Normally I'll drop the level on one end in the evening and give it the night to stabilize. Then I'll move it to the other end and check it again around supper. More time than needed for the level to even out, but it's just sitting there anyways and I've got nothing but time to burn. This is, of course, on a day where I won't need the lathe. But so far, comes back good every time. I've even moved it a couple times since set up and still, doesn't move.

My "bench" isn't hard connected to the garage floor, it's on wheels:

8801F173-E175-4B6F-87F7-770F5BA77253.jpeg

You can just see one of the wheels in the reflection in the bottom right corner of the picture. The cabinet is an old medical cart that used to hold an Ultrasound machine, it's heavy duty compared to retail stuff.

But it's still not enough to keep the lathe "true", especially with the two piece top. It is held true by a piece of I beam under the 1/8 metal top surface. Basically, the lathe is held true by the I beam and the cabinet just holds it at a comfortable working height.

I would guesstimate a similar method was used shipboard.....attach the lathe to something rigid but not dependent on it being "level". I've een some shipboard and mobile arrangements where there's a type of "tourque tube" attached at one enf and a lathe trued up to that tube/beam. the vessel is free to move, but the lathe stays true to the tube/beam, regardless of what the deck does....
 
Last edited:
I have an old metal lathe that I have been tinkering with/setting up since January. Was missing some parts but now operational. It was missing the bolts and plates in the base to level it up. I made a setup this weekend and have 1/2 inch bolts setting on steel plates to level it. I used a carpenters lathe to get it as level as this will tell me. One leg of the base was not even touching the concrete floor because some previous owner welded the base to the frame. Hopefully this will stead up the rocking vibration I was getting. I just need a more precision level to get it closer. I see used Starett machinist levels in the $150 range plus shipping. I hate to pay that for a tool I will use once, for 30 minutes, and store in a toolbox. Is there a more economical way to do this?
I got a 10” master precision level from Shars for $80 or so (price may have gone up over the years). It’s precise to 0.0001” per 10”. Rough level with the carpenters level and finish level with the master precision.

Levels are self calibrating and you often use them as comparator gauges so they are a good candidate for an import one.
 
Anecdotally speaking. I have a 1941 south bend 9a. It has a little way wear. If I level it (no twist), it will cut a slight taper (about .0007" over 3.5" unsupported 1" steel). If I add a very slight amount of twist, I can get the taper down to less than a tenth near the headstock turning.

On the other hand I also have a beefy little Taiwan lathe from the late 70's early 80's (Select 816b) that has hardened ways and very little way wear. Leveled (no twist), I get taper of less than a tenth.
 
Back
Top