- Joined
- Mar 21, 2018
- Messages
- 1,597
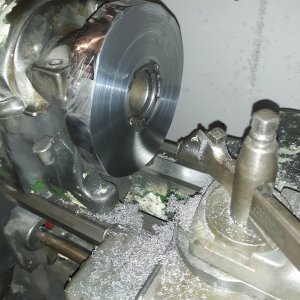
That's quite a bit of runout. That much will be reflected in any parts you turn off the plate. This is the face plate you were talking about creating, correct?On the plus side, the dial indicator showed a rough runout of about 3-5 thousandths.
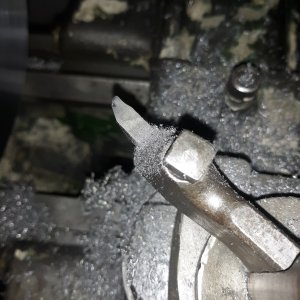
You can try using a shear tool with a radius. This is my shear tool I use on outside diameters. The cutting edge is the line on the upper left. It is a vertical edge - no angle. A shear tool for a facing operation is nearly the same, except there is a 1-2" radius on that edge. Cuts with a shear tool are very shallow - DOC less than 0.001". I normally use 0.0005" DOC. The swarf from this tool is like angel hair. It is so light that it will float in the air. Use oil and a slow feed rate.