- Joined
- Feb 24, 2015
- Messages
- 1,382
This should be an on-going project for the next couple weeks.
I kinda blew my budget building the lathe stand this year, so I'm trying to mostly use materials I have at hand.
About a decade ago I picked up some 1.5" and 1.25 1/8" square steel tube I planed to make a weight lifting table with. I got un-inspired about that project so it has been sitting around rusting for a decade or so.
For a project a couple years ago, I ended up with a 2' x 3' plate of 1/4" steel plate. About the right size for a table I'll have room for. One end was about an eighth out of square, so I trimmed off about a quarter inch with my plasma cutter and a straight edge.
I purchased a couple sticks of 2" x 2" x 3/16" angle for the project at my local Metal Supermarket. The steel plate is not exactly flat so I'll use the angel flatten it some. The angle is turned with the flange out to provide clamping surface around the edge of the table top. I drilled some 7/16" holes every 4" in the angle to attach it to the plate with plug welds.
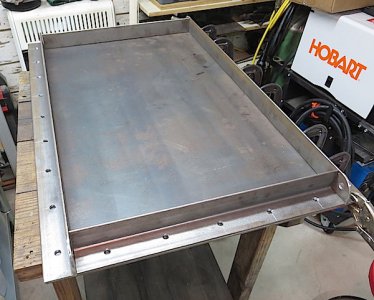
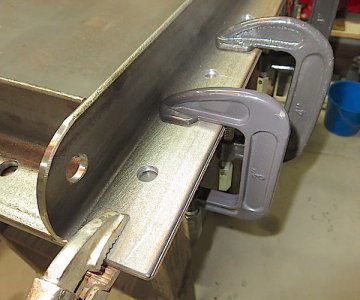
The ends of the long angles are rounded minimize injuries and drilled with a 1/2" lifting hole at each corner.
Once the top is welded up, it will just sit on the square tube frame.
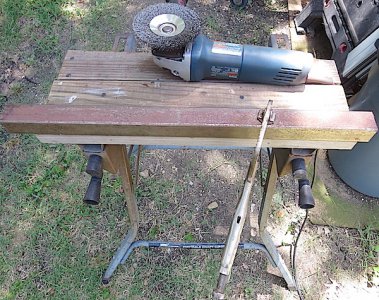
Like every steel project I've taken on, rust has to be removed. The angle had some rust, so I go my trusty angle grinder and wire brush and cleaned up as much as I could.
The tubing was pretty funky from sitting around for a decade so I had to clean it.
These are the legs of the stand. The 1.25 tube will slip in the 1.5" tube to make the stand height adjustable from 30" to 36" high, drilled and held with d-lock pins. They are cleaning up pretty nice. I've ordered a 2" steel boiler brush to clean the insides of the tubes.
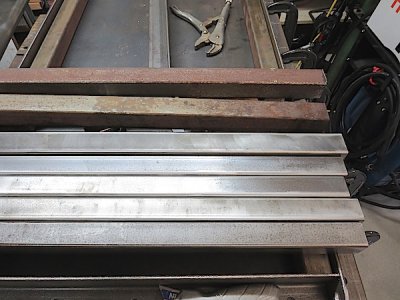
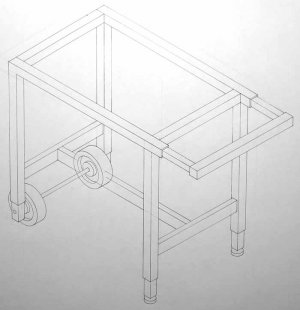
The legs will have a couple 6" wheels on one end and adjustable feet on the other so I can move it around.
The plan is to make an extendable handle on the opposite end of the wheels that can be extended to serve as a handle to move the cart (like a wheelbarrow) and double as an extension support arm.
I figure it is going to be pretty heavy, so the bracing for the legs will have points to allow me to use a floor jack to raise and lower it to change the height. I have no plans to drill holes in it for clamps. The table will double as an assembly table and I don't want screws and parts falling through the holes. I figure if I need to clamp some guides, I can use high powered indicator magnet bases. The table will never be perfectly flat, so critical work will have to shimmed and squared with a level.
I have some preliminary plans but nothing finished enough to post. Details are still in the mulling stage.
More to come.
I kinda blew my budget building the lathe stand this year, so I'm trying to mostly use materials I have at hand.
About a decade ago I picked up some 1.5" and 1.25 1/8" square steel tube I planed to make a weight lifting table with. I got un-inspired about that project so it has been sitting around rusting for a decade or so.
For a project a couple years ago, I ended up with a 2' x 3' plate of 1/4" steel plate. About the right size for a table I'll have room for. One end was about an eighth out of square, so I trimmed off about a quarter inch with my plasma cutter and a straight edge.
I purchased a couple sticks of 2" x 2" x 3/16" angle for the project at my local Metal Supermarket. The steel plate is not exactly flat so I'll use the angel flatten it some. The angle is turned with the flange out to provide clamping surface around the edge of the table top. I drilled some 7/16" holes every 4" in the angle to attach it to the plate with plug welds.

The ends of the long angles are rounded minimize injuries and drilled with a 1/2" lifting hole at each corner.
Once the top is welded up, it will just sit on the square tube frame.

Like every steel project I've taken on, rust has to be removed. The angle had some rust, so I go my trusty angle grinder and wire brush and cleaned up as much as I could.
The tubing was pretty funky from sitting around for a decade so I had to clean it.

These are the legs of the stand. The 1.25 tube will slip in the 1.5" tube to make the stand height adjustable from 30" to 36" high, drilled and held with d-lock pins. They are cleaning up pretty nice. I've ordered a 2" steel boiler brush to clean the insides of the tubes.

The legs will have a couple 6" wheels on one end and adjustable feet on the other so I can move it around.
The plan is to make an extendable handle on the opposite end of the wheels that can be extended to serve as a handle to move the cart (like a wheelbarrow) and double as an extension support arm.
I figure it is going to be pretty heavy, so the bracing for the legs will have points to allow me to use a floor jack to raise and lower it to change the height. I have no plans to drill holes in it for clamps. The table will double as an assembly table and I don't want screws and parts falling through the holes. I figure if I need to clamp some guides, I can use high powered indicator magnet bases. The table will never be perfectly flat, so critical work will have to shimmed and squared with a level.
I have some preliminary plans but nothing finished enough to post. Details are still in the mulling stage.
More to come.
Last edited:


