Gas Welding Joints & Beads

I **highly recommend** this video on fillet brazing of this master brazer revealing his tricks!


It covers it all: flame, beautiful & patient brazing technique, braze washing, sanding, & even a destructive test at the end! He achieves both strength & beauty.

I have always been so critical of myself for often washing my welds, as well as grinding & sanding my weld beads. I know that you are expected to do this for brazing, but still, if you want the result to be both strong & beautiful maybe it is okay to wash & grind.
 
Last edited:
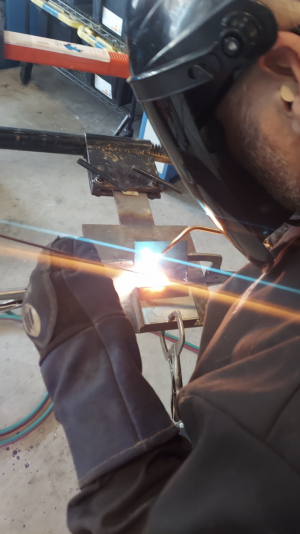
I will be practicing gas welding for the next few months (but only on the weekends). I am trying really hard to **not get into any other projects** other than welding on coupons.

Today I bumped up to a #4 welding nozzle for my 1/8” sheet coupons. I started off with a #2 (nowhere near enough heat), & then I tried a #3.

I could get it done with the #3, but the work was going way too slow for me. Not many people would have continued on with a #3.

It sure was nice to finally have enough BTUs! I don’t mind gas welding if I have enough heat. Gas welding without enough BTUs is miserable & wastes time.

With the #4, everything went fine. At times I had too much heat, but I just pulled away the torch.

I also switched to 1/8” R45 filler rod. You gotta love it when the diameter of your rod matches the thickness of your base metal.

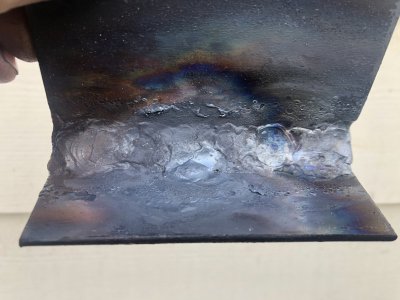
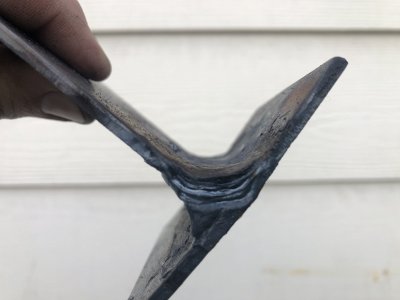
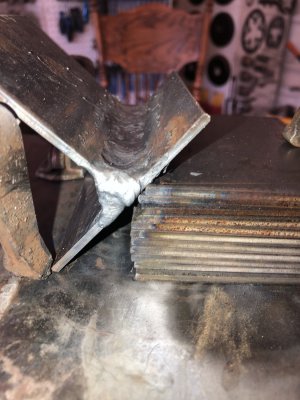
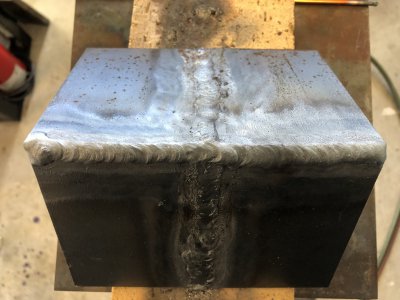
Here is the first flat T-joint with the #4 welding nozzle, 1/8” rod, 10psi max oxygen & 7psi max acetylene. This weld has been washed, but only to get the toe of the weld to tie in to the parent metal. This weld bead is ugly but sound, has some cold lap, some undercut, and overfill.

58727903-EA80-4275-87BD-DD58208A7622.jpeg

image.jpg

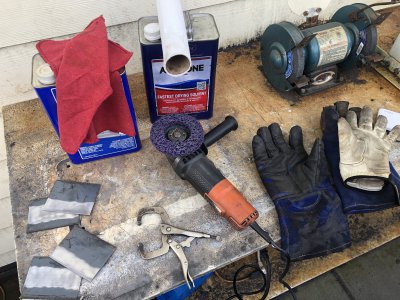
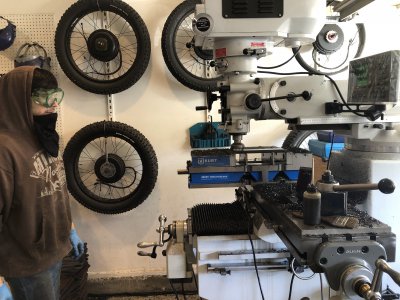
Here is my stripping setup. I only weld on mill scale if I have to.

3AB78081-31CE-4F5F-9277-B2BCA8EA29E7.jpeg
 
Last edited:
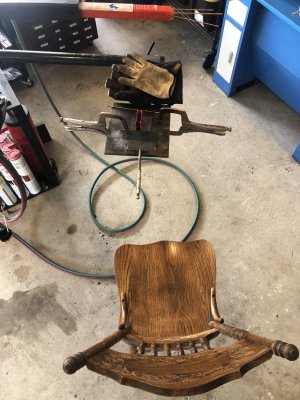
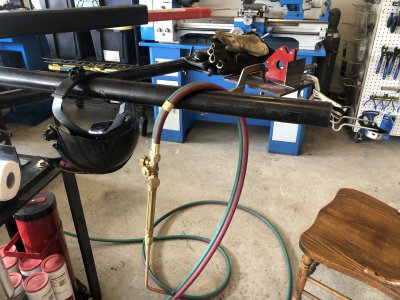
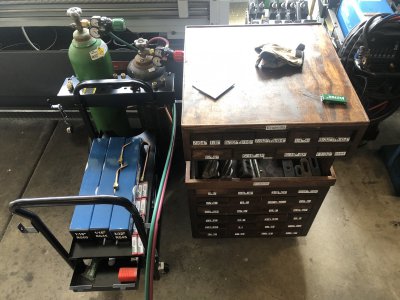
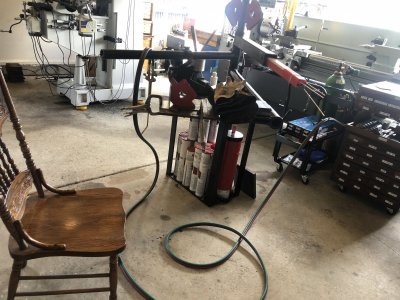
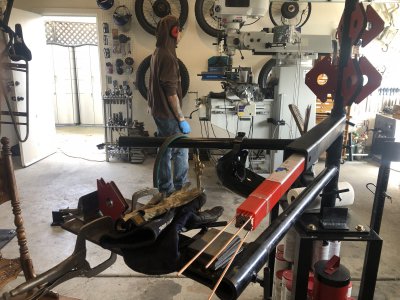
I will take some pictures of my setup. I invite constructive criticism because this is the setup that I will be using for months.

Usually when you set up for something, it is only for one task. It was really nice to spend spend time setting up, & then not have to spend time setting up for months.

Ready for horizontal tack welds:
F8678B97-7A76-47DF-9DFD-B5DCB524A4C6.jpeg

I am getting my money’s worth out of that stick welding glove by cutting off the burnt fingertips & wearing TIG gloves underneath it. The striker for the torch fits nicely in that pipe (dumb luck):
F556614D-3F89-46A4-836E-5F39D89FA424.jpeg

FFAEF18C-D3D9-4128-B7F3-36A8D920DC2C.jpeg

B1B6CF52-9BFC-44CA-938A-BE601AD0E41F.jpeg

Jack is usually here:
14851BA3-6A48-4C13-AB6A-74DC17099BAC.jpeg
 
Last edited:
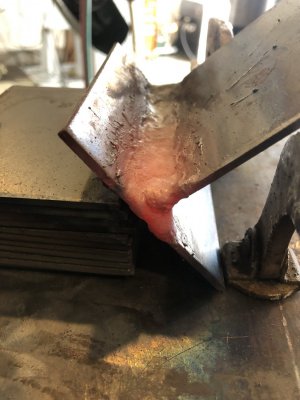
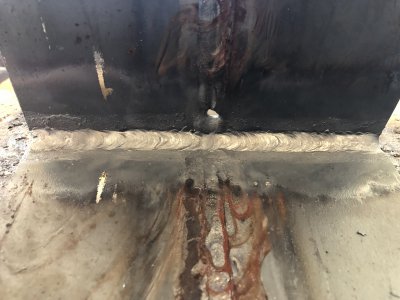
Here are some more pictures. On the last joint, the toe of the weld tied in to the coupon at every point along the pass.

I certainly had enough heat. I might go back to a #3 tip with the maximum recommended pressure settings, because I was often in danger of getting undercut with the #4 nozzle. For .125” sheet, you are either going to use a #3 tip turned up really high, or a number #4 tip turned down really low.

I did wash this bead, but only down the centerline for the purpose of assured penetration.

D5A53C0E-1303-409C-8627-9342352188FD.png

E315DC15-BF6D-4068-B147-BCE11F29BF2A.jpeg

EF80CD3C-A3A2-4120-AA44-15661780448F.jpeg

3997D8EC-B3FE-4E04-88F4-29D696B1A7ED.jpeg

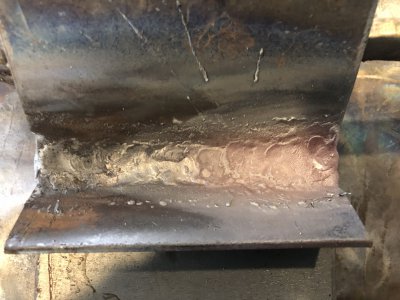
I think this bead is unattractive yet sound, with some cold lap & some undercut. It has about the right amount of fill.

I have always preferred welding as hot as possible, if for no other reason than to complete the work quickly. Also, it is more exciting that way. You know you are welding too hot when you are almost getting undercut.
 
Last edited:
I wasn’t planning on posting a picture today, but I love this bead:

7D00E941-397B-42F6-B387-9265E35EB20C.jpeg

Today I am doing corner joints as well as fillet joints on used, unprepped (only wire brushed) .125” mild steel coupons.

I do the corner joints in the flat position, & the fillet joints in the horizontal position. I have 1/8” R45 rod, a #2 tip usually turned up very high, a large torch, & acetylene & oxygen at 6psi.

This is what is going on next to me:

image.jpg
 
First bead of the day, a horizontal fillet weld on used coupons:

92EE7F71-ECD7-4CE3-A64B-31DD1A9717D7.jpeg

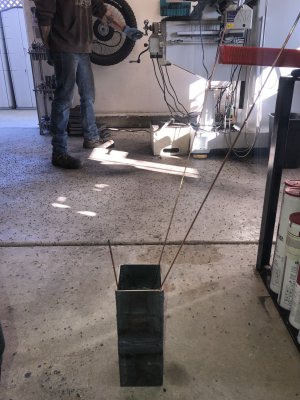
I can practice butt, corner & fillet welds on these .125” coupons & make stands that hold my filler rod:

6ABB10F1-F8AF-425A-B383-030D749F68E7.jpeg

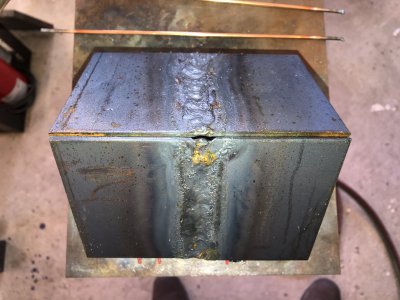
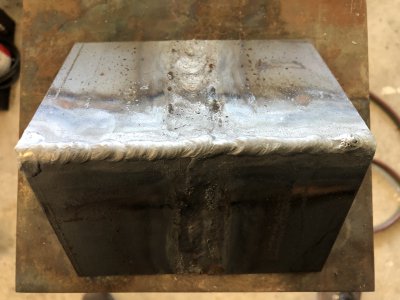
Next up, a corner weld in the flat position:

57455886-CFFA-4C93-95DB-7B40BA3310E1.jpeg

283952A3-9D1A-4015-A0B4-FCA3AE851D1A.jpeg
 
Last edited:
Question about welding aircraft tubing? I was once told they were gas welded so the frame did not get magnetized and interfere with the compass. Is this a myth? Sounds like arc welding is now used?
People say the silliest things.
Gas welding was preferred for thin walled 4130 BECAUSE gas welding creates a large HAZ. 4130 is an air hardening steel. Let it cool quickly and it gets brittle enough to rip apart by hand. The extra heat from gas slows the cooling.
Someone stated that the steel would typically be 3/4"x.049. That would be typical on a motor mount. The cockpit or tail section frame would lean more toward 1/2" or 5/8" .035. Canopies are typically a 3/8"x.035 My experience was building a Dyke Delta, but saw this across a lot of other models.
The correct filler for 4130 was any mild steel rod. Weaker than the 4130, but the bead is going to be 3 to 5 times thicker than the tube wall. You wanted the weld to give some as it cooled in order to minimize warping.

@erikmannie , how are you holding the torch as you weld? The results suggest that you may be pointing straight into the puddle. That will always give a terrible result. You want to hold it at a 45. The flame will form two tongues, one inside the other. You want the tip of the inside tongue to barely touch and blow into the front side of the weld puddle. When the hole in front of the flame opens up, drive the filler into the back part and almost immediately move your flame into the new position, so that it continues to blow into the trough. Sexualization of this post is left as an exercise for the reader, but do that and you'll get more than just your welding right.

"Washing", if I understand you correctly, is a pointless waste of your welding gas. Put a part that you've done that way in a vice, and beat it apart with a hammer. I think you'll discover that your re-melted the filler and made it look better, but did nothing to penetrate the metal underneath it. You probably did penetrate the parent material at the sides of the bead, so when you tear it apart, it'll come loose under the weld and then hinge at the edge of the bead.
 
Looking good! And dang, that's a big vise!

Having taught gas welding... you need a root gap on those corner welds if you want good penetration. IIRC about the filler rod diameter. With skill you get a clean but less pretty weld on the backside. And it will do a full reverse bend

Sent from my SM-G715A using Tapatalk
 
People say the silliest things.
Gas welding was preferred for thin walled 4130 BECAUSE gas welding creates a large HAZ. 4130 is an air hardening steel. Let it cool quickly and it gets brittle enough to rip apart by hand. The extra heat from gas slows the cooling.
Someone stated that the steel would typically be 3/4"x.049. That would be typical on a motor mount. The cockpit or tail section frame would lean more toward 1/2" or 5/8" .035. Canopies are typically a 3/8"x.035 My experience was building a Dyke Delta, but saw this across a lot of other models.
The correct filler for 4130 was any mild steel rod. Weaker than the 4130, but the bead is going to be 3 to 5 times thicker than the tube wall. You wanted the weld to give some as it cooled in order to minimize warping.

@erikmannie , how are you holding the torch as you weld? The results suggest that you may be pointing straight into the puddle. That will always give a terrible result. You want to hold it at a 45. The flame will form two tongues, one inside the other. You want the tip of the inside tongue to barely touch and blow into the front side of the weld puddle. When the hole in front of the flame opens up, drive the filler into the back part and almost immediately move your flame into the new position, so that it continues to blow into the trough. Sexualization of this post is left as an exercise for the reader, but do that and you'll get more than just your welding right.

"Washing", if I understand you correctly, is a pointless waste of your welding gas. Put a part that you've done that way in a vice, and beat it apart with a hammer. I think you'll discover that your re-melted the filler and made it look better, but did nothing to penetrate the metal underneath it. You probably did penetrate the parent material at the sides of the bead, so when you tear it apart, it'll come loose under the weld and then hinge at the edge of the bead.

I am going to try what you said about the two tongues of the flame now.

I have had a bad time recently because I was using acetylene tanks that were almost empty. That is a miserable time (gas welding with tanks that are almost empty)!

I just hooked up a cylinder that is almost full; I am very much looking forward to welding with that now.

I always intend to hold the torch at a 45° angle, & usually I do. I also intend to distribute the heat on to the 2 sides evenly.

I almost always preheat these joints. When I’m *preheating*, I am more likely to hold the flame perpendicular.

I have pretty much given up on washing welds, at least in this practice scenario. I agree that washing welds is a waste of gas.

In order to save time, I also stopped removing the mill scale & cleaning with acetone, but only in this practice environment. I only go after it with a stainless brush now.
 
Looking good! And dang, that's a big vise!

Having taught gas welding... you need a root gap on those corner welds if you want good penetration. IIRC about the filler rod diameter. With skill you get a clean but less pretty weld on the backside. And it will do a full reverse bend

Sent from my SM-G715A using Tapatalk

I’m definitely with you on the gap for the corner joints. It never bothers me to have a gap. However, it is a complete dealbreaker for me if I don’t get full pen.
 
Back
Top