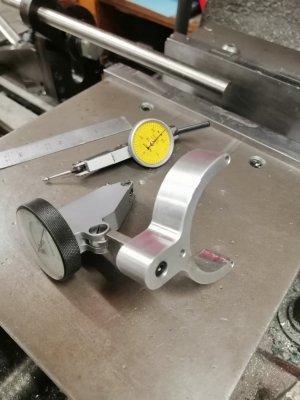
Had a thought: is there a small version of a co-ax indicator for small mills?

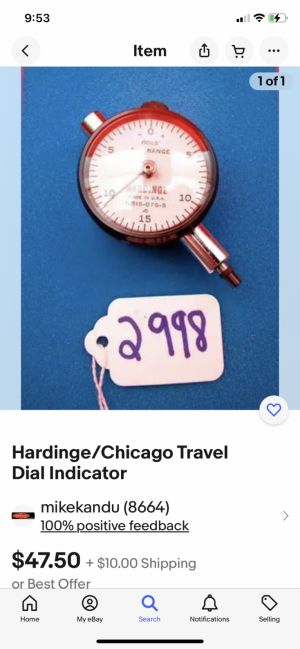
Most companies that make/sell indicators have AGD 1 versions that have 0.0005" resolution and around a 0.125" range; here's one from SHARS:

View attachment 454077
That might just fit the bill.

Needs to be drop type for what I'm thinking.

Not even sure describing what I'm thinking of would do any good as I have the idea and some details worked out, but problems incurred along the way will most likely change things somewhat.

This might be a job for MS paint.
 
The Blake is a comparator. Sure, the probes are sized, but think about it- there are very very few points (mathematical limits, like sin pi/2 = 0) where the gauge works as a 1:1 gauge. It is sensitive and accurate, so it is a comparator, not a measuring tool. You're centering, there's no dimension to measure. Just relative deflection.
Very true, same goes for a DTI. The probe moves in an arc, not linear. They're best for relative comparison than an actual measurement.

Bruce
 
Very true, same goes for a DTI. The probe moves in an arc, not linear. They're best for relative comparison than an actual measurement.

Bruce
This brings up a question that's been bothering me for a while and is only slightly tangential to the topic at this point. I've heard it said that plunger back indicators aren't able to be calibrated to units, and that they are comparators. I can only assume it is because the plunger is hard to set to true perpendicular compared to a traditional drop gauge. Anyone have insights on that?
 
Very true, same goes for a DTI. The probe moves in an arc, not linear. They're best for relative comparison than an actual measurement.

Bruce
True, parallax errors are a thing, but that all depends on the end user. Ive seen "My betters" (You know the type) with their indicator tips on 45-50* angles to the work surface tramming a mill and just shake my head. Having it parallel axially to the hinge of the tip is best if at all possible, but to what degree.....?


Thinking back on this I may have described the long probe/CO-AX issue improperly.

With the longer probe the amount of deflection of the dial needle is lessened.

IE a .002 irregularity in the part will only show .0005 on the dial. Couple that with an out of round condition, surface irregularities and the "Co-AX skip" and you can better realize the frustration of trying to get within .001 or better with the long probe.

Sorry for any confusion.
 
Last edited:
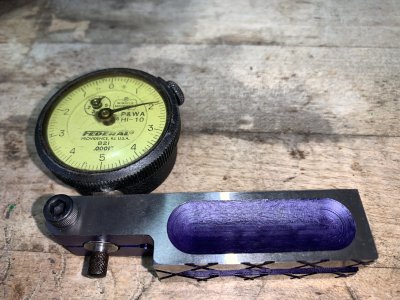
I may have found the perfect indicator for this right in my own toolbox.


IMG_3194.jpeg

Anyone have a 5/16-40 tap?
 
Had to look that up. A UNS thread. Don't have one. I do have 1/4-40 tap and die. There's several listings on eBay including NOS for that size under $20, if you can't find one near you.
 
Had to look that up. A UNS thread. Don't have one. I do have 1/4-40 tap and die. There's several listings on eBay including NOS for that size under $20, if you can't find one near you.
I’ll probably get engineering to order me one if I can’t come across one.

This is to add a 3/8” stem in place of the cap for the indicator stem so I can hold it in a collet.
 
Any update from n your project?


Cutting oil is my blood.
 
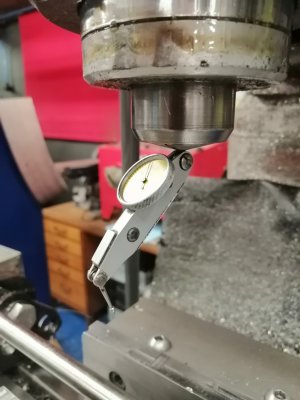
The shortest I've used without any extra tooling is the indicator directly in the collet. This is 3.5" from the spindle nose to the stylus tip, you will need a pivoting spigot though.


chuck dti.jpg


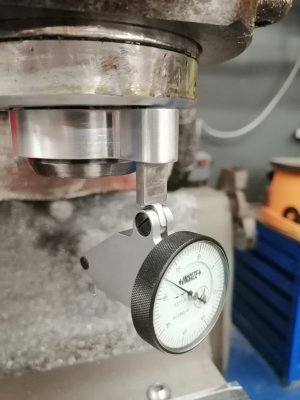
For a shorter solution I use my clip on holder that reduces the distance from the spindle nose to stylus tip to 2"

clip on dti.jpg


both dti.jpg
 
Last edited:
Back
Top