Heavy 10 project

Hi Greg,

One nice thing about painting in 100 degree weather, the paint flows well. :))

Nice to see you're finally in the home stretch. That VFD looks very sweet. I've never used one of those four way tool holders. I think they could be handy, but the quick change is really a must in my opinion.

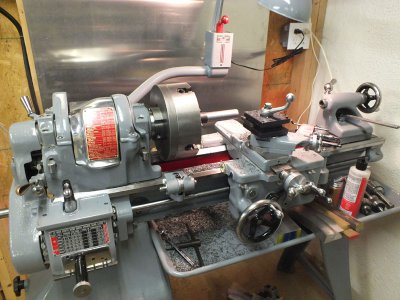
You have one great looking lathe!

Steve
Yup, I'll probably upgrade to a Q C tool post at some time, but this one was free and of good quality. I think it will work fine for awhile.
 
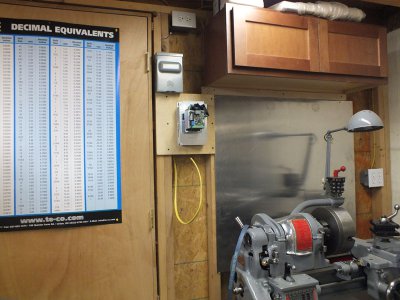
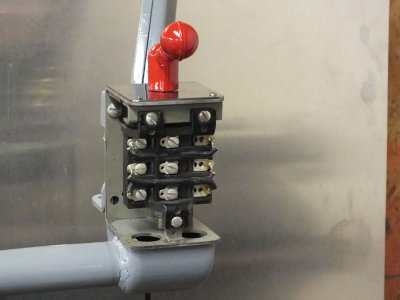
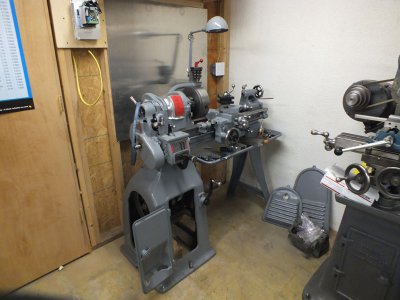
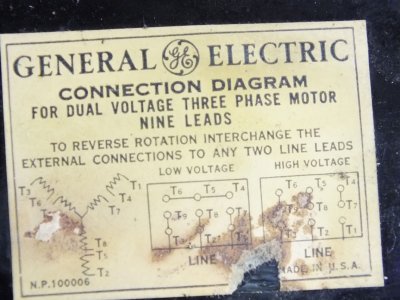
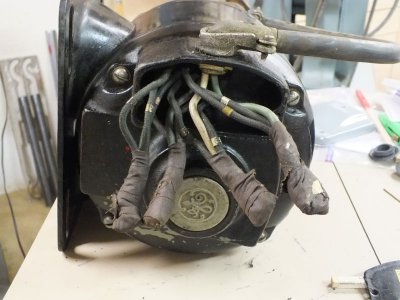
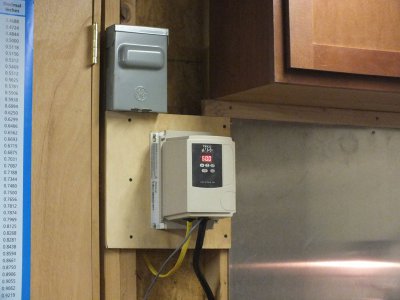
wiring-001.jpg wiring-002.jpg wiring-003.jpg vfd,-electrical-003.jpg vfd,-electrical-004.jpg Well I finally got some time to work on getting the south bend wired up, only to hit a couple of snags. First of I can't figure out how to wire the switch to the vfd, I posted in the electrical section on this for some help and advice. Second I can't find the proper wire that the vfd manual calls for, output 220 3 phase calls for 3 conductor 14awg shielded with ground, not a big box store item. I will have to go to an electrical supply house for the wire I suppose. I got the vfd mounted and a service disconnect installed before the vfd in case I ever have to service it. I pulled the motor back out of the pedestal to check and see if it was in fact wired for 220 and not 440, it was, had to be sure. No ground wire for the motor though, the wires look good and are not all dried out and falling apart. Got the switch mounted, just have to figure out how to wire it.
wiring-001.jpgwiring-003.jpgwiring-002.jpgvfd,-electrical-003.jpgvfd,-electrical-004.jpg
 
Last edited:
Well I finally got some time to work on getting the south bend wired up, only to hit a couple of snags. First of I can't figure out how to wire the switch to the vfd, I posted in the electrical section on this for some help and advice. Second I can't find the proper wire that the vfd manual calls for, output 220 3 phase calls for 3 conductor 14awg shielded with ground, not a big box store item. I will have to go to an electrical supply house for the wire I suppose. I got the vfd mounted and a service disconnect installed before the vfd in case I ever have to service it. I pulled the motor back out of the pedestal to check and see if it was in fact wired for 220 and not 440, it was, had to be sure. No ground wire for the motor though, the wires look good and are not all dried out and falling apart. Got the switch mounted, just have to figure out how to wire it.

Greg,

Congratulations on a fantastic job of documenting the restoration of your Southbend Heavy 10 project. I read every word and enjoyed all the photos.

Good luck on getting the wiring sorted. I'm of no help there. Heck I have a hard enough time just flipping a light switch. With all the more than qualified folks on here you'll be up and running in no time.

Thanks again,

Dale
 
Today was a momentous occasion. I got the wiring of the vfd done and the switch wired up as well. I threw the switch for the first time and glory be, everything worked as it should. The old girl is alive again! I ran it for about a half hour with no load and the bearings didn't even get warm. I engaged everything forward and reverse, the back gear needs a little adjustment yet as it's to tight. The geartrain is a little noisy, I might be able to adjust that a little too. The belt I stitched up runs as quiet as can be. The gearbox and apron all work in all functions, the clutch works and I can't stop it if I grab one of the wheels while it's engaged. After months of working on her she's almost done! Very rewarding! I still need to get a 3 jaw chuck, get the tailstock set and dialed in, get the tool holder mounted, and then make some test cuts. I would say she's about 98% done. I'll get some picks up of the vfd soon, to damn tired tonight.
 
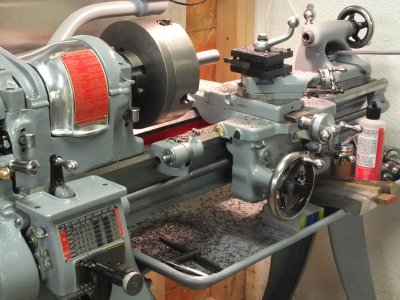
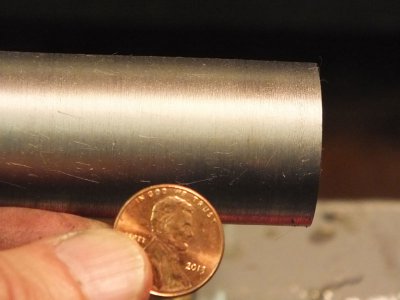
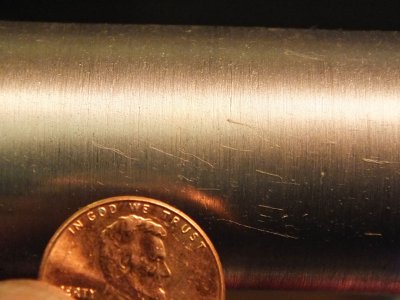
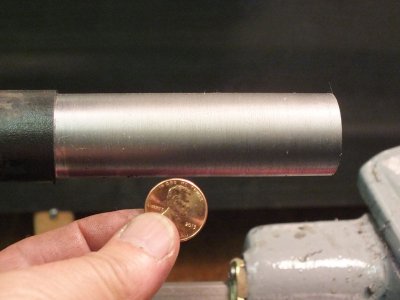
first-cuts-013.jpg first-cuts-014.jpg first-cuts-011.jpg first-cuts-007.jpg first-cuts-008.jpg first-cuts-009.jpg first-cuts-010.jpg Here's a cople pics of the vfd and service disconnect. I just used a ac non fused service disconnect that I purchased at home depot for 6 or 8 bucks, it was cheap. I like the idea of the line being completely dead when you pull the link, that's very safe when you are working on the machine or the vfd. The vfd is very cool and washdown sealed, being dustproof is very important as my machines are also in my wood shop. I got to make some test cuts today and boy do I like this little lathe, it sure is fun to use and very rewarding after all the work I put into it, she is like new. I said all along that I intended to use her and not just make it look pretty. See the chips in the pan? I did play with the speeds and feeds a bit, I had the underdrive belt on the wrong pullys and turning to fast, I made test cuts in some high carbon hot rolled round bar with hss and carbide cutters. She seemed to give the best finish with a .010" depth of cut. The finish is not supper smooth but that may be the material. I will try some other materials and see how she does. The pic with the penny is the hss cutter. This was a unsupported cut as I don't have the tailstock set yet, Working up to that.
first-cuts-013.jpgfirst-cuts-014.jpgfirst-cuts-011.jpgfirst-cuts-007.jpgfirst-cuts-008.jpg

- - - Updated - - -

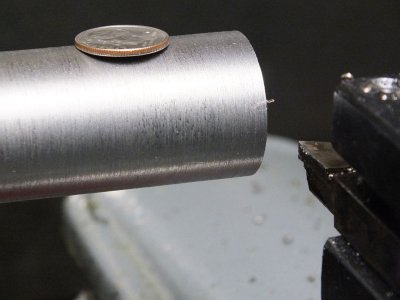
A couple more pics, the last one with the dime on it was with a brazed carbide cutter, it left a little rougher finish. I think I need to experiment with the spindle speed a little more for the carbide. I played with the lathe for a good bit today and made some chips, some where blue and very hot some not, got the lathe dirty with cutting oil and chips and had some fun. The spindle bearings never even got warm and that's a good thing. It was a very rewarding time today after all the work I put into her and finally being able to use it a little and test her out. Still more to come and need to get some things finalized like the tailstock, needs to be leveled, and a 3 jaw chuck.


first-cuts-009.jpgfirst-cuts-010.jpg
 
Last edited:
Congratulations!!! Fine job you have done. That is an early model SB,with the lever on top of the QC box. It probably won't run fast enough to properly use carbide.

How accurate a straight bar will it cut,measured at each end and in the center for parallelism? I know you have said the ways were in good condition. If there is wear on the front way,there will be a little vertical "cliff" where the apron has "sunk"(worn) into the bed. Strange someone put Turcite on the apron if nothing was worn. Maybe they just did it to make the apron slide smoother? Not that they wouldn't slide smoothly in the first place. I think you're lucky someone did do that. It would save wear on the ways for sure.

If there's no scraping at all on the ways,I'm wondering if someone had the bed re ground at some point. On a lathe that early,there would be a scraped bed on it. If it was re ground,you are again very lucky. On old lathes,not only wear can happen,but I have seen beds warp. I rebuilt a Rockwell lathe not all that old. Probably from the 60's. Its bed had warped about .010" upwards near the tail end. I had to re cut the bed due to that and other wear. The bed was hardened,too.

I'm also wondering if the large dials on your machine were added later. I don't know offhand when large dials came out. They are a definite improvement over the very small ones found on earlier lathes.

Thanks for all the feed back George. I am told that this was one of the last lathes with the cast Iron pedestal, I don't know if that's true or not. There was no scraping anywhere on the ways, just the compound. The large dials are also an indicator that this was a later lathe, it serial dates to 1949 and the build card matches that year as well. I have not had the chance to check the accuracy yet, it's on the to do list. I have to level it yet and get the tail stock set. It Might go fast enough for carbide :dunno: I had to slow it down for hss to get a decent cut and not overheat the cutter. My set up right now is on the slower of the 2 underdrive pulleys, that gives me some good adjustment with the spindle pulleys. On the fast underdrive pully it really hums, although I don't really know what rpm. What I think really happened with this lathe, and it's just a guess, is that at some point someone did a half a** restore on it. they added the turcite for some reason, it seems to be a common practice with machine rebuilders around here and of the time. Then they did the poor job on the spindle bearings which pretty much ruined the lathe and probably made it useless. Then it sat unused for the rest of it's life in a building in Detroit forgotten about till I found it and saved it. That is why I believe the parts and gears where in such good condition and the apron was not packed with chips. Will it be perfect as far as bed wear? I don't know, I'll have to finish with the set up and testing and I will post my findings good or bad. I will say this, everything works as it should and it is fun to use so far, I am still learning it though.
 
There was a machine shop around here which replaced the motor on a cast iron pedestal SB lathe with a 3450 RPM motor to get it to run faster. I'm sure that was not the best thing to do for the bronze bearings !
 
Looks good Greg

The finish you got with hot rolled steel is about as good as you're going to get. Just "maybe" if the stars line up right and all your ducks are in a row, you may stumble onto a depth of cut and surface footage that gives a better finish but I woudn't count on it.

A better grade of steel with allow you to get a better surface finish. Unless you need the additional strength, HRS will be just fine.

Jeff
 
Yeah, that is really nice glad to see you cutting up with it
 
Back
Top