VN High Speed Sub Head

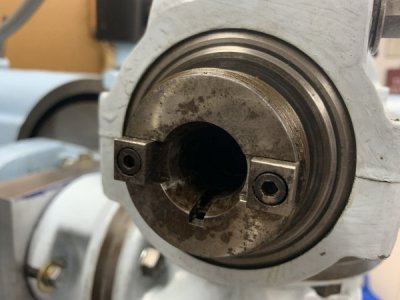
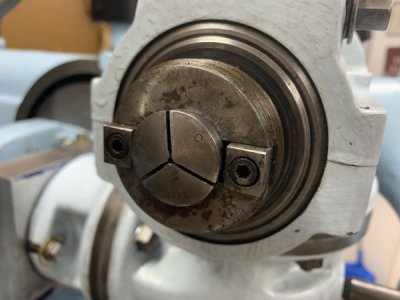
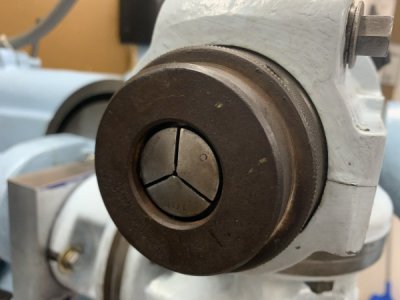
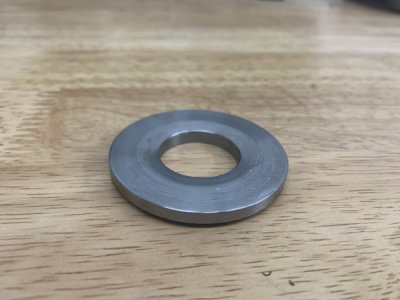
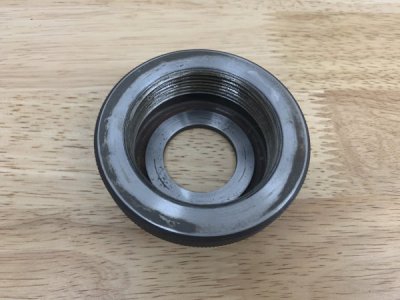
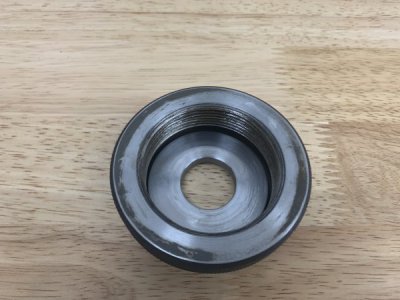
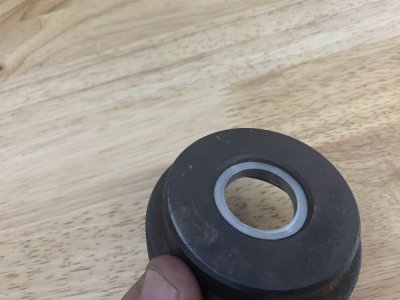
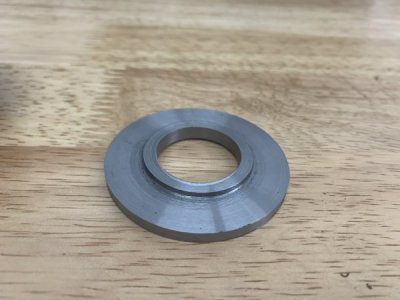
Concerning the 12-737-C, 12-772-C & 12-738-C retainers in the above drawing: Can anyone provide the opening (inside) diameter for all 3 or perhaps just 1? The 1 I have is 1.32". The opening for the part 12-738-C is 0.775" according to a friend. Help if you can!
 
Last edited:
Does anyone have dimensions of the correct collet closer for the subhead to work with the VN C collets?

You’ll see in the photos the unit I have does not engage the collets. The inside diameter is 1.285”
 

Attachments

  • 4C2B0172-67E3-4F94-8930-A3642CD6F0E5.jpeg
    4C2B0172-67E3-4F94-8930-A3642CD6F0E5.jpeg
    41.9 KB · Views: 12
  • 52C63C3B-9F88-4E78-8BD2-B0FAD64D2F4D.jpeg
    52C63C3B-9F88-4E78-8BD2-B0FAD64D2F4D.jpeg
    41.4 KB · Views: 13
  • 38BDB705-4A0F-49E1-8FB6-72456CF84555.jpeg
    38BDB705-4A0F-49E1-8FB6-72456CF84555.jpeg
    37.8 KB · Views: 12
The largest 'C' collet that Van Norman made was 5/8" ID, so I suspect that the ID of the closer would be slightly larger that that, maybe 0.66"? Drawing C-385-C shows the angle of the face of the collet to be 5 degrees. High speed sub-head diagram 1607740-A shows closer 12-738-C. It appears to have a tapered surface that would match the nose taper on the collet.

I'm guessing that your closer is intended to work with 1-1/4" arbors. Does your closer have any numbers stamped on it?
 
To sum up the retainers so far: mine is 1.32" opening diameter. Manderioli has 1.285" & the number we need according to a friend is 0.775". The threads for the retainer to screw onto are 11 TPI. I'm struggling with the 11 TPI at the moment. I'll show what I am attempting to do to retain 'C' collets once I get it figured out. Meanwhile you all might actually read what you're responding to. Cal, I have a lot of respect for you - but to dismiss a real number (0.775) & throw out a guess: 0.660" What are you saying? Perhaps a 0.66" opening is best - but we now have what VN provided. Now I gotta download & post the pics that were sent to me proving what is factory. Personally 0.66 is a tighter number & perhaps a better opening size for what we are trying to do - just remember this was merely a guess & real numbers were ignored once posing that guess.
 
Last edited:
No numbers stamped into my closer.

I decided to experiment and make an inset washer. The washer located off the closer ID and has an 8deg taper in other side which antes with collet face.

I need a spinner wrench to tighten closer enough to clamp anything inside a collet.

The washer was picked up from Ace Hardware. It is a hardened 3/4” id 2.5” od 1/4” thickness.
 

Attachments

  • 74AFEB57-4514-4E20-94DC-E7C9A02F562B.jpeg
    74AFEB57-4514-4E20-94DC-E7C9A02F562B.jpeg
    36.9 KB · Views: 10
  • C68F7047-17AB-4E4F-AA65-CBC28CAE2C91.jpeg
    C68F7047-17AB-4E4F-AA65-CBC28CAE2C91.jpeg
    50.2 KB · Views: 9
  • 9BDC9019-8FFF-45B6-9058-98C48B680C22.jpeg
    9BDC9019-8FFF-45B6-9058-98C48B680C22.jpeg
    49.1 KB · Views: 9
  • 9B94B529-48B4-49C8-82A1-D56D82890E94.jpeg
    9B94B529-48B4-49C8-82A1-D56D82890E94.jpeg
    36.6 KB · Views: 9
  • E53B9376-D531-4DB9-9602-0F7038DE0DD1.jpeg
    E53B9376-D531-4DB9-9602-0F7038DE0DD1.jpeg
    39.8 KB · Views: 9
... Meanwhile you all might actually read what you're responding to. Cal, I have a lot of respect for you - but to dismiss a real number (0.775) & throw out a guess: 0.660" What are you saying? Perhaps a 0.66" opening is best - but we now have what VN provided. ...
There is absolutely no need for you to get rude or to lecture me. I was responding to Manderioli's post and had simply missed the fact that you already had the correct number. I don't have a lot of to spend on this forum and certainly not enough to spend re-reading the entire thread before posting.
 
Thanks for your response Cal. As I said, I do actually have alot of respect for you.
 
The collet retainers use an 11 TPI thread. I thought to make my adapter screw down into the retainer. What makes this a bad plan is the fact that the threads inside the retainer stop short of the bottom. So, while I started with a square piece of 3/8 steel, I ended up with very similar results to what Manderioli did up above. The center register is the key to making the adapter work. As for the collet removal rod, the inside bore of the spindle is 0.445 so a 7/16 drill rod is a nice fit. My final length came to 6 1/16 + the piston, which is 0.841 dia x 0.177 thick. I started with a 1/2 drill rod. Turned it down to 7/16 & used it as a mandrel to turn down the piston which started as a 3/16 thick piece of scrap. 0.875 is the smallest cross section of the spindle in the collet area, so that was my target diameter for the piston. But 3/16 is too thick for the piston with some collets, so I had to rework it to fit. I don't have all the necessary measuring tools to get an accurate range of what the piston thickness tolerance might be. Nor can I say what limits there are for the adapter thickness. I just left everything long & thick then dialed them to acceptable numbers for my application. Your numbers might vary to suit your needs.

Marked up Factory drawing (just showing the added info).

07.jpg

My finished pieces. As measured with a collet in hand, Manderioli's 8 degrees for the collet face was spot on for mine as well.

20190716 05.jpg

The face of the adaptor with centering ring follows.

20190716 06.jpg

Due to the 10 - 32 screw not being centered in the ejection rod (despite my trying to do it right) I actually came up with a cool benefit. Once the rod is installed, it can be rotated to catch the lip of the narrow section (as seen in the collet portion of the factory drawing) & won't fall out.
 
1 more step closer. The tool holder finally fits inside the adaptor!

20191024 DRIVE HOLDER.jpg
 
The adapter I have that allows me to use no22 sized attachments on my no24 works beautifully. If I were to make 1, I'd want to revise it. The fit is so good that it requires 4 grub screws to aid removal. It would be better if these were accessible from the front. Same for the 1 mounting stud really. But, this design does keep everything square!

20200225 02.jpg

20200225 01.jpg

A little grease on the splines & the elbow is in place.

20200227 01.jpg

Spins so smooth in neutral! Time for the 2nd portion.

I didn't want to wrestle with it, so the table aided the alignment.

20200227 03.jpg

So far, so good! Until.

20200227 04.jpg

When tightened up, the gears hang up. When loosened they spin just fine, but sound wrong. I'll have to take it apart again & figure out the premesh.
 
Back
Top