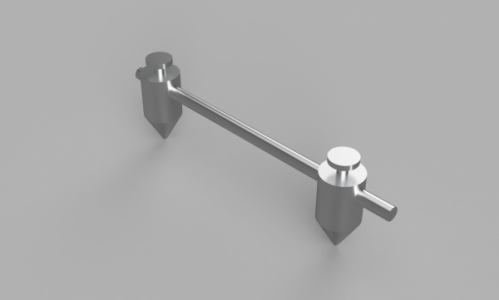
Hole Center Distance Finder (for lack of a better name)

rwm

Robert
H-M Lifetime Diamond Member
Joined
Mar 25, 2013
Messages
4,614
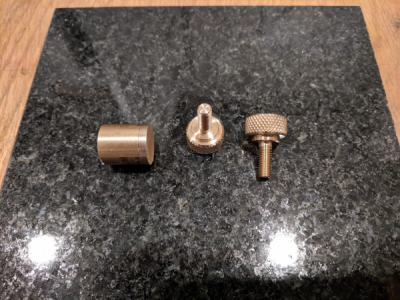
I started this idea in Fusion, now making some parts.
Center_Measurer_2019-Aug-02_02-09-05PM-000_CustomizedView1406717594.png

Thumbscrews first:

1564763567109.png

This brings up an interesting debate on order of operations. When making thumbscrews it is suboptimal to grip the work by the knurl or by the thread. How do you go about this? I cut the knurl after making the shape but before threading. Then I cut the thread and parted off. Then I had to grip on the threads to chamfer the ends of the knurled part. Worked OK, but is there a better order? What if you started with knurled bar? Knurling is always a gamble for me so I hate to do it last.

Robert
 
I have always done it as you outline; if the part is held in a collet for the face/chamfer operation, no damage to the threads is done; if held in a 3 jaw chuck, likely some degree of imprinting on the threads by the chuck jaws is likely.
 
Then I cut the thread and parted off. Then I had to grip on the threads to chamfer the ends of the knurled part. Worked OK, but is there a better order?

Why not start the part off to get some tool clearance for the chamfer, then chamfer, then finish the part off. This is what I normally do.
 
I make collets or split sleeves out of delrin to hold parts on the knurling when needed. Don't need to use delrin but I have it. If a collet is not good enough to hold a part by the threads I'll make a threaded mandrel for part to thread into and use a nut to lock in place if needed.
 
Why not start the part off to get some tool clearance for the chamfer, then chamfer, then finish the part off. This is what I normally do.
Actually, in some measure, that is what I do, I make a partial part off, leaving a very small amount of stock on the length, then do my knurling, having previously roughed out the thread diameter; the partial part off lessens the length (generally) that the knurl needs to cover, making that operation easier, I then chamfer the part off, then finish the thread diameter, and thread the part, then part off, and finish the length of the parted off length; I find it nearly impossible to make a nice finish with the parting tool alone. I finish the thread diameter after knurling because the pressure of the knurling tool frequently moves the part in the chuck, so that the thread diameter does not run true.
 
Incidently, there is a precision measuring instrument, the "Sorensen Center Mike" that was made by Brown & Sharpe, that measures hole centers using a device that looks like a vernier caliper, but has two sliding jaws, and will measure center distances to .001" in different diameter holes. The type shown on this post cannot do that because of the error due to angularity when one probe fits deeper into a larger or smaller hole than the other.
This device seems to be fairly rare, I have only seen 3 or 4 on E Bay over 10 years or so, and they come in several lengths. Late news flash, egg on my face, I looked on e bay, and right now there are a bunch of them for sale!
 
Last edited:
I had no idea the Sorensen was made by Brown & Sharpe. And he's right, they come up on eBay often and are a wonderful tool. I'd not heard of it until a thread on THM.
 
This brings up an interesting debate on order of operations.

Personally, I would extend the part out of the chuck long enough for the whole part plus clearance for the knurling tool, then center drill it and use a live center to support it. Then I would use a parting tool to demarcate all the cuts to their final depths. That is, part in to the depth of the threaded section, then the part under the knurl; leave the knurled part for last. Then turn the threaded part to size, chamfer it and cut the threads. Then turn the part under the head to size; I would use a knife tool for this. Then chamfer the part for the knurl and run the knurl. Then cut the part off, flip it and grab the threaded section in a collet and face and chamfer the top of the knurl and you're done.
 
I had no idea the Sorensen was made by Brown & Sharpe. And he's right, they come up on eBay often and are a wonderful tool. I'd not heard of it until a thread on THM.
I never knew about them until I ran across one on Brown & Sharpe tools on E Bay, where the seller indicated that it was made by them (they are stamped); they never appeared in any B&S catalogs that I have ever seen, I never thought to look for them under Sorensen; there are nearly 20 of them for sale!
 
Very interesting instrument! It's basically just a vernier caliper with a 2X magnified scale. The distance between hole centers is half the sum of the distances between the inner and outer edges of the holes. Very clever execution of this summation and division by 2!
 
Back
Top