How to thread stainless

@FTlatheworks

Congratulations!
It looks like your persistence got you there. Well Done.

Just a couple things:

First, as 
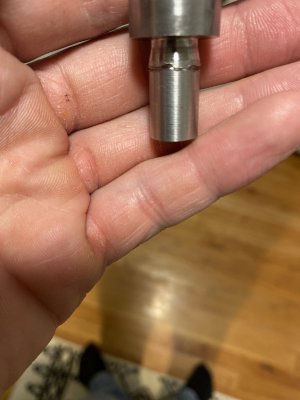
@BladesIIB said reduce that tool hang-out for less vibration.


First some terminology. Compound = top-slide. They are the same thing.

We are using the compound (top-slide) angle adjustment to set the angle we want to feed the tool into the cut.
In this case by feeding in with the compound the tool kind of slides in at an angle rather than straight in.
This allows it to only cut on the left-hand leading edge (when feeding towards the headstock, tool at front, top of the work rotating towards you).

I find on my light and kinda loose Southbend 9" lathe this works much better than feeding straight in using the cross-slide.
When I try infeed with the cross slide the cutting forces are higher due to both side faces of the tool contacting the work-piece.


Yes absolutely we do lock the half-nuts to the lead-screw and use the lathe gearing to move the tool precisely for every rotation of the spindle.

This maybe confusion between terms again; longitudinal "carriage" feed vs. tool infeed.
The lathe will power feed the tool (indeed the entire carriage) left and right.
Our tool infeed really controls the depth of each cut. For threading we can start with larger infeeds , but as the cutting progresses the tool bit gets deeper into the work-piece and does more work, so we can relieve a little of the stress my feeding the tool bit in less.

I often start threading with 2-5 thou. infeed but it can be different for each lathe, tool bit and work-piece material.
I might try up to 10 thou. to start if I know the tools and material.
Threading often ends at 1 thou. infeed when you are getting close to final size.
Then one or two "spring passes" are done with no additional infeed. This helps to clean up the threads.

In normal outside diameter turning we usually infeed with the cross-slide....but here too you could use the compound set an an angle for infeed. Just beware that the numbers on the cross-slide dial will no longer indicate the true infeed. But it can be calculated using trig and the angle of the compound. This is sometimes used when you want very fine infeeds, like when trying to remove sub-thou. of material with a shear tool.

For threading either the compound (top-slide) or cross slide can be used for infeed.
I just find the cross-slide gives me better results on my lathe.

I'd recommend that as you get more comfortable with single-point threading you give both a try and see what works best for you.

-brino
Yes, I should have reread before I posted. I’m not sure why I conflating top,cross,and compound. It sounds like you knew understood where I was going though. Thank you for the support.
 
Well, crappy night. I tried to thread a part that I machined in the wrong order. It was too small and I should have cut threads first.
I thought I could handle it without crashing the tool post into the chuck. The tool post hit the chuck and the press stalled. I hit the brake and tried to disengage half nut, but it wouldn’t budge. I had to turn chuck in reverse with the chuck tool to disengage half nut. I Then took the tool post off. Nothing seems to be broken, but I’m worried about what damage I may have done. The tools post and two of the jaws have the face ground off.The threading tool nearly cut .100 deep in a .437 diameter piece of stainless. My question is how did it cut that deep if it was set to do a scratch pass? What could flex that much to make the tool cut that deep?
It clearly pushed the post and the top slide down and into the work, but what flexed enough for that to happen? Did I bend something. I will post pics of chuck and tool post tomorrow.
 

Attachments

  • image.jpg
    image.jpg
    1.7 MB · Views: 19
Last edited:
My guess is that the tool post rotated into the work after contacting the chuck.
It was then likely sprung down and the work sprung up over it.

I would check the half nuts.
Perhaps you can see them with a flashlight and mirror.
If not, maybe just test them by cutting a few more threads.

You may have gotten away with no real damage other than some marks on the tool post and chuck jaws ........ and to your pride.

These are the type of issue that make me glad I have a flat belt that I can slacken just a little if there's a chance something goes wrong.
Like a fuse in the system, it prevents any major damage.

-brino
What am I looking for on the half nuts? I looked at them from the sides of the carriage, can’t see much from there though.
 
Sorry about your crash. Sounds like you cleaned most of it up well. I think one quick way to test the half nuts would be to move to different spots on the lead screw and feel and observe how they clamp. Can be non running for this just seeing if they engage clean and smooth. Maybe move the hand wheel and see if any play after engaged. If they engage clean in multiple places including where the crash occurred then I think that would eliminate the concern for any major damage? Have not tried this so curious what others think would be a good check.
 
I sanded the sharp edges off on the tool post.
Could the lead screw have bent from that, or do they usually have some perceptible wobble to them?
 

Attachments

  • image.jpg
    image.jpg
    1.8 MB · Views: 9
  • image.jpg
    image.jpg
    1.6 MB · Views: 9
What am I looking for on the half nuts? I looked at them from the sides of the carriage, can’t see much from there though.

It depends on the lathe, and how much room there is between the apron and the bed whether you can get a light and mirror in there.
Best case you can look at the half-nut tooth profile and see an acme thread like profile and then move on.

However you may need to fall-back to some functional tests.
I would NOT immediately disassemble (remove the carriage) I would:
1) with the machine off lock the half-nuts put an indicator against the carriage and see how much "slop" you have when you manually push the carriage left and right. Then the question becomes how much is too much "slop".
2) cut some more threads as a test. In this case small slop won't matter. It is a gross test to see if the half-nuts are completely stripped.

Last resort is if all the above fail to give any reassurance. Then pull the carriage, or at least the half nuts off to look for damage.
Hopefully it does not come to this.

-brino
 
Back
Top