How to thread stainless

That pic explains a few things! I can't believe you could cut any thread like that. Rotate your compound back to pass your zero mark and then keep going until you get to 60.5 deg. That should be the correct angle on your machine.
Your machine is labeled like mine such that 0 deg is parallel to the bed. That is non-standard.
By the way, we are NOT referring to the tool angle. We are referring to the axis of compound travel. Is that the point of confusion?
R
 
Last edited:
Check Shars for threading tools. They have on-edge inserts in negative, positive, and neutral rake that all fit the same holder. They have laydown inserts ant holders for them. If chipping is your problem you might try HSS or cobalt alloy tools at the appropriate SFM.
 
That pic explains a few things! I can't believe you could cut any thread like that. Rotate your compound back to pass your zero mark and then keep going until you get to 60.5 deg. That should be the correct angle on your machine.
Your machine is labeled like mine such that 0 deg is parallel to the bed. That is non-standard.
By the way, we are NOT referring to the tool angle. We are referring to the axis of compound travel. Is that the point of confusion?
R
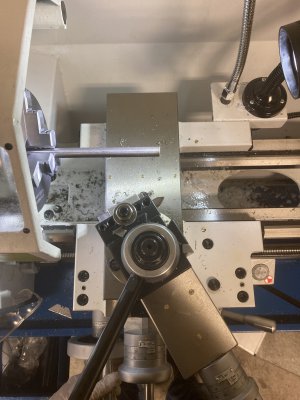
So I should rotate the compound adjustment dial to the right, or towards the tail stock until it is lined up with what would be on out import machine 60.5 degrees.

can anyone explain with pictures how to precisely measure angle of compound slide axis. I was measuring from the tool and that makes sense to me. Once I figure the correct way to measure and I restore my new machine... lol, I will put new badges and scales on everything similar to davids 1340. It will be nowhere near as awesome as his, but I will try.
 
can anyone explain with pictures how to precisely measure angle of compound slide axis.

One way is to use angle gauge blocks between the chuck face and the compound. Or a protractor between those same surfaces.

For higher precision (not necessary for threading) you can set up a couple indicators and determine the slope of the compound as the carriage moves. One measures carriage travel (z) and the other measures perpendicular (aligned with the cross slide) to the compound’s side surface (x). The angle is arctan(x/z).

Edit: that formula gives the angle from the carriage ways. If you want the angle from the cross-slide ways, you’d subtract that from 90. Same issue that started this thread, if I remember.
 

A great way to accurately set the angle of the compound. I don't think you need it for threading, but just to verify, it might be helpful. He has a few interesting videos on threading as well.

Keep in mind, the TOOL needs to be perpendicular to the work. The Compound can be 30 degrees or whatever, but the tool has to be lined up.
 
^ that’s much better, using the compound slide to determine one leg (the hypotenuse) and the cross slide w/indicator to determine the other leg.
 
Please see Mikey's post. That illustrates it very well.
R
 
There are so many posts from helpful people. I’m not used to having this many responses. It’s great, but I need to be more mindful of the answer given. Thanks everyone for the help. Hands down best forum and people, this I’m sure of.
 
I’m confused still! If we move the compound to 60.2, or 29.5, why are we moving the tool post? This is at 60.2. What else needs to happen here?
 

Attachments

  • image.jpg
    image.jpg
    1.9 MB · Views: 14
Back
Top