I made an ooops, now how do I fix it??

I got the epoxy earlier this afternoon. Cleaned all of the parts. Then applied the epoxy and clamped the pieces together. Everything was setup within 10 minutes, but I'm going to keep it clamped together for the next couple of days. Later this coming weekend I'll unclamp everything and possibly machine everything.
 
I’m also a rank amateur when it cones to machining, but I learned a while ago that all of the axis’s that you AREN’T working in get locked down before you hit the “start“ button.

The only axis that should be able to move is the axis in which you are working.

It’s right up there with other universal things like “safety glasses everywhere, all the time” or “never get inline with the cutter rotational plane”, “never touch a running machine around the work interface”, “never reach over a running machine”, “never grab a curl on a running machine”, etc.

Too late to help here, but re-stating it might help the next “newbie” that happens across the thread….
 
Last edited:
I’m also a rank amateur when it cones to machining, but I learned a while ago that all of the axis’s that you AREN’T working in get locked down before you hit the “start“ button.

The only axis that should be able to move is the axis in which you are working.

It’s right up there with other universal things like “safety glasses everywhere, all the time” or “never get inline with the cutter rotational plane”, “never touch a running machine around the work interface”, “never reach over a running machine”, “never grab a curl on a running machine”, etc.

Too late to help here, but re-stating it might help the next “newbie” that happens across the thread….
This is good information. I put it into practice when repairing my mistake.
 
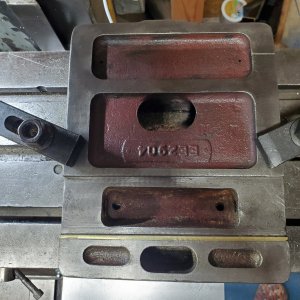
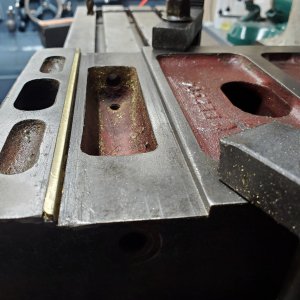
I got some time this week to work on this tailstock. I had cut a piece of brass to size, cleaned the area, then used the epoxy to hold it in place. After about 48 hours I decided to mill the area to get it back to spec. After a couple of light passes, the piece of brass came loose and flew from the tailstock. Both the area of the tailstock and the piece of brass were smooth when I used the epoxy, I thought I could get by with it, but not so much.

After I cleaned all of the epoxy off everything I scratched a crosshatch pattern into both the tailstock area where the brass will be as well as the faces of the piece of brass. I then placed it back in place using the epoxy once again. I then drilled some holes vertically and placed some brass rod down the holes and they were secured in place using red Loctite.

It was allowed to dry for roughly 24 hours and I decided to go to work on it again. Taking small bites each time I got it milled to size. I took my time, but everything worked out okay.

20230130_144217.jpg20230130_144244.jpg

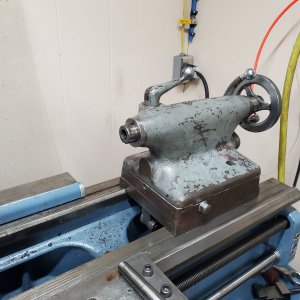
After finishing up the machining, I got to work putting everything back together. Here it is back together, it just needs a new paint job :)
20230130_162336.jpg
 
Back
Top