

- Joined
- Jan 6, 2017
- Messages
- 1,214
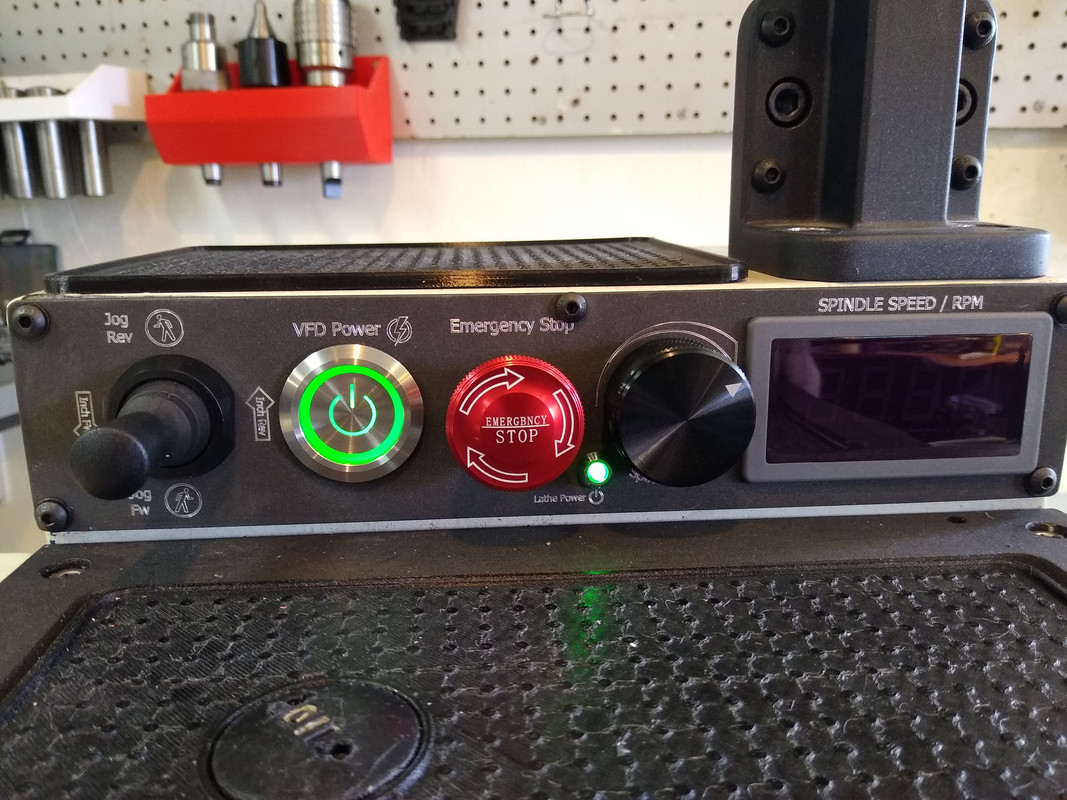
The lathe panel is finished. Just waiting for a small 120v to 12V power supply to show up in the mail, to power the tachometer. It's already wired up, with 4 connectors in the electronics enclosure to plug into the 12v power supply.


Since that's done, I spent yesterday building up aluminum tig welds on the cast aluminum (welding that stuff sucks) flange on my German made Helmke 100l 3 phase motors flange and machining it to fit on my step pulley PM935ts.
Still waiting on some FAG bearings from Amazon for the motor. I always start a motor project with new, good bearings. The motors fitted to the mill, except for boring to pulley to 28mm, broaching a new keyway, and a 1/2-13 adjustable lever and pivot screw. Oddly, the stock PM handle and screw are 1/2-12. I decided to replace the less common 1/2-12 stuff rather than order a 1/2-12 tap.
So, today I got started on the mills new control panel.
I cut down a 9"x4" aluminum project box from Amazon, and replaced most of the screws with rivets. Mounted the DRO display to the top of it, and remounted the DRO arm to the enclosure. I 3D printed some handles, and a piece to fill the space between the display and project box. It's all mounted up. Just waiting for a few more switches from Amazon.
I think I'm going to use the same cobalt cerakote and drag engrave from the lathe panel to label the mill panel.
The mill will use a 3 wire vfd control setup. A green illuminated 2 position direction switch, greed and red illuminated momentary run and stop switches, the same illuminated power switch from the lathe, a tach and a 2 way joystick jog.

