-
Welcome back Guest! Did you know you can mentor other members here at H-M? If not, please check out our Relaunch of Hobby Machinist Mentoring Program!
You are using an out of date browser. It may not display this or other websites correctly.
You should upgrade or use an alternative browser.
You should upgrade or use an alternative browser.
Logan 9B spindle assembly
- Thread starter AR1911
- Start date
- Joined
- Nov 5, 2010
- Messages
- 871
OK, I read it again: http://www.hobby-machinist.com/showthread.php?t=20631&p=188006&viewfull=1#post188006
As much detail as you went into, it does not answer the question: Where do the bellville washers go?
1 -inside the headstock
2 - outside the headstock, under the rear bearing
It appears to me that #2 is the only way that makes sense, because the OD of the bellvilles is less than the ID of the headstock hole. They are about the same diameter as the rear bearing.
And why would you need a setscrew in the collar if the bellvilles were acting against it? You would want it to float.
- Joined
- Feb 5, 2014
- Messages
- 198
Maybe i am not understanding inside vs. outside. On the 400 they go on the rear end of the spindle between the spacer and the rear bearing. That would place them inside the headstock casting. I made a mistake in reversing them originally but corrected that in post # 65. (I so regretted not taking better pictures when i took mine apar)
http://www.hobby-machinist.com/showthread.php?t=20631&p=188465&viewfull=1#post188465
Do you mind posting a few pictures of the 9B to see how it is different.
Matthew
http://www.hobby-machinist.com/showthread.php?t=20631&p=188465&viewfull=1#post188465
Do you mind posting a few pictures of the 9B to see how it is different.
Matthew
4
4GSR
Forum Guest
Register Today
Little late responding to thread...
Before I press or install any bearing, I measure both the Shaft OD and the bearing ID, to check how much interference there is. A bearing of this size, tapered roller bearing, should not have much more than .0005 to .0010" interference. And always apply a oil film to both the ID and OD of a bearing surface before pressing.
Before I press or install any bearing, I measure both the Shaft OD and the bearing ID, to check how much interference there is. A bearing of this size, tapered roller bearing, should not have much more than .0005 to .0010" interference. And always apply a oil film to both the ID and OD of a bearing surface before pressing.
- Joined
- Nov 5, 2010
- Messages
- 871
Maybe i am not understanding inside vs. outside. On the 400 they go on the rear end of the spindle between the spacer and the rear bearing. That would place them inside the headstock casting. I made a mistake in reversing them originally but corrected that in post # 65. (I so regretted not taking better pictures when i took mine apar)
http://www.hobby-machinist.com/showthread.php?t=20631&p=188465&viewfull=1#post188465
Do you mind posting a few pictures of the 9B to see how it is different.
Matthew
Matthew, I don't think it's different. Your copy of the parts diagram looks just like mine.
From Post #65,with my comments:
- Once the nose bearing is in, you can slide in this order the rest of the parts through the rear bearing bore. (Make sure the "C" clip is in there)
1 Small spacer
Seems to me like the left headstock bore should fall here (see photo)
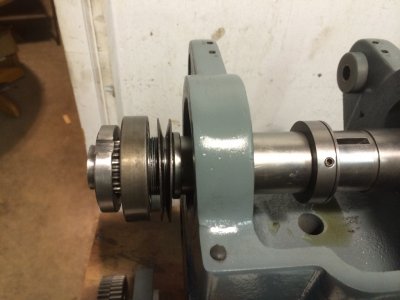
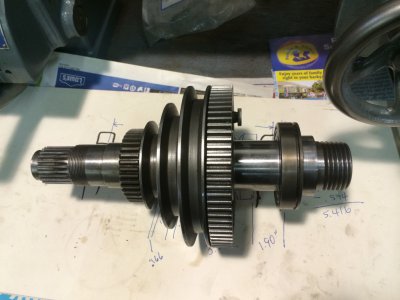
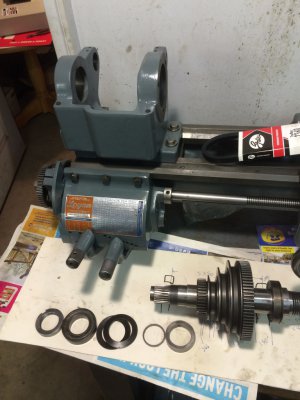
2 First Belleville washer. Above I had this part wrong. It only made sense if this went in concave to the rear bearing. That way the ID presses on the small spacer.
3 Second Belleville washer. This one goes concave to the nose bearing.
My Belleville washers will not fit through the rear bearing bore. That is why I think they go outside of the bearing
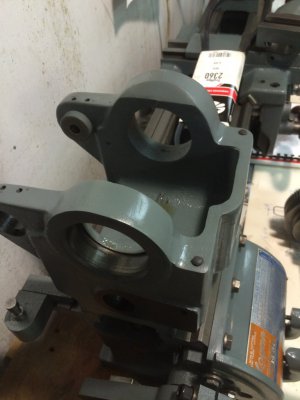
4 Rear bearing. This has to be tapped in with a wood mallet and once it gets past flush to the housing you will need a wood tap spacer.
5 Rear lock nut. This can be used to draw the bearing down onto the "C" clip.
6 Main lock nut. I only have one locking nut. Maybe the 2nd one is missing?


- Joined
- Feb 5, 2014
- Messages
- 198
Rex,
Man, the 9B is the same as the 400. Re-modeled and upgraded with more options. Now where is that elusive 9B saddle/apron assembly I am looking for....
So what you are saying is that the Bellville washer OD is bigger than your bearings OD. (or the bearing bore.) Hmmm.....
On mine the washers are to the inside of the bearing. They are mid way through the bore.
After the bearing there is just the main lock nut. I see that I stated that twice now in my steps. Rear lock nut = main lock nut. There is only one lock nut. (Will go back and edit that)
You can see below that there are no washers between the lock nut and the bearing on the outside.
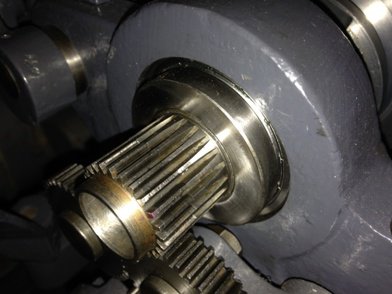
Below shows the washers up against the small spacer. Could not get a picture to actually show the washers but they are in there hidden by the shadows.
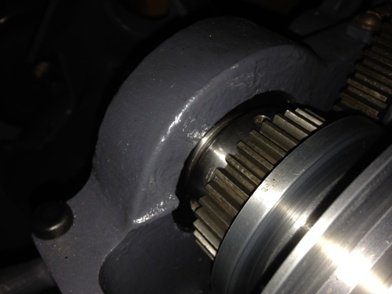
The only thing I can think of is that the washer OD is just real tight to the bore ID on yours as your parts look exactly like mine.
I did not have any issue getting mine in but I do recall them being close in size.
BTW. Your first picture shows the washers reversed. The first on should have the smaller diameter pressing against the spacer. That is the make this shape. <>. You show them as ><
Matthew


Man, the 9B is the same as the 400. Re-modeled and upgraded with more options. Now where is that elusive 9B saddle/apron assembly I am looking for....
So what you are saying is that the Bellville washer OD is bigger than your bearings OD. (or the bearing bore.) Hmmm.....
On mine the washers are to the inside of the bearing. They are mid way through the bore.
After the bearing there is just the main lock nut. I see that I stated that twice now in my steps. Rear lock nut = main lock nut. There is only one lock nut. (Will go back and edit that)
You can see below that there are no washers between the lock nut and the bearing on the outside.

Below shows the washers up against the small spacer. Could not get a picture to actually show the washers but they are in there hidden by the shadows.

The only thing I can think of is that the washer OD is just real tight to the bore ID on yours as your parts look exactly like mine.
I did not have any issue getting mine in but I do recall them being close in size.
BTW. Your first picture shows the washers reversed. The first on should have the smaller diameter pressing against the spacer. That is the make this shape. <>. You show them as ><
Matthew


- Joined
- Nov 5, 2010
- Messages
- 871
Matt, look back at that pic of the bare headstock casting. See that step in the bore? The washers' OD are bigger than that ID, they will not pass through. That is why I faced the washers as I did. Otherwise, what would the inner edge of the washers bear against? They are a loose fit on the spindle, and they almost go over the small spacer.
With the outer race tensioned against the outer edge of the washers, and the take-up nut bearing against the inner race, that should preload both bearings. That arrangement has the outer bearings at both ends acting against the headstock casting, with tension against the inner races applied by the nut. At least that is how I see the forces. If I reverse them as you suggest, I don't see how it would give any preload.
With the outer race tensioned against the outer edge of the washers, and the take-up nut bearing against the inner race, that should preload both bearings. That arrangement has the outer bearings at both ends acting against the headstock casting, with tension against the inner races applied by the nut. At least that is how I see the forces. If I reverse them as you suggest, I don't see how it would give any preload.
- Joined
- Nov 5, 2010
- Messages
- 871
I searched through the Lathe-list Yahoo group, which is run by Scott Logan.
It seems to confirm that the "cones" should be touching.
"Make sure you have the Belleville washers positioned correctly --> )( ."
"When I first tore into mine, I discovered that the Belleville washers (I had 4) were installed wrong. The were installed ))(( and should be )()( "
From Scott hisself:
"On the Model 400, the bellevilles (2) should be installed back to back,
like so:
)( "
Here's the thread (5 messages) https://groups.yahoo.com/neo/groups/lathe-list/conversations/messages/26872
The only other thing I am unsure about is what role that thin spacer plays. One post seems to indicate it goes in the middle of the Bellevilles to limit the amount of crush when you tighten the nut down, so you don't collapse the Belleville washers.

