Long way around...

anyway of attaching a DTI to that? Maybe others will chime in, but I don't think a height gauge is the right tool for surveying flatness of a plate.
 
I guess I'm confused. If I bolt my fixture to the bed of the Bridgeport and then sweep it with the indicator, why would I doubt the flatness?
 
I started cutting and, after a single pass, my shirt and shorts were totally covered in sharp little chips. My family really doesn't appreciate it when I bring those into the house and then they step on them with their bare feet...so, once again, I improvise. This picture is purely for your amusement. My wife and kids were likewise amused. I think it's a solid look. Dont be shocked when you see it on the high fashion runways of Paris in the near future.

Ross,
I noticed in your photos that you are a motorcyclist so just thought I'd pass along some information on one thing I use to help with chip control. I wear full face helmets so from time to time the face shields need to be replaced. I use the old face shields mounted on a cheap mag base with adjustable arms and just position it close to the mill spindle when machining. The curvature of the face shield kind of wraps around the milling cutter (within a few inches) and is pretty effective at containing about 80 -90 % of the flying chips.
Just some food for thought.

Ted
 
I guess I'm confused. If I bolt my fixture to the bed of the Bridgeport and then sweep it with the indicator, why would I doubt the flatness?

I think there's a couple of disconnects going on here.

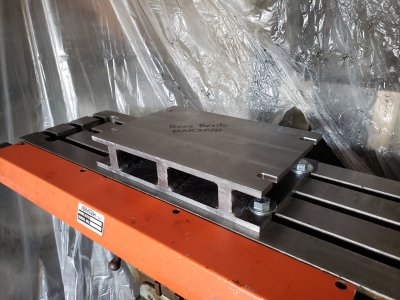
First, you're machining the fixture to be as flat as you can make it. However, by clamping the fixture to your mill to machine it you may be inducing movement in the fixture that will then affect the flatness of the fixture. Think about how metal bows when you hold it from both ends or how you can bend something over a fixed object. Also by simply removing metal you may change the internal stresses of the fixture such that it will move/ warp when you remove it from the mill, especially given that it's a weldment. To figure all of that out, you need a surface plate (which you have) and a surface gage with DTI to map the surface of the fixture and see if it's truly flat - almost certainly it won't be.

Second, this is a pretty chunky piece of metal and if it's ever so slightly banana shaped, when you clamp it to your mill table you may cause your mill table to bow to match it. So even if you sweep the fixture and it looks flat, the X travel of the mill will proscribe a slight banana shape that partially matches the shape of the fixture.

That's why you need to check it at multiple points in different ways. Now, could be that you don't need that degree of accuracy, which is fine, it's not my project and I don't know the tolerances that you're working to. But it would be good to know what inaccuracies exist, so that you can either fix them or compensate for them in your work, especially when you get stacking errors (where multiple small errors combine to create one larger one).
 
I have one of the Grizzly face mills, like the one shown, I’ve never been really impressed with the results, I think the tool itself is very well made, I think the finish issues, at least for me, have been directly related to either the usually cheap TPG or TPU inserts. I really believe they are a lathe tool turning insert, and are marginal as a milling insert. Especially on edge related cuts, the inserts do not like any kind of interrupted cuts. I have some really expensive inserts made by both Valenite and Mitsubishi, that have a much better finish, but are about 7 to 8 times the cost of run of the mill TPG/TPU inserts. I found the mill can work and have a decent finish, it all based on good quality inserts and a lot of trial and error.
 
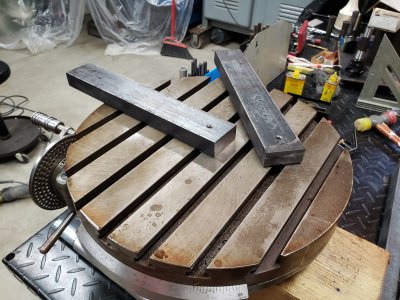
Back to the project at hand. I cut the 1x2 bar into 12" lengths and went about setting up for making those $20 parts that started this whole project a month or more ago.

20200502_175740.jpg

The rotary table has a .25" pin at the center so I drilled .25" holes in the bars to reference off of. I bolted my adapter up to the mill with 1/2" hardware.

20200503_104545.jpg

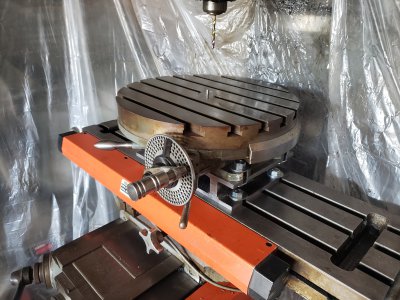
From there, I dropped the RT in place and bolted it down. This is the end result that I've been trying to get to for months.20200503_105726.jpg
 
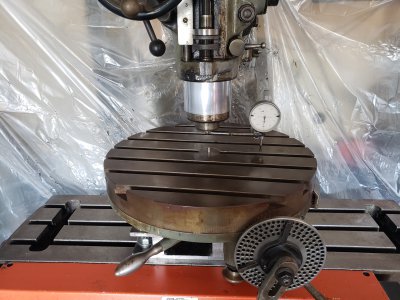
I swept the table and was well within .001". Its not quite as good as the Bridgeport table is, but not too bad considering the stack-up.

20200503_110643.jpg

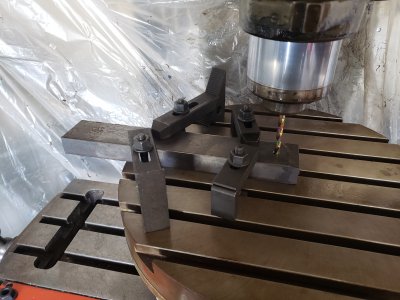
I dropped the bar on to the centering pin, used the .25" bit to find center for head, and then clamped down my work.

20200503_111745.jpg

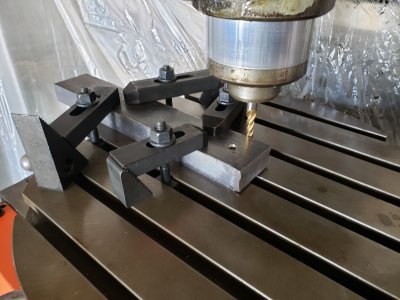
I offset the table in the Y axis by 1" + the radius of the cutter. I then rotated the RT thru 180 degrees of travel just to make sure the path was going to work as intended.

20200503_113419.jpg
 
Back
Top