

-
Welcome back Guest! Did you know you can mentor other members here at H-M? If not, please check out our Relaunch of Hobby Machinist Mentoring Program!
You are using an out of date browser. It may not display this or other websites correctly.
You should upgrade or use an alternative browser.
You should upgrade or use an alternative browser.
Melting and casting metals...
- Thread starter MrCrankyface
- Start date
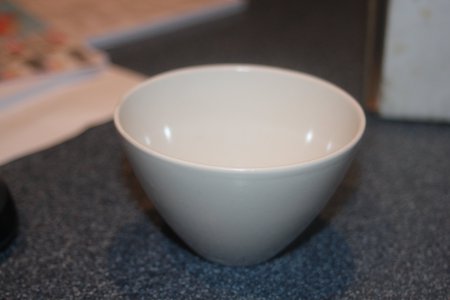
 Says they're porcelin 150 mls .

- Joined
- Nov 7, 2019
- Messages
- 434
Alright so a little progress again.
Bent up a bunch of stainless wire, hoping this will reinforce the cement.

To get a decent seal against the bucket I decided to put the lid in place and fill from the top.
Put an old headlight in place and sealed everything up.

Felt a bit unsure about this since the hole is quite small and it was difficult to push the perlitecement in.

And as I feared, didn't manage to distribute and pack very well along the bottom.
Should probably have tried vibrating it to shake things into place.

Decided to cover it with a layer of high-temp cement, hopefully it binds well to the previous cement and protects it a bit.
Once this has set properly I think it's actually finally ready for some heat!

Also made a brick with some leftovers, same thing here that it seems hard to pack it and distribute the cement.
Will have to try vibrating it if I do it again.
Will still be useful to test how it reacts to fire and heat.

Bent up a bunch of stainless wire, hoping this will reinforce the cement.
To get a decent seal against the bucket I decided to put the lid in place and fill from the top.
Put an old headlight in place and sealed everything up.
Felt a bit unsure about this since the hole is quite small and it was difficult to push the perlitecement in.
And as I feared, didn't manage to distribute and pack very well along the bottom.
Should probably have tried vibrating it to shake things into place.
Decided to cover it with a layer of high-temp cement, hopefully it binds well to the previous cement and protects it a bit.
Once this has set properly I think it's actually finally ready for some heat!
Also made a brick with some leftovers, same thing here that it seems hard to pack it and distribute the cement.
Will have to try vibrating it if I do it again.
Will still be useful to test how it reacts to fire and heat.
- Joined
- Mar 25, 2013
- Messages
- 4,614
The lid looks fine. That will work just fine.
The PID controller is probably overkill. These electrics take so long to melt Al that you pretty much just melt it, skim it, and pour. It may be useful if you decide to do heat treating or something like that.
The PID controller is probably overkill. These electrics take so long to melt Al that you pretty much just melt it, skim it, and pour. It may be useful if you decide to do heat treating or something like that.
- Joined
- Nov 7, 2019
- Messages
- 434
PID is definitely overkill, a simple on/off controller would've been good enough but comically are harder to find cheap than PID.
I want to try case hardening sometime in the future so some kind of temp control is definitely needed.
Finally got it all up and running.
Gradually increasing temperatures over time. Initially it was cooking off a lot of steam even at 100c, as it calms down I would increase the temp further.
As the temperature started creeping out into the insulation I'd notice both the bucket and lid start sweating and steaming more so takes quite some time to dry it out.

After several heatcycles I decided to go all the way up to 950c and try melting silver.
While waiting for it to heat up I started making a mold.
Didn't have enough sand so the top is only half-full, making it very delicate and at risk of falling out.


Pour itself went pretty good but definitely scary doing it for the first time.
Managed to touch the wood frame with the red-hot crucible causing both smoke and a bit of flame.
Definitely a challenge both aiming and keeping a consistent pour rate.

End results with silver.
Took a bit of cleanup and I definitely need to get better at mold making as a lot of the edges were damaged when I tried to get the pattern out.
Looking forward to doing some more casting stuff but with aluminium instead.


I want to try case hardening sometime in the future so some kind of temp control is definitely needed.
Finally got it all up and running.
Gradually increasing temperatures over time. Initially it was cooking off a lot of steam even at 100c, as it calms down I would increase the temp further.
As the temperature started creeping out into the insulation I'd notice both the bucket and lid start sweating and steaming more so takes quite some time to dry it out.
After several heatcycles I decided to go all the way up to 950c and try melting silver.
While waiting for it to heat up I started making a mold.
Didn't have enough sand so the top is only half-full, making it very delicate and at risk of falling out.
Pour itself went pretty good but definitely scary doing it for the first time.
Managed to touch the wood frame with the red-hot crucible causing both smoke and a bit of flame.
Definitely a challenge both aiming and keeping a consistent pour rate.
End results with silver.
Took a bit of cleanup and I definitely need to get better at mold making as a lot of the edges were damaged when I tried to get the pattern out.
Looking forward to doing some more casting stuff but with aluminium instead.
- Joined
- Mar 25, 2013
- Messages
- 4,614
Outstanding! Love to see this.
I see you are not fooling around; starting out with Ag! That is almost brass temp.
You will get used to burning your flasks. All mine are charred. If you get really into casting you can cast your own flasks in aluminum but wood works just fine.
I see you are not fooling around; starting out with Ag! That is almost brass temp.
You will get used to burning your flasks. All mine are charred. If you get really into casting you can cast your own flasks in aluminum but wood works just fine.
A good first pour. Sometimes I turn scrap metal into scrap metal. My first attempts at making cores were less than ideal.
Always wear your safety gear, dropping a crucible full of molten metal would not be good.
Do you ever watch Windy Hill Foundry videos? Olfoundryman videos are excellent.
Always wear your safety gear, dropping a crucible full of molten metal would not be good.
Do you ever watch Windy Hill Foundry videos? Olfoundryman videos are excellent.
- Joined
- Nov 7, 2019
- Messages
- 434
I've watched hours of different foundry videos on youtube, can barely remember who or what anymore. 
Time to revisit this project.
I've had a bunch of big bags with a aluminium scrap taking up space, decided to melt them down into ingots to clean everything up and save space.
Made some ingot molds, definitely too greedy with amount of slots which made the relief angles non-existant., ended up having to beat the walls out on every second slot and only use those.

Managed to melt down quite a lot before the smelter gave up, seems I have spilled aluminium on the coils which quickly ruined them. I tried splicing them together again after removing the bad parts but the repair only lasted a short time.

Putting in new coils is a PITA, the diameter of the internals is too small to accept my new crucible and I don't like the bad thermal insulation of the bricks I used.. SO I've decided to overhaul it a bit so it's nicer to use.
First tearing out the old bricks and making more space by chiseling out the perlite-cement.

Then I ordered insulated firebricks which will cut down the heat conduction from almost 29kW/m² to around 2.6kW/m², should make a massive difference both in heatup times and energy required to keep it hot.
Unfortunately they arrived like this, so it's a good thing I ordered a few extra...

I managed to find enough whole-ish pieces to get started with slotting them out for the kanthal wire.
Using the dust extractor cover for my handheld router and a shopvac took care of 99% of the dust as long as I moved slowly.
First pass was with a dovetail cutter to help the heater coils stay in it's channel, second pass was with a radius bit to lower the risk of cracking due to stress risers and also deepen the channel.
I'm hoping making the channels extra deep will allow me to make the coil "too long" so it stays in there better as it contracts from heating/cooling cycles.

Once 9 of these have been mitered, a tenth stone will be cut with angled slots to create a sort of spiral along the internal circumference.
This should make it very easy to install and potentially replace coils in the future.
I sketched some lines and almost started cutting before I realized I have to miter everything before I draw the lines for them to match correctly.

Time to revisit this project.
I've had a bunch of big bags with a aluminium scrap taking up space, decided to melt them down into ingots to clean everything up and save space.
Made some ingot molds, definitely too greedy with amount of slots which made the relief angles non-existant., ended up having to beat the walls out on every second slot and only use those.
Managed to melt down quite a lot before the smelter gave up, seems I have spilled aluminium on the coils which quickly ruined them. I tried splicing them together again after removing the bad parts but the repair only lasted a short time.
Putting in new coils is a PITA, the diameter of the internals is too small to accept my new crucible and I don't like the bad thermal insulation of the bricks I used.. SO I've decided to overhaul it a bit so it's nicer to use.
First tearing out the old bricks and making more space by chiseling out the perlite-cement.
Then I ordered insulated firebricks which will cut down the heat conduction from almost 29kW/m² to around 2.6kW/m², should make a massive difference both in heatup times and energy required to keep it hot.
Unfortunately they arrived like this, so it's a good thing I ordered a few extra...
I managed to find enough whole-ish pieces to get started with slotting them out for the kanthal wire.
Using the dust extractor cover for my handheld router and a shopvac took care of 99% of the dust as long as I moved slowly.
First pass was with a dovetail cutter to help the heater coils stay in it's channel, second pass was with a radius bit to lower the risk of cracking due to stress risers and also deepen the channel.
I'm hoping making the channels extra deep will allow me to make the coil "too long" so it stays in there better as it contracts from heating/cooling cycles.
Once 9 of these have been mitered, a tenth stone will be cut with angled slots to create a sort of spiral along the internal circumference.
This should make it very easy to install and potentially replace coils in the future.
I sketched some lines and almost started cutting before I realized I have to miter everything before I draw the lines for them to match correctly.
- Joined
- Nov 7, 2019
- Messages
- 434
At the end of post 39, maybe plaque or something is more accurate than jewelryMust have missed it… were you able to make the piece of jewelry for you wife’s birthday??
Need to remake it some day as apparently the font was wrong on the other side where her 'nick' is.