Mike's SCARA Robot

First project. Buy another one, paint it ... recreate this scene.

"SCARA, you sonofabishh"

0uulS4f.gif

You know they only filmed that to show off Schwarzenegger's massive biceps!
 
I am going to start bringing the robot in the house now. Even though it only weights 140lbs, I'm going to treat it the same way I did with my lathe and use the engine hoist and a ramp to lower it in slowly. It is large and the joints move when you lift it, so I'm not comfortable tucking it under my arm and carrying it down the stairs.

I have a few outstanding questions that Epson support is trying to help me with. These are going to be my biggest stumbling blocks.

1) In order to use the motors with my servo drives I need to generate a Custom Motor File (.cmf). This requires a lot of nameplate motor information that is not often published. I have requested that Epson try to find these values for me and I am very much hopeful that they can. If not I will have to measure them or replace the motors entirely. These parameters are:
  1. Torque Constant (Nm/A)
  2. Inertia (Kg*cm^2)
  3. Poles Per Revolution
  4. Winding Resistance (Ohms)
  5. Winding Inductance (mH)
  6. Rated Voltage (Volts)
  7. Maximum Speed (RPM)
  8. Intermittent Current (Amps)
  9. Continuous Current (Amps)
  10. Thermal Model Parameters (if possible)
    • Rth-we (C/W)
    • Cth-we (W*s/C)
    • Rth-wa (C/W)
    • Cth-wa (W*s/C)
  11. Flux Saturation Curve (not required but helpful)

2) Servo motors use encoder feedback to measure position and relay that to the servo drive. There are many dozens of types of feedback but my drives are only compatible with some of them. Very fortunately these are standard differential incremental quadrature encoders (ABZ) which I can read. Unfortunately they seem to be missing any kind of commutation signals. Permanent magnet AC motors require commutation signals to know the rotor mechanical angle so the drive can generate the appropriate electrical angle. This is a lot like the timing belt and cam shaft on a car engine or the electronic timing of the spark plugs. Usually commutation is done with 3 wires carrying 120 degree phased square waves that equate to the number of motor poles. This way there is always a unique coding on these 3 wires for each of the 8 motor poles. The motors on the robot do not seem to have these signals nor any of the other common methods of commutation (analog SIN/COS, serial startup). I might be able to cofigure the drive to self sense the commutation angle, but I don't love this idea, and I don't know if the particular drives I am using can even do this.

3) I don't know the reduction ratios of the gearboxes. I am hoping to find this without tearing down the entire robot to get to the gearboxes.
 
Looking forward to your adventures. This would sure make one heck of a Bartender robot!
 
Looking forward to your adventures. This would sure make one heck of a Bartender robot!

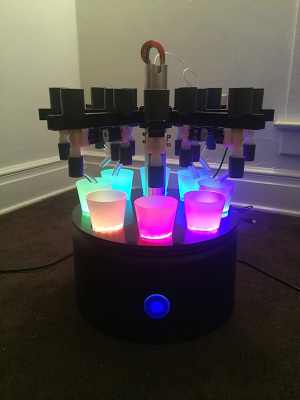
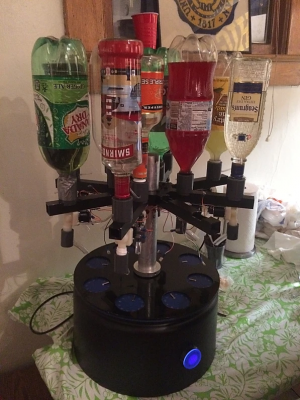
Amusingly, myself and 3 of my very good friends built a robotic bartender in college. To this day I think it might be the only robot to make 8 drinks at a time
1588722708757.png

1588722731783.png

1588722746411.png

This is the Foobartender. It even made up a fair portion of my best man's speech at my wedding!
 
OK robot is in the house and down the basement. That was as difficult as dealing with my 12x36 lathe (granted I had a buddy help with that one).

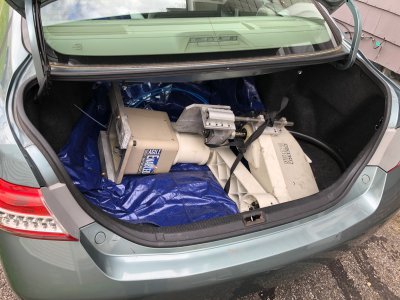
Robot in my trunk again. Used a webbing strap to keep the arm bent over on itself.
61040456841__150D0DE0-81F7-465E-9995-1B84C4DDEED8.JPG

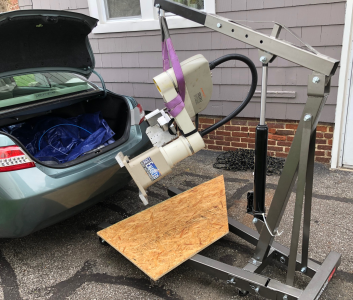
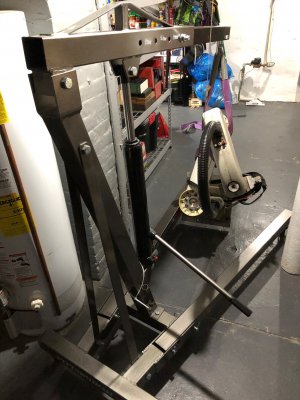
I used my Harbor Freight engine hoist to lift it out of the trunk and onto a piece of OSB. I like the hoist but it is a real chore to take it apart and carry it upstairs. Also the long legs are great to go under a car but terrible for reaching on top of work benches.
8192.png

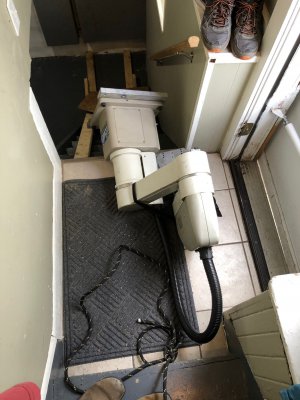
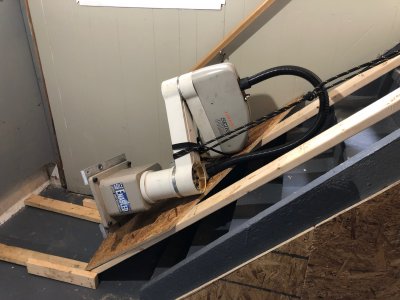
I manhandled it onto the landing of the basement stairs and used the same ramp I did for the lathe to set it up to slide down.
IMG_8692.jpg

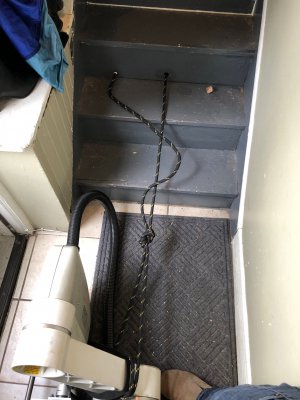
It was secured with some rope going to a chain on the ceiling joist. I used an auto locking belay device (rock climbing) to hold the load until I wanted to lower it slowly. There is a painted plug that normally covers this hole.
IMG_8693.jpg

61040645419__34F0661B-98F8-44B0-B889-83CF58051747.JPG

Once at the bottom I took apart the engine hoist and carried it downstairs, reassembled it, and picked up the robot again. I could lift the robot for sure, but I was not comfortable moving it around and certainly not lifting it onto the table top. There was around 20 pounds of tooling that I could have removed to make life easier, but I didn't consider it.
IMG_8697.jpg

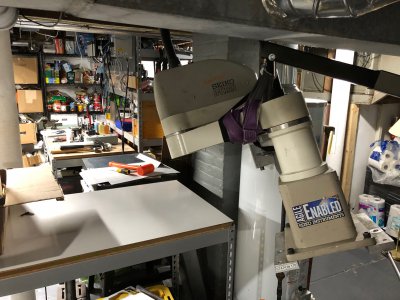
I re-positioned the lifting strap and tried to get it on the table but there wasn't room under the duct. Plus the cable tube was hitting the ceiling on the other side. I ended up lowering the table top by 5 holes and it was just enough to get the base onto the table.
IMG_8700.jpg

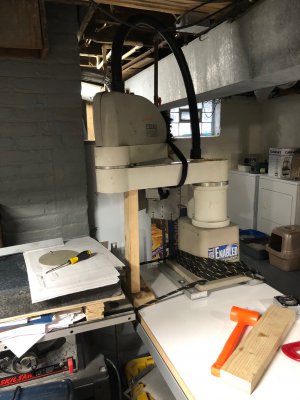
The final part really sucked. The hoist's legs are too long and I couldn't get the hook over the table. I ended up having to unhook it from the hoist with only half the base on the table and heave it the rest of the way. Not super safe but I was ready to jump out of the way if it started to fall. It ended up working out ok thankfully. I didn't have anything to hold it down to the table with so I used the rope to secure it.
IMG_8703.jpg

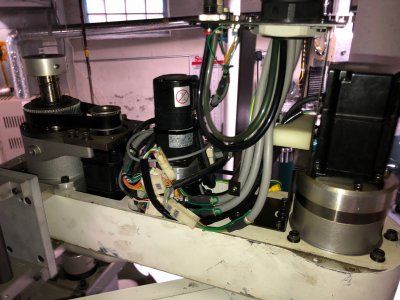
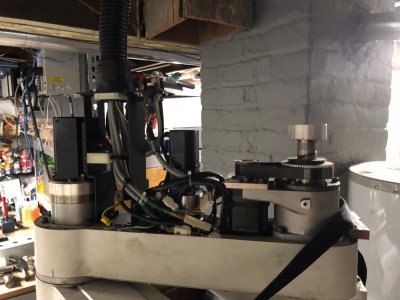
Here's a quick peek inside the head. T2 motor is on the left, U axis motor is in the middle, and the Z axis motor is on the right belted to the ballscrew.
IMG_8704.jpg

Bringing it in took 2 and a half hours. I'm exhausted and calling it a night.

-Mike
 
Wow! It looks like it weighs more than the bench.
You may need something more substantial to bolt it to.

I guess there really was some arm-wrestling.

-brino
 
I guess the arm wasn't so much "heavy" as it was what I call "ugly heavy" ;~)
 
Wow! It looks like it weighs more than the bench.
You may need something more substantial to bolt it to.

I guess there really was some arm-wrestling.

-brino

The table is far from ideal but it is what I have. The top is 2" of MDF so it is rather stout. Real SCARA robot installations would probably be done on a thick piece of Mic6 tooling plate or something similar, but that would cost me a fortune.

I sat and bounced on top of the table before the robot went on and it didn't budge. maybe just a little sway side to side.

I guess the arm wasn't so much "heavy" as it was what I call "ugly heavy" ;~)

I'm going to have to save that one! Perfectly describes the experience. I can squat/bench/lift that kind of weight no problem, but make it big, with nowhere to hold onto, and make it move when you do lift it, and all of a sudden it gets a whole lot harder.
 
Took some pictures of the inside of the robot and did a little research. Thought I'd share.

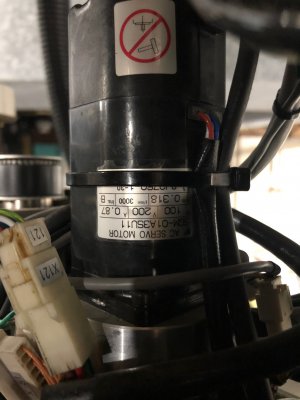
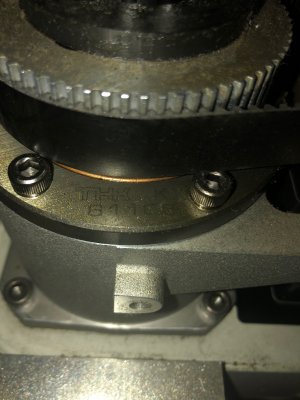
The motors were identified to be Yaskawa SGM AC servo motors although the naming scheme indicates that these motors were likely specials offered to Seiko for their robots. I think they are electrically equivalent to the other motors in the series, however I'll have to call Yaskawa to confirm. It seems that these servos were offered with several different drives from Yaskawa over the years so they are present in a couple of different manuals. I've attached one manual and provided download links to two others.


After reading it still remains a mystery to me how commutation is accomplished with these motors. The absolute variant of the encoder has a serial channel that could provide a commutation offset at startup, however the incremental encoder does not have this at all. I'll definitely be asking Yaskawa about this as well.

The good news is that the Yaskawa manuals provided me with an absolute ton of information and motor data. While I don't have it all, I'm pretty close. This means that even if the encoders can't be used with the hardware that I have, encoder replacement is a viable option. The factory encoder is a 2048 pulse per revolution encoder so the controller sees 8192 counts per motor revolution (quadrature interpolation gives 4x resolution over the P/R count).

image001.jpg

There is a sheet metal bracket that holds up the cable gland. A large number of cables enter the T2 link and connect to the motors, encoders, and user interface panel.

image002.jpg

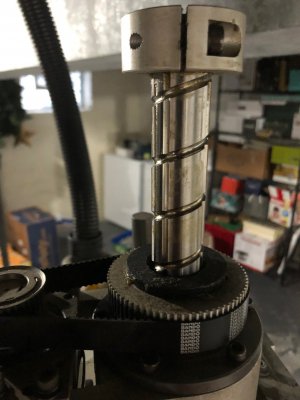
Here is a better closeup of the ball screw/spline. It is manufactured by THK and is in their KX series (model 61108). I haven't really found much information on it, but I'm not too worried about it right now. Notice how there are parallel grooves running lengthwise on the screw in addition to the spiral ballscrew grooves. This screw is ground and was probably quite expensive. It is hollow with an 18mm hole down the center. After removing the old end effector tooling and adjusting the hard stops, I was able to get the full 150mm of travel on the Z axis.

This youtube video has a couple of short segments showing this kind of screw.


image004.jpg

image006.jpg

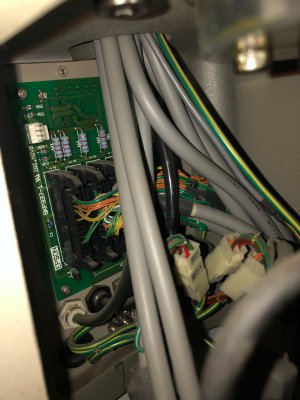
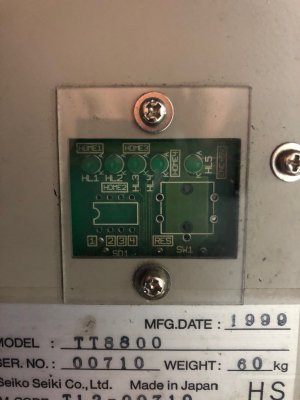
Inside the hollow base of the robot is a 400W servo and harmonic drive gearbox. There is also a circuit board that looks like it is mostly an interface board between the cables and the MDR 68 pin connector exposed to the outside. There are also some components on the board so I will have to investigate these. I have a feeling that all it does is light up some LEDs in a window to show the user when the home switches are hit and when encoder power is active.

image008.jpg

image009.jpg

I'm still in the research phase here. Will share any updates as I come across them.
 

Attachments

  • TSE-S800-15.2.pdf
    2.5 MB · Views: 22
Last edited:
Back
Top