-
Welcome back Guest! Did you know you can mentor other members here at H-M? If not, please check out our Relaunch of Hobby Machinist Mentoring Program!
You are using an out of date browser. It may not display this or other websites correctly.
You should upgrade or use an alternative browser.
You should upgrade or use an alternative browser.
Millrite MVI spindle bearings replacement
- Thread starter Tim9
- Start date
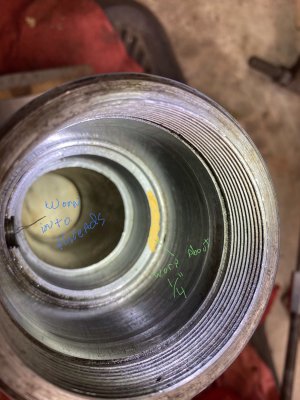
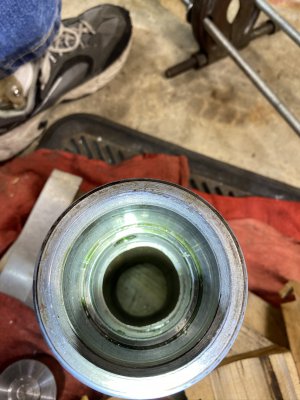
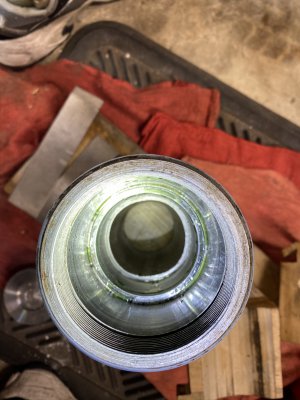
So I decided that I will try to repair this by lightly turning the worn area to clean up that recessed worn area and then make a steel ring to fit into the worn area. I didn’t want to use heat so I’ll secure it with Loctite 680.
So I took some measurements and then cut the ring a little oversized. Then I rigged my steady rest to accept the spindle. I’m surprised how smoothly everything worked.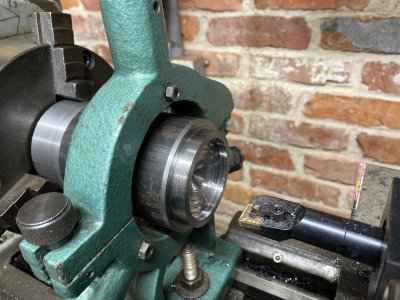
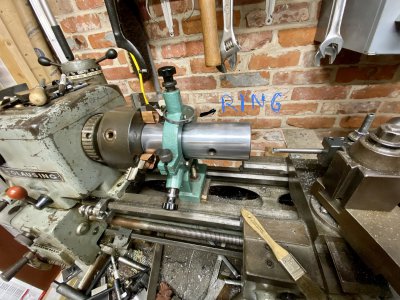
So I took some measurements and then cut the ring a little oversized. Then I rigged my steady rest to accept the spindle. I’m surprised how smoothly everything worked.


Last edited:
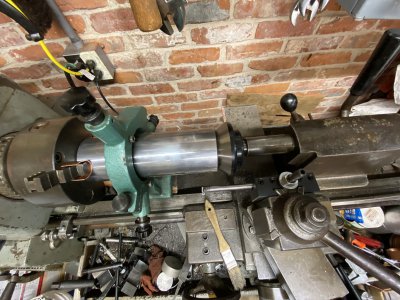
I re-chucked the quill in the chuck. I used a bullnose tailstock adapter to get everything fairly well lined up and the snugged my steady rest. In all honesty, my steady rest is just okay in the best of cases. I think it’s an old Asian rest from a defunct Grizzly lathe..... probably an early copy of a Clausing. Even in the best of cases it has about a 2-1/2” capacity. I loosened all of the set screws for the brass fingers.....pushed the fingers almost flush to the casting diameter, and then was able to fit the quill in the rest. While the bullnose was supporting the end of the quill, I then pushed the fingers into contact with the quill housing and snugged the set screws into the fingers.
Knowing that this rest is shaky, I turned the quill in backgear @ 150 rpm. First try at facing the ring spacer was with a 3/8” hss boring bar but it flexed way too much. Switching to a 1/2” hss top notch bar was the cats meow in my opinion.
As shaky as my setup was, it went flawlessly. I cut a bit and let it cool since I didn’t want to weaken the Loctite by building up too much heat. Cup of coffee and then finished it off.
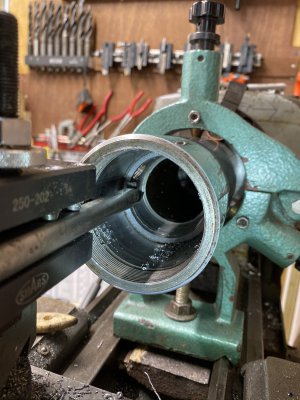
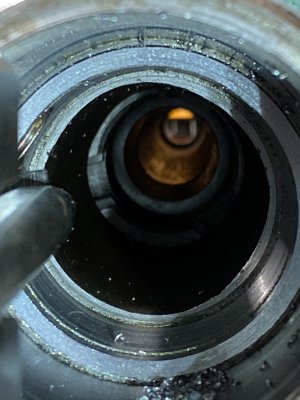
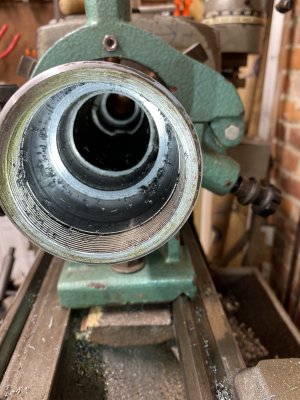
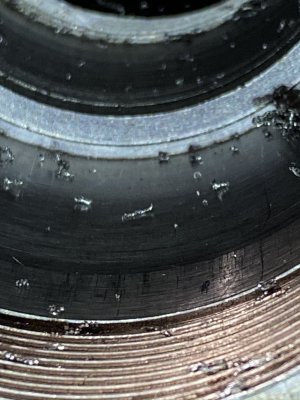


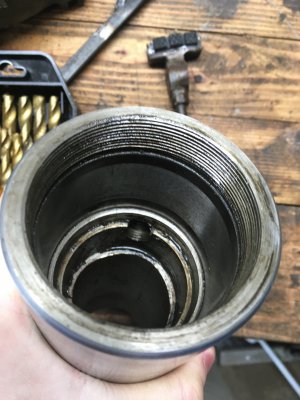
So, I get the Quill in the vise.....assemble the spindle, tighten the bottom quill nut...and my spindle locks up. After about an hour of measuring and head scratching, I come to the conclusion that my ring is touching the bearing cage. Back in the lathe.....machine about 0.025 recess in that ring....back on the vise....assemble spindle....still binding but quill nut almost bottoming out....back in the lathe. This went back and forth. Finally it felt about right. The quill nut bottoms out in the quill and there’s no in/out slop of the spindle. The spindle spins freely and preload feels about right.
Now it’s time to reassemble the Millrite.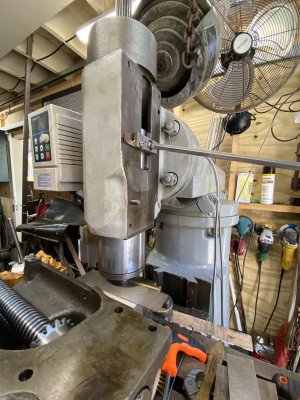
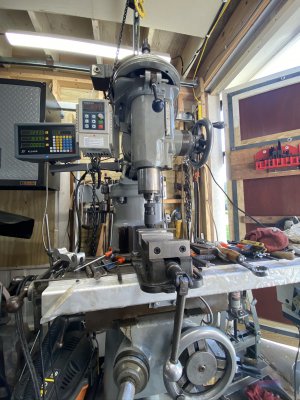
Now it’s time to reassemble the Millrite.


FWIW, it could be that there should be a recessed area..... but not as worn as my spindle was. I definitely had a huge amount of slop in my spindle. I had noticed it a number of times. I just thought that I had an issue with my fine down feed mechanism. But no, I had a problem in which the spindle was actually moving up and down inside of my quill.
Since I could only go with what I had....only going with what I assumed was the issue, that’s what I did. I’ve never had a Millrite spindle apart before.
So...all back together and I ran it for a few minutes. Still need to read that break in procedure again. I forgot the details. But it doesn’t seem to be getting hot. I then installed a 1/2” collet and a 1/2” end mill. I checked the run out on the smooth shank of the end mill. I’m getting about 2 thousandths run out. Not great, but I’m okay with this for now. Since the quill was so damaged and the spindle was walking up and down in the quill housing for who knows how long, I was just happy to be able to save the spindle.
I had no reference for where to set the high spots in the new bearings in relation to the quill. So, at this stage I’m going to use it for a few months and make sure that the bearings are good to go. Once I’m happy with the bearings, I might try to regrind the R8 spindle seat. I still need to figure out how I’m going to get my grinder mounted to where I can move it in and out at the proper angle. I’ve seen a few videos of this done so I know it’s doable.
Last edited:
- Joined
- Mar 29, 2017
- Messages
- 737
Great write-up, Tim! I have an MVN with a little racket in the higher speeds. I need to check your idea about spindle moving up and down in the quill too.
Good work. Thank you for posting this! I may have found my Quarantine Project.
Of course AFTER I get the mill out of the kitchen. (Thanks, Brino)
Good work. Thank you for posting this! I may have found my Quarantine Project.

Of course AFTER I get the mill out of the kitchen. (Thanks, Brino)

I just so happen to be going through the same process, hopefully I'll finish up this weekend. So far the worst trouble I've had is that I knew the spindle nut was left hand thread and still beat on it the wrong way for half an hour. It took mikeamick's pics to set me straight.
I tapped my bearings off with a copper hammer- hopefully no harm done. My slinger is definitely worse off because of it. The puller route looks much more elegant.
I have no idea what a "light tap-fit" was supposed to be either. My bearings fit pretty tight, I can't start them by hand. I mic'd my spindle and got around 1.5006. The timkens can be up to 1.5005, so I don't think I'd want it to be any looser--just in case I ever decide to replace bearings (even though they cost more than I paid for the whole mill).
I'll will also probably try dusting my spindle taper with the grinder. Waiting for Shars to open back up so I can get a cheapo .0001 indicator.
Here's a pic of my quill for comparison. Looks like it is supposed to be recessed, but I bet the shoulder on yours had more wear-- important thing is that your fix works.
Attachments
I trimmed my oil spinner on the lathe because it was still bent even though I used an aluminum spacer when pressing the bearings off. So my slinger is now about 1/4 smaller diameter.
I should also add that the ring I installed was then needed to be recessed... ie turned in lathe to accommodate the bearing cage because the cage was scraping on it. In the end a small portion of those threads were cut into. I have to admit. I’m not exactly sure to the degree of the cause of my flopping spindle. I know it was walking in and out of the quill. I know someone had been in it before. And I know it’s no longer moving in and out of the quill, or should I describe it as the spindle moving up and down in the quill. Like I mentioned earlier in one of my other posts.... I noticed that the quill acted very odd when drilling. I would notice the drill bit drop and a cluncking noise when drilling through something. I always thought it was an issue with the fine down-feed mechanism.
But when the quill was in the vise.... and I was proceeding to disassemble it, I then noticed the spindle could move inside the quill.
I wish I had a definitive answer
Ok, I’m close to retiring and im starting to collect tools while I can somewhat afford them. I picked up a 1966 MV1 a couple months ago and took the 3 phase motor/220 and wired it to a VFD. I’ve got quite a bit of work ahead of me so this is a real WIP.
todays question is can I still buy a new quill?
todays question is can I still buy a new quill?


