Models for grinding HSS Lathe Tools

Where is a good source for ground steel plate to back up the pyroceram glass? The sources I found for ground steel are either too big, made of O1 or A2 (which seems overkill), etc. This may be buried in the thread somewhere, but I don't remember seeing it and can't find it now.
 
Don't know why you'd need ground steel. I mount the pyroceram with JB Weld, as suggested by the source I bought it from. JB Weld will cover a great multitude of sins. Matter of fact, I lightly sandblast the substrate(s), just to give the JB some "tooth" to grab onto. As I recall, I also sandblasted the back side of the pyroceram.
 
My pyroceram platen is JB Welded to el cheapo angle iron from a big box store. If you're really worried, machine or bolt a ledge on the bottom, but mine hasn't budged at all. I think if I replace it, I'll probably be best off replacing the whole steel part as well. :)
 
Where is a good source for ground steel plate to back up the pyroceram glass? The sources I found for ground steel are either too big, made of O1 or A2 (which seems overkill), etc. This may be buried in the thread somewhere, but I don't remember seeing it and can't find it now.

Personally, I used precision ground O-1 steel plate for my platen. I just prefer knowing the glass liner has a consistent layer of JB Weld between the liner and the substrate. I admit that I may be overly anal about this, though. I do have two 6-32 SHCS sitting under the lower edge of the liner, just in case.
 
Not sure why I thought a ground plate was a good substrate? I'll try just epoxying the pyroceram to my existing angle iron, which is on the flimsy side at maybe 1/8" thick, but the pyroceram and epoxy should stiffen it up quite a bit I'd think. My sander is only a 1" wide belt.
 
Personally, I used precision ground O-1 steel plate for my platen. I just prefer knowing the glass liner has a consistent layer of JB Weld between the liner and the substrate.
So THAT'S where I got the idea!

Just ordered 2 pyroceram plates. I'm a little concerned about excessive flex, but I figure it will be orders of magnitude better than my current angle iron backing. Plus I have a spare just in case.
 
Last edited:
Examples finally arrived.
@mikey, the turning tool you ground sure resembles the tool I have been using.
It came in a lot of bits.
Just looked right to me.
These examples are really nice.
I am going to take plenty of measurements.
The second pic is a tool I attempted to grind from Tom Lipton.
It has a 45 front and side, with a relief, 3 in 1 tool, face, turn,and chamfer.
My grinding skills need some work.
 

Attachments

  • 20201110_213852.jpg
    20201110_213852.jpg
    797.8 KB · Views: 33
  • 20201110_214022.jpg
    20201110_214022.jpg
    1.8 MB · Views: 33
You will find that the shape of a tool has to do with access to features of the work; getting into a corner or angle is sometimes necessary so we change the shape to suit our needs. Quick change tool posts allow us to quickly turn the tool and they have really influenced more modern tool shapes.

BUT what really matters are the relief and rake angles. They determine how effective and efficient the tool is. The more you understand what those angles do and how they can be chosen to suit the need, the better your lathe will work for you. The smaller and lighter the lathe, the more important these angles become.

My advice to you is to take your time and try to understand why you are grinding what you're grinding. Spend most of your time, at least initially, grinding keystock. I suspect most guys don't follow this advice but of all the things I could tell you, this is the most important because you are learning to move your hands while your brain is sorting out what each angle does. It is then a simple step to sort out which angle to modify if you want your tool to be stronger at the tip or cut cooler or finish better or ...
 
Here is a question that I have been wondering about. Searched the thread and didn't find an answer. What is the purpose of the side angle? I have used my square tool bit and my knife tool bit for general turning and can't see any difference in the cut, finish, etc. I always take relatively light cuts. Mostly .020 cuts to sometimes a .030 cut when roughing off material.
 
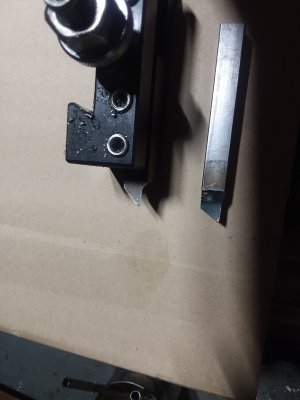
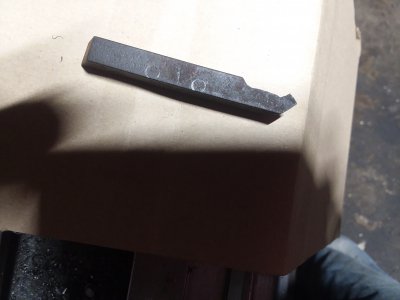
There are two key differences between the Square tool, or general purpose tool, and the Knife tool. First, the Knife tool has lower back rake angles; this focuses the cutting forces just to the rear of the nose radius, which is exactly where you want a facing tool to cut. Second, end cutting edge angle of the Knife tool is intended to allow better access to shoulders, while the tiny nose radius minimizes the root radius of that shoulder. The knife tool is a specialized tool meant for fine work.

The side angle you referred to is called the Side Cutting Edge Angle. This angle, along with the End Cutting Edge Angle on the end, define the shape of the tool and determine the ability of the tool to access parts of the work piece. It can be altered to suit your needs, as I know you realize. What differs between the Knife and general purpose tools are the tool angles and where they focus the cutting forces. This may seem like a piddly small difference but it matters, at least to me. I use the Knife tool as a facing tool, shoulder work and almost all the trepanning work I do. It also chamfers pretty good, too. The Square tool is used for almost everything else. When the tool angles allow adequate access I use it for shoulder work, too, but the nose radius tends to be larger than on a Knife tool so when that root size matters, the Knife tool comes out.

Hope this helps.
 
Back
Top