MX210V tailstock ways surface improvement question

Tomzo

H-M Supporter - Silver Member
Joined
Jul 27, 2021
Messages
221
Greetings,

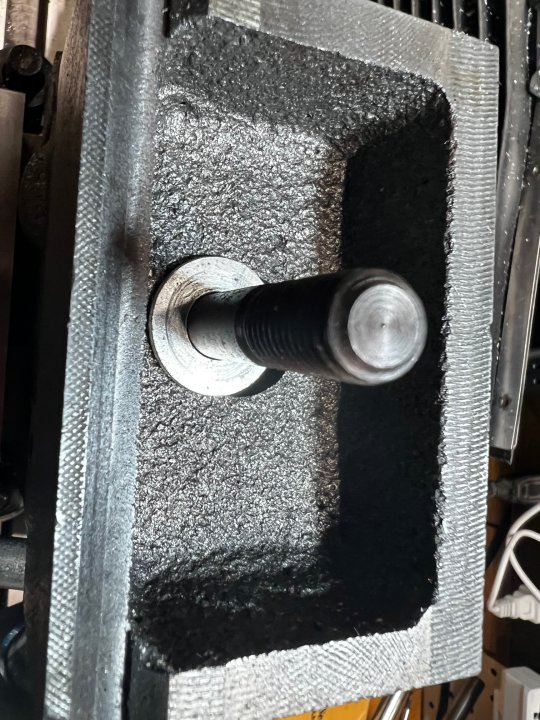
I had previously posted a thread on my MX-210V lathe and am finally getting around to dealing with the very, very poor surface finish on the bottom of the tailstock that slides on the ways. As the image shows, it is more of a rasp than a machined surface. The tailstock sits a hair high, so I thought I would pop it on my mill and take a nice slow finishing pass over the bottom with a facing mill.

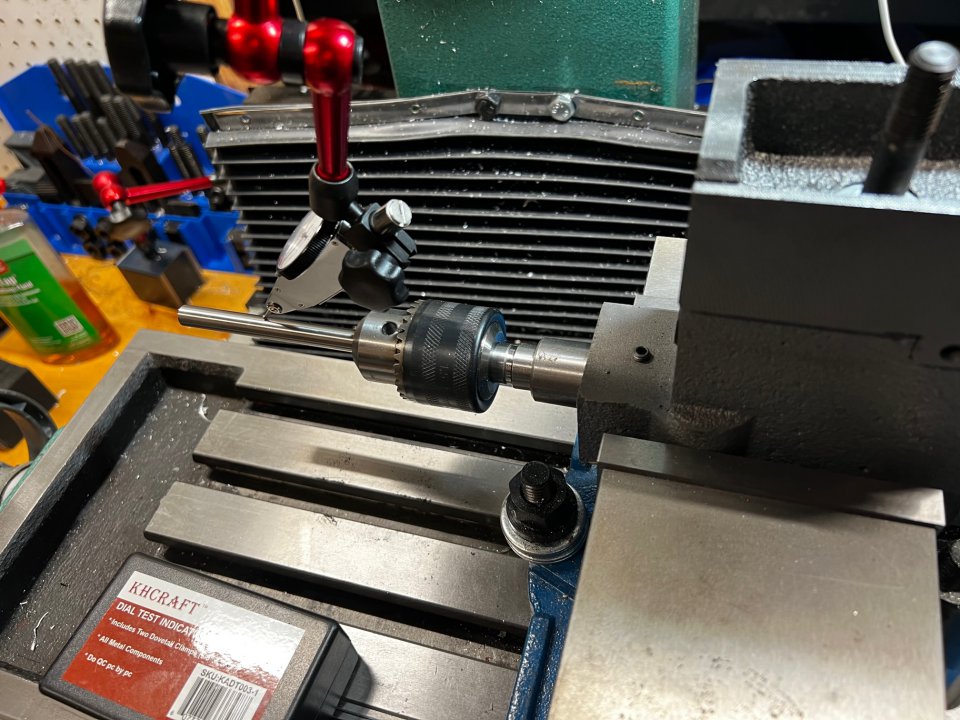
My question is how to determine the appropriate reference surface to use when clamping the tailstock in the vise. When I just drop it into the vice, my dial indicator shows that it is pretty darn parallel to the top with the rasp marks being about the only thing jiggling the dial. I then popped a ground bar into the jacobs chuck and that is well out of parallel with the other surfaces. I am thinking that there are two factors fighting me on this measurement with the first being the cheap chuck and the second being the challenge of running an indicator along a round surface.

My inclination is to just use the existing surface as the reference surface - I am sure they used a setup just like what I am doing but just cranked it through there and got a really poor finish. I am not making parts for NASA here, so that might be good enough.

Thoughts?

Thanks

Tom
IMG_0528.jpg
IMG_0529.jpg
 
That drill chuck setup is not conducive to accuracy, a test bar would be much more appropriate.
 
Maybe it wasn't the right way to do it, but when I did some work on my tailstock I used the extended quill as my reference surface. After extending it, I used the lock to hold it in place. In use, I tighten up the quill lock just enough to take out any play, and put it back into the same relative position it was when I machined the tailstock.

Indicating off a poorly machined surface like yours can be difficult. To make it easier you can place a smooth flat piece on top of the rough surface and indicate off that -- the flat piece replicates what that rough surface (hopefully) mates to. McMaster-Carr will sell you a 1/2" x 1/8" x 12" piece of precision-ground low-carbon steel strip for $9.31 plus a bit for shipping. While it's going to be very good with regard to thickness variation it still could have some bow so check that, either with a precision rule, against your mill table, or surface plate if you have one. Some judicious bending will correct the bow, if it turns out to be more than you like.

I have a length of 1" wide precision-ground stock I use for tramming my mil on the Y axis (the table is too narrow on that axis to get much accuracy) so it's useful for a number of purposes in the shop. I keep it in the same felt-bottomed drawer where I store my other alignment items like a precision-ground rod for aligning my lathe, the (few) gage blocks I've got, etc.
 
I have a set of Shars parallels that purport to be precision ground - I will give that a try. The movement of the dial indicator appears to be consistent with the "depth" of the "ridges" in the poorly machined surface. I figure that if I make a cleaner surface that is parallel to the existing rough surface I will at least not be filing away at the ways every time it slides - even if that surface is not exactly parallel with the axis of the quill.
 
Firstly could you extend the tailstock quill to its max and then sweep it with your indicator? Of course check for any slop on the extended quill first.
Secondly I would suggest you clamp your tailstock to a large angle plate secured to the table, thereby increasing rigidity. It looks a little flimsy just locked in the vise.
 
Yes - I will be using a different clamping method. One side is flat but the other has the little bump for the quill lock. I plan to stack some parallels (and shims as needed) to get even clamping. Perhaps it is an excuse to buy some gage blocks....

The quill on this cheap lathe is pretty sloppy - actually very sloppy. The same person who machined the base put it together, so....
 
If you take off what you need to make the surface pretty, will your tailstock still be true on center with your head spindle? Probably not. I reckon if you take .040" off the bottom to bury those deep grooves, you'll be .040" low on your centers. That's no good at all for a lathe.
 
Mine is a tad high (by sight anyway) and I figured I could put some shims in between the upper and lower parts of the tailstock if need be to get it dialed in. I think I am going to take some real light passes on there - probably 5 thou or so. My main concern is that the surface being like that will wear the ways over time which is probably worse for what I do with this thing. In any event, my prediction is that I will own this for another couple years and upgrade if inclined to do so. That is my normal path in the hobbies I have endeavored into over the years. Start with something functional but cheap, figure out if I like it or find utility in it (so far both are true), learn all the things I did not know before, and from those experiences invest in something better. If I just had a bigger shop.....
 
Greetings,

I had previously posted a thread on my MX-210V lathe and am finally getting around to dealing with the very, very poor surface finish on the bottom of the tailstock that slides on the ways. As the image shows, it is more of a rasp than a machined surface. The tailstock sits a hair high, so I thought I would pop it on my mill and take a nice slow finishing pass over the bottom with a facing mill.

My question is how to determine the appropriate reference surface to use when clamping the tailstock in the vise. When I just drop it into the vice, my dial indicator shows that it is pretty darn parallel to the top with the rasp marks being about the only thing jiggling the dial. I then popped a ground bar into the jacobs chuck and that is well out of parallel with the other surfaces. I am thinking that there are two factors fighting me on this measurement with the first being the cheap chuck and the second being the challenge of running an indicator along a round surface.

My inclination is to just use the existing surface as the reference surface - I am sure they used a setup just like what I am doing but just cranked it through there and got a really poor finish. I am not making parts for NASA here, so that might be good enough.

Thoughts?

Thanks

TomView attachment 400620View attachment 400621
Tom,
If I can offer a few tips. First off you need to adjust your indicator tip so as to try and gain a perpendicular indicating surface as shown in my pics. Because you are working on a radiused surface you CAN'T tram your indicator along the top surface of the rod in X axis. What you can do is tram two separate points along the length of the rod traveling in the "Y" axis. Your goal is to obtain 2 equal MAX dial readings. You can do the exact same method to measure the front face of your rod if you tram two separate points along the rod using your quill's "Z" axis. Honestly if it was me and your only concern is attempting to clean up a rough machined surface on the bottom of your tailstock, I think your ate going to create more problems than your are going to solve. Maybe i'm not on the same page as you as far as what you are trying to achieve. The last comments is I really would not trust a chinese 3 jaw chuck and an unknown straightness rod for tramming the tailstock. (just my opinion)

Y Axis tram.jpg


Z Axis Tram.jpg
 
Last edited:
Forgive my question, but is it too late to leave it alone? I've got the nagging feeling that by the time you're done, you'll be wondering the same thing. If I've learned anything about precision fits, it's when to stop removing metal, and it's always learned the hard way.
 
Back
Top