My 9" Seneca Falls lathe carriage needs some help

helmbelly

Registered
Registered
Joined
Oct 18, 2019
Messages
221
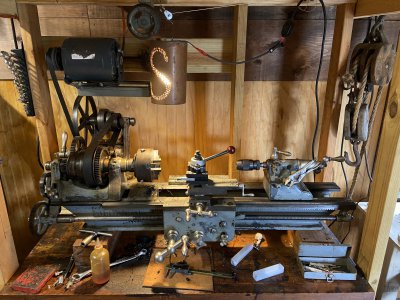
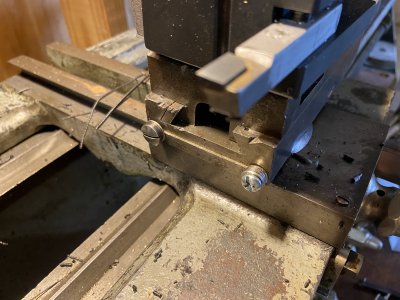
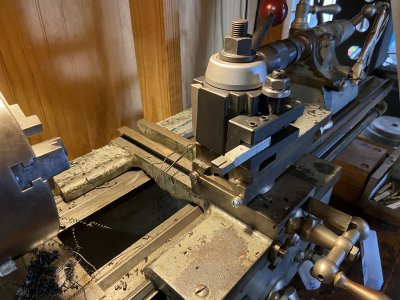
Have a very old SF lathe that was my grand dads home machine, he was an MIT engineer and babied it. It's like new but after using it for 10 years myself the carriage is developing some wear - when I move it left towards the chuck it galls gears not engaging clean. I tighten a nut on the face of the carriage I can tweak it to work smoothly but for just a little while. I have to remove and overhaul it, find out what's worn out or lost engagement in there.

Just wanted to ask before I take it off if there are curve balls involved, tightly wound springs aimed at my forehead kinda thing - and always- if anyone is aware of that golden video link by TubalCain that is all about this operation. My book on how to run a lathe has almost nothing on carriage - just very general stuff.

Thanks mates! Caleb
 
Love it like your Grandad did. Don't be afraid of taking it apart, and finding out exactly what that little nut does, because from what I know about cross slide carriages, there is not only one (little nut) involved when tightening a gib, or whatever. Now your lathe approaching due time for its (maybe) 2nd service interval, it is up for some TLC!

Of course there will be curve-balls to encounter! On this site are experts who have already seen them all. Go ahead and start taking it apart. Stash and label every piece you move in plastic bags (if small), and keep in boxes or containers. Take pictures as you go, maybe somtimes include in the photo a paper note with Sharpie label. If there is something you might forget, put a note in the box with them. It will get grubby, but you don't care.

Depending on what you find, this need not take too long. It's a bit of a voyage of discovery. If something won't play, don't force it! Take some pictures, post them here, and ask. I know the expert folk here will help, regardless the question!

The worst that can happen is if you get into a situation that is truly funny, you might see some appreciative emojis, and they might tell you what happened to them when they tried it. In passing, discount heavily any recommendations that have no regard for your wallet!
 
I've had a similar era Seneca Falls Star #20 machine well over 20 years. Like yours mine came from a relative. In my case it was my wife's grandfather. He ran it for well over 40 years in a prototype shop for a vending machine company. It was given to him as a retirement present.

It's been many years since I took the apron apart. I can't remember the exact configuration, but as I recall it was fairly simple. Nothing was spring loaded, and nothing flew out. Be sure to take pictures at every step of the way. You'll thank yourself when it comes time to reassemble it. Don't assume any of the fasteners have what are considered "standard" threads today. Many manufacturers of that era including Seneca Falls used uncommon thread sizes to ensure customers would return for parts. My machine came with a handful of odd sized taps and dies. I almost threw them out but quickly realized they were being saved to be used on the machine itself.
 
P-nut, hey there I came across some of your posts a few years ago researching these things- I remember it coming from wife's Grandfather. I work mostly on camera parts which is like big clocks so I could not imagine machine- unless it went a bit faster. I played with pulley sizing but decided not to increase speed much bc I want to baby it and give it to my grandson.

you still have those odd sized dies? My compound is locked from rotating by two small screws that have to be quite tight, I think they are number 8- or M5. I sheared one off last year when tightnening, the head just sheered away. Lucky me, got the shaft embedded and no compound. After a couple weeks of fretting (ok a couple months, I'm 60! ) I took the compound apart got it in my mill vise put an extractor bit into the shaft and ran it backwards - and it popped right out. That felt good.

But nothing fits back in there. An M5 (I think) fits close enough to use w/o serious griping. But I would love the make a good fit and a spare. Any chance I could pay round trip shipping insured and send you a deposit so I could have a go ?
 
Love it like your Grandad did. Don't be afraid of taking it apart, and finding out exactly what that little nut does, because from what I know about cross slide carriages, there is not only one (little nut) involved when tightening a gib, or whatever. Now your lathe approaching due time for its (maybe) 2nd service interval, it is up for some TLC!

Of course there will be curve-balls to encounter! On this site are experts who have already seen them all. Go ahead and start taking it apart. Stash and label every piece you move in plastic bags (if small), and keep in boxes or containers. Take pictures as you go, maybe somtimes include in the photo a paper note with Sharpie label. If there is something you might forget, put a note in the box with them. It will get grubby, but you don't care.

Depending on what you find, this need not take too long. It's a bit of a voyage of discovery. If something won't play, don't force it! Take some pictures, post them here, and ask. I know the expert folk here will help, regardless the question!

The worst that can happen is if you get into a situation that is truly funny, you might see some appreciative emojis, and they might tell you what happened to them when they tried it. In passing, discount heavily any recommendations that have no regard for your wallet!

Yes it needs to go into the shop and I'm IT. A healthy fear and ignorance have schooled me in leaving a painstaking bread crumb trail back to status quo ante! Problem is when it gets really fun and interesting I stop documenting and go for hours with no lifeline! But yes my guess is that something has worn out and I'll need to spend the week end machining a new part - or if lucky things just need an clean and adjust. Thanks for the good word - you'll prob be hearing from me soon - saying why in heck did you get me into this mess! ;-)
 
Yes it needs to go into the shop and I'm IT. A healthy fear and ignorance have schooled me in leaving a painstaking bread crumb trail back to status quo ante! Problem is when it gets really fun and interesting I stop documenting and go for hours with no lifeline! But yes my guess is that something has worn out and I'll need to spend the week end machining a new part - or if lucky things just need an clean and adjust. Thanks for the good word - you'll prob be hearing from me soon - saying why in heck did you get me into this mess! ;-)
Not quite IT for me (microwave CAD), but much the same in practice. I could rely on mechanical experts to make the stuff. Now, I learn to get entangled with this sort of thing myself, and I have some that I have taken apart, and not been able to put together (yet). I have even taken apart brand new stuff!

If it's a very worn slide, that is not a weekend breeze to fix. It sounds like it might be locally worn by that nut you were tweaking. If you get lucky, it's just cleanup, oil, and some setup adjustment, but don't count on it. Take it apart. Post some pictures. Get a (new) quality steel rule and some feeler gauges, and a flashlight (for shining through any gap under the rule) . Be finding out what is really straight under there.

Look on this site, and search the net for every bit of information on your lathe. Especially stuff that has diagrams, parts lists, and stuff to help you get to know every little bit of it. Some stuff you might well update, like old leather belts, ways wipers, and the like.

Look also at the main ways, and when you get the carriage off, look at the parts that would contact the main lathe ways. At this stage, you will have encountered the ACME thread leadscrews, the worn nuts that they roll in, handles, pins, and more. Some of this stuff can be heavy. Get help, or handle appropriately. If you drop it on your foot, you will regret!
 
Last edited:
Look also at the main ways, and when you get the carriage off, look at the parts that would contact the main lathe ways. At this stage, you will have encountered the ACME thread leadscrews, the worn nuts that they roll in, handles, pins, and more. Some of this stuff can be heavy. Get help, or handle appropriately. If you drop it on your foot, you will regret!


Right, I'm just hoping it's not going to be too gruesome bc I'm the only user last 70 years and this issue has just begun and I have not used it when it is griping, I just tighten the nut and it becomes smooth - so hoping since I've caught it right away it's not too awful.

Here is the old girl. with a couple photos of that horrible M5 or #10 screw I had to use.
 

Attachments

  • IMG_2084.JPG
    IMG_2084.JPG
    630.1 KB · Views: 20
  • IMG_2085.JPG
    IMG_2085.JPG
    510.1 KB · Views: 20
  • IMG_2086.JPG
    IMG_2086.JPG
    547.2 KB · Views: 20
Love my Star lathe, has given me many years of service. I'm sure yours will too with a little TLC.
 
Even though old, it is still a proper bit of precision iron. Consider the odd ding as part of its history, but where the slide rides over them, past the edge, is where you stone them (with a slipstone) so that there is no raised metal to interfere with the slide. Remove burrs, clean up.
Generally, it looks OK, though in need of a checkout. It's been inside, and kept running. Its not a pile of rust!

I happen to have South Bend, and it has a renovation publication. I don't know if there is something similar for Seneca Falls. It's not essential, but at some stage, you will want to get a careful look at everything. You might use a dial gauge to check run-out. At some stage, you might turn on a piece of pipe provided with end closures, welded or glued ends to allow to run between centres. Even if a centre only at the tail end.

Basically a dumbbell shape so you can take a fine cut off the end near the headstock, and without moving on the tool depth at all, get the carriage to the tail end, and continue the same cut, Then measure both with a micrometer, to discover if you are cutting a taper. That lets you adjust the tailstock (there are screws). Once it's cutting straight, you will feel the buzz! :)
 
Back
Top