New Caretaker of Two 12” Craftsman Lathes

I am still amazed by your lost foam work! How think are the walls of that casting anyway? It came out really well. Robert

I still can't believe lost foam actually works Robert....LoL. The wall thickness on the gear cover is 1/4".

Best,
Kelly
 
  • Wow
Reactions: rwm
We have ourselves a fabulous fab man here.
Beautiful work sir!
I wish I had some of your sheet metal skills. Your no slouch in the foundry either.
 
I imagine yor Grandfather would be very pleased if he knew what good hands his lathe is in. GREAT work!
 
Beautiful work sir!
Thanks Jeff. I'm having a ball with it.
I imagine yor Grandfather would be very pleased if he knew what good hands his lathe is in. GREAT work!
No doubt, but I can hear his voice saying it's a lathe, don't need to be so pretty....LoL. I know some of the Atlas/Craftsman purist may cringe at the mods, but it's for me, and I guarantee neither would hesitate to modify any machine to suit their tastes. I can remember one day my Grandfather needed a lower speed on his big Monarc and had been cussing it. By the end of the afternoon, there was a 3-speed Jeep transmission bolted in between the electric motor and countershaft.....!

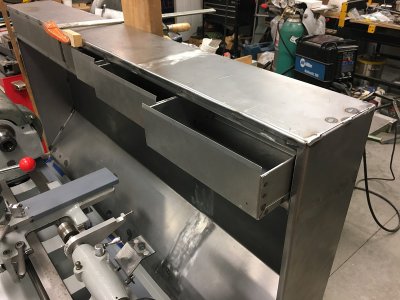
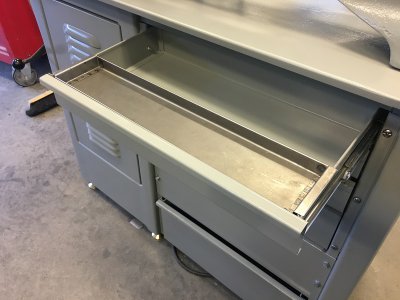
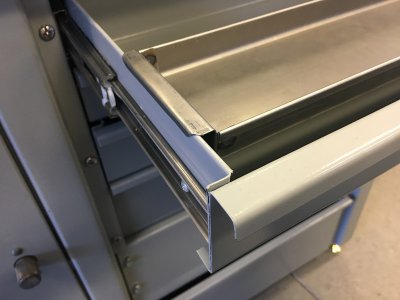
Only had about an hour in the shop yesterday but did manage to knock out a drawer tray.

58 Drawer Tray.JPG
59 Drawer Tray.JPG

I like it and may make a couple more of varying depths when I start to fill the drawers up with goodies.

Coming down the stretch. I have a confession. I got a very good deal on a 3ph 1/2HP motor so I bought a VFD. I’m going to make a motor mount that can be easily adjusted for belt tension because the back of the lathe will be against the wall and under a back splash which is also in process. Then it will be time to set it up in place, dial it in, and turn those cast pulleys.

Best,
Kelly
 
Last edited:
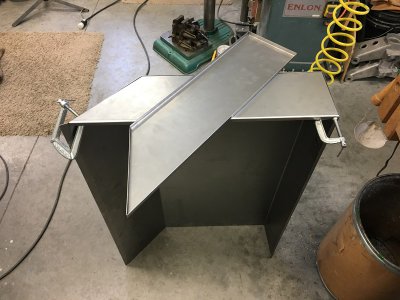
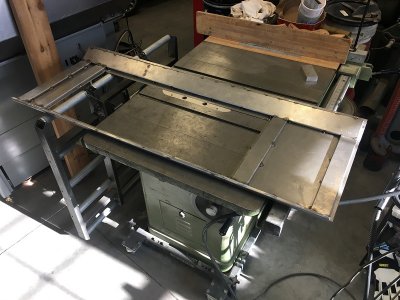
I started fabricating the back splash.

60 BS Started.JPG

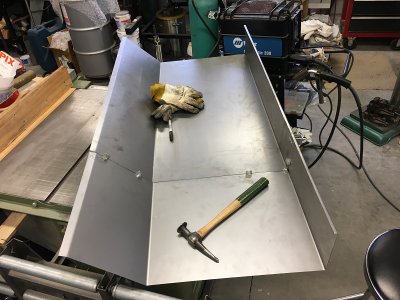
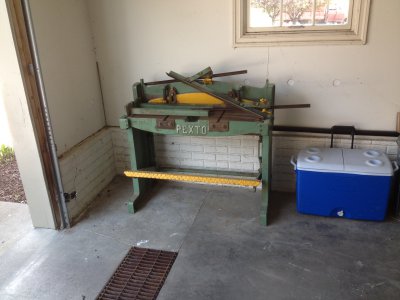
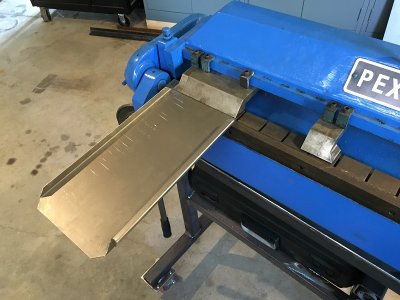
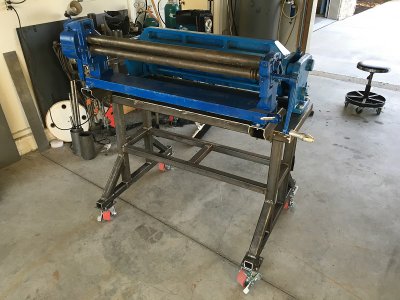
I have a Pexto jump shear, finger brake, and slip roll. Good old American iron. They are all 36” width models. When I buy my sheet stock in 10’ x 4’ sheets, I have them shear it to 3’ x 4’ panels so I can handle it in my equipment. The drip pan on the lathe is 50 ½” long so I had to splice for a full length back splash and weld it together. I don’t particularly like doing that but all in a day’s work, I guess.

61 BS Splice.JPG

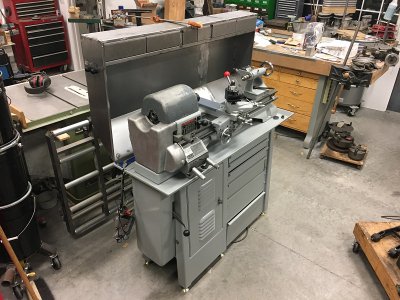
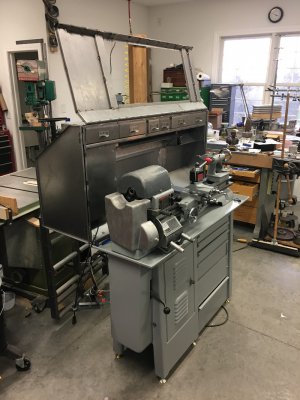
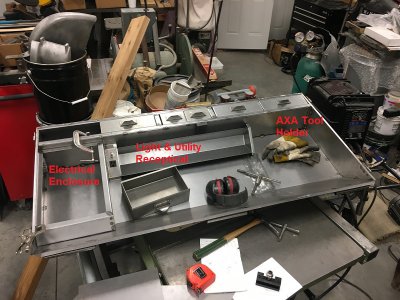
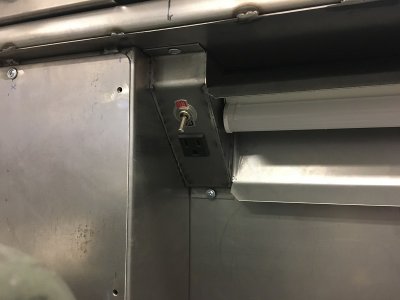
Weld, grind, hammer/dolly, and it’s a splash. I decided to incorporate some more storage, lighting, electrical, and various bells and whistles.

62 BS Mounted.JPG
63 BS Mounted.JPG

Over time, I accumulate sheet metal drop/remnants. Small drawers are perfect projects for consuming the drop, and once you get the folding development laid out, you can knock out a lot of drawers in a short time.

64 BS Drawers.JPG

It’s just sitting in place on the drip pan now for me to size things up. Since the lathe will be placed against a wall, I’ll mount the back splash on the wall to isolate it from machine vibration and keep the weight off the drip pan.

-Getting’ there.

Best,
Kelly
 
Last edited:
Kelly,

You do amazing work.
Can you share some of the spot weld details? (machine, ideal materials, overlap, gauge, etc.)
I would love to be able to produce drawers like that!

Thanks,
-brino
 
Kelly, You do amazing work
You're too kind, but thank you.
Can you share some of the spot weld details? (machine, ideal materials, overlap, gauge, etc.)
The backsplash is 18ga and the drawers are 22ga. I keep 18ga, 20ga, and 22ga steel on hand. I don't stock thicker than 18ga because that is the full width capacity of my equipment. I don't have much use for thinner that 22ga, but most drawers in inexpensive tool chests would be that or likely less, however they usually have some other formed features to add stiffness. I think 22ga is fine for small drawers like this. I also will use 20ga if I have the scrap/drop available, and on occasion 18ga, but only if I'm going to put a lot of weight in that drawer. Attaching the drawers to the cabinet via full extension slides stiffens the drawer considerably.

The tabs are typically 3/8-1/2" for my drawers. 1/2" is generous but makes it easy to spot weld in the center of the width because of the spot welder electrode diameter. There is a little more on this earlier in this thread.

My spot welder is just a cheap Harbor Freight unit. They ran them on sale for $159 and I succumbed. Then I bought a set of 12" tongs for $75 (LoL) for additional reach because the HF unit only comes with 6" tongs. It's not very refined but frankly, there's not much to a spot welder and you can make your own that works just as well for next to nothing. Search DIY Sport Welder on YouTube.

As far as equipment, I collected mine over a three year period, adding the last 5 years ago. I gave $200-300 for each pretty much as shown, which is a steal (or is that steel?......sorry), but required patience and 2-4 hours of driving for each. For speed, accuracy, and quality of result there is nothing like stand alone machines but the downside is they take up a lot of space and are heavy. I made the stand for the brake and slip roll to conserve space. There is a lot of weight on it (~1000lbs). Moving it requires care and caution. I rarely move it when I do, carefully just a few feet.

Brake Drawer.jpg
Slip Role.jpg
IMG_1294.JPG

I'm not a big fan of the import 3 in 1 machines like you would find at Harbor Freight (Princess Auto for you). They are definitely a compromise, but with space limitations they may make sense for many. Most machines can do one gauge thicker at 1/2 width. Many imports exaggerate their gauge capacity.

I would love to be able to produce drawers like that!
The good news is, you can make a drawers like this with nothing more than tin snips, a piece of angle iron, and a hammer. The first real sheet project I ever did was 8th grade metal shop, and it was a small tool box and that's exactly how it was made. It really just depends on how many drawers/how much flat work you want to do. A light duty brake is also easy to make and that might be a good compromise.

DIY Sheet Metal Bender - Diy Projects - YouTube

For speed and convenience, the machine I would miss the most would be the shear, but the brake is a close second. The slip roll gets much less use. I know people that pick up salvage appliances curb side, then use nibbler or power sheers to harvest the free sheet stock.....you get your project painted for free :)

Best,
Kelly
 
Last edited:
Got back to the lathe project this weekend. I decided to go full CNC……

65 Cover.JPG

-Just kidding:laughing:

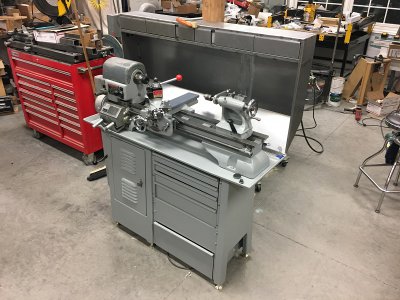
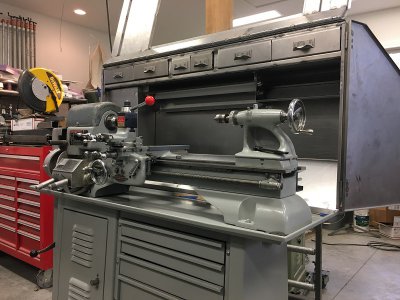
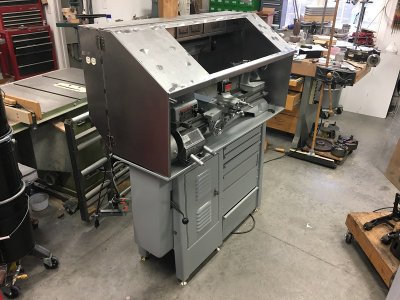
It’s really just a dust cover for storage. The open space will have a flexible film curtain with magnetic strip to seal it up for storage. I do all kinds of things in my shop and I hate cleaning and oiling a machine, then having it become filthy just from sitting in open air…..and believe me, in my shop it would.

Though it’s a functional guard, in use I’m sure it will be in this position for me.

66 Covers Open.JPG

The guard hinges up and the side doors are on lift off hinges……but if OSHA ever visits my shop I’ll show them the lathe not the beer in the refrigerator!

I had to cut the side doors out of fresh stock but the rest were remnants from my scrap pile that I pieced together…….the product of an overactive imagination and alcohol….but it was fun.

67 Cover Front.JPG
68 Cover Back.JPG

So then it was back to back splash.

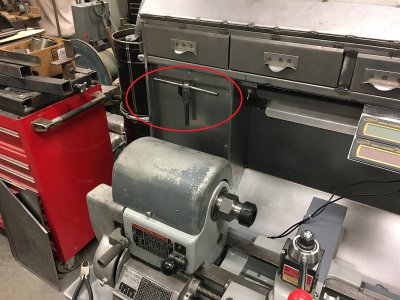
69 BS Fab Layout.JPG
70 BS Mounted.JPG
71 Light.JPG
72 Tool Holder.JPG

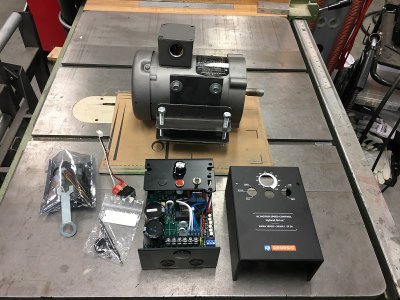
The back splash fab is pretty much done except to finish the electrical enclosure interior. Next are the cables and mounting hardware for the VFD controls and DRO displays. I ordered some electrical components that are due mid-week.

73 Motor  VFD.JPG

Best,
Kelly
 
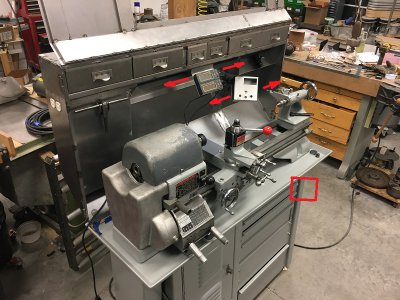
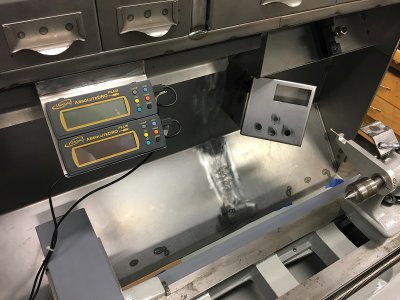
Pretty nice day for December so I worked outside this morning winterizing the property but did manage to get a couple hours in the shop this afternoon. I made sheet metal mounts for the DRO display and VFD controls that have magnetic bases and can be repositioned pretty much anywhere, but here are my favored locations.

74 VFDDRO Mount.JPG

The DRO display can be moved anywhere along the length of the bottom of the backsplash drawer shelf and the excess cable tucks up above the light deflector. I decided to mount the VFD in the electrical enclosure and relocate the VFD controls because at 9” x 5” x 5” the VFD and added tachometer display would have taken up a lot of real estate in the work space whereas the new enclosure for just the controls (power on/off, speed, fwd/rev, plus the tachometer display) is only 5”x 5” x 1.75”, and with the cable, I (re)position it wherever I want on the backsplash of even on the front edge of the drip pan.

75 DRO VFD.JPG

Some years ago I had a box of magnets given to me. There must have been 100 of them. They are 2” x 2” x 3/4”. I’ve used them for all sorts of things. There are two in each base and they hold firmly. So firm, I’ll probably glue on some felt to soften the grip just a bit and prevent scratching paint. I have sort of a love hate relationship with magnets in the metal working environment because the attract all fines and burrs but since the iGaging DRO displays already had them, I figure what the heck.

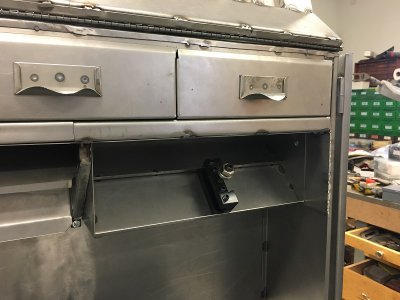
Whittled out a chuck key bracket and spot welded it on the electrical enclosure cover.

76 Chuck Key.JPG

Hopefully the electrical components I ordered will arrive on time this week and I can pull everything apart for paint.

Best,
Kelly
 
Last edited:
Back
Top