New PM1228 Lathe erratic dial test readings on spindle and any chuck

It's no different rotating the chuck manually. Hopefully your question is rhetorical, but if not, Is there a problem with my inquiring of PM regarding why I can't duplicate in similar fashion what there are countless numbers of other lathes doing in the exact same test, including others like my own, deliver a steady, repeatable readout on a DTI?

I'm actually trying to help, and the readings you get under power are going to be very different from those derived under controlled conditions. Quite often guys have found a spindle with big run out numbers observed under power have very good run out numbers when measured properly, as I suspect will be the case here. This is why I questioned whether there is actually a problem here; unless you measure it properly, how do you know?

I'll leave this to you from here, maticulus.
 
I do not see any specifications for spindle TIR for that particular lathe, and within every specification there is a variance as to what is acceptable limits for that machine. Until we know what that is for a particular lathe model, it is independent of what other lathes are capable of holding. As far as a chuck holding a 0.0001" tolerance mentioned in your original post, I do not know of any manual chuck that can repeat to this level for this type of lathe. The set-true style type of chucks usually fall into being able to repeat in the 0.0004-0.0006" range for 8" and under, and collet chucks there can be other variables. This is also the repeatability for the same size material, scrolls have some degree of variability across their clamping range. The mention of 0.0001" precision is a bit pie in the sky, even though they state that "Accuracy: User-adjustable so you can dial in to .0001 or better, with .0004″ Repeatability of clamping on the same diameter".

It does seem that your spindle run out is a bit higher than expected, but for a Chinese lathe with garden variety bearings, I am not sure what the rated TIR specifications for the spindle is, and to some degree one can overcome some variance with a set-true style of chuck, and this only has an impact if one is doing repeated operations with the part in/out of the chuck. There could be some variation to the spindle nose, the spindle itself or it could be the bearings used in this model. Precision is relative, most hobbyist are happy to maintain a precision level of 0.001", with some extra effort maybe 0.0005".
 
Do PM lathes do not come with an inspection sheet listing all the tolerances measured before it left the factory? I bought few Chinese made tools (mini lathe, mini mill, a mag drill) all 3 came with an inspection sheet listing spindle runout, table flatness etc. I guess they're not, as you would've mentioned. Perhaps it's a European or my national requirement.

I would first remeasure after a half an hour warmup.

Personally I have less runout on the inside taper of my mini lathe. I have about 3 tenths. I can't say if what you have is normal for a new bigger machine. My big lathe is a very old one with a plain bearing so unless it runs at least 30 rpm and warms up first I can't even measure runout, but when I do I get about a thou and a half.

However, as others said, it depends how you intend to use the machine if it will matter to you. Personally if I was buying a new precision lathe I would attempt to get it better than that. Just to give you some measure of what to aim for there are certain "industrial acceptability norms" in my country (Poland) and concentric runout on the inside taper of the spindle measured just behind the face of the nose is 50 microns(2 tenths) for "precision lathes", on the outside face of the nose 100 microns (4 tenths) and on the outside surface of the nose (where the chuck registers) 70 microns (3 tenths). The values can't exceed those under power after warmup.

So this is way off IMO, whether it matters is another matter. Personally I really like the ability to pull small work out of a collet, do some operation on the mill and then put it back in the lathe. However, I have to mark the part position anyway as my collects and the collet chuck are far worse than the lathe. So if you're already marking the position extra thou of predictable runout is probably not an issue. Also, I really expect it to dissappear when the machine is warmed up.
 
This is why I questioned whether there is actually a problem here; unless you measure it properly, how do you know?

The set-true style type of chucks usually fall into being able to repeat in the 0.0004-0.0006" range for 8" and under, and collet chucks there can be other variables.


Personally if I was buying a new precision lathe I would attempt to get it better than that.

Appreciate you all. I did not receive this degree of dialogue from the tech person I was in communication with, no disrespect to him. I don't know his level of expertise with this machine and was not receiving input to the extent of what has been provided here, which has reduced my level of concern considerably at this point. That's all I was looking for, an explanation regarding what I was seeing, or reason not to worry.

mikey I purchased the DTI holder you recommended within minutes of reading it. Your advice has not fallen on deaf ears.
mksj, the extra chuck at a premium is adjustable and said to be repeatable in the range you've listed, although the spindle jitters makes it difficult to home in on.
Flynth, I considered the Taiwan level 12x36, but I don't have a need for that much lathe and at the moment I don't have the space.

I'll do some cutting with the iron horse and see how it goes.

Again, thanks to all who tried to help.
 
The NOGA mount for the DTI arrived today, so I took some time to try it out. It's a very nice piece of equipment, I'm glad to have it. A couple of days earlier the local to me metal supplier was generous enough to give me nearly 4 ft of 1.25" mild steel stock and 1 ft of aluminum stock in the same diameter for $10 for practice. I started with the aluminum and faced it off nicely and put a pretty decent finish on it for a novice.

I'm still pressed for time in the middle of the work week so I didn't follow the steps mikey listed perfectly, but It doesn't seem like it would have made much difference, considering the performance is just as bad with what should be a near perfect 0 on runout, except for problems elsewhere. Tell me what you think. The spindle is a bit squeaky if that matters.

 
Hard to figure that’s something other than bad/loose bearings.
 
It is difficult to say if the lighting is not making the part appear perfectly smooth while it does have some "ridges" from turning. Then the indicator may simply be showing surface imperfections.

Have you tried to measure it after half an hour warmup? Preferably inside the spindle taper. I would take the chuck off (measuring with the chuck will not give you a definite answer).

Then I would choose some mid-high speed and I would leave it like this for half an hour while doing something else in the workshop. If the spindle bearings are not getting warm to touch increase the speed (that's based on plain bearing experience, I don't know if roller bearings are supposed to get warm to touch.
The finish is pretty good, I ran a finishing pass of about .0025 depth although there are ridges in it, they're on par with what I have seen demonstrated with a closeup view of examples by experienced machinists. I also put the larger ball tip on the DTI to reduce resolution sensitivity to that and it made no difference that I can detect visually.

I have other videos of the inside taper and centric of the spindle that were not posted, from dialogue with PM. The dancing needle is consistent throughout and the squeaking noise is new compared to the initial video posted. I did a spindle run at medium speed for 25 min, after which the spindle was only slightly warm to the touch with the back of my hand. The squeaking noise started not long after that and there is a marked difference in the way the machine sounds now, compared to the first video posted. Listening with headphones really makes that difference clear.

I'll send the latest video above in to PM and see what they say at this point.
 
Last edited:
The finish is pretty good, I ran a finishing pass of about .0025 depth although there are ridges in it, they're on par with what I have seen demonstrated with a closeup view of examples by experienced machinists. I also put the larger ball tip on the DTI to reduce resolution sensitivity to that and it made no difference that I can detect visually.

I have other videos of the inside taper and centric of the spindle that were not posted, from dialogue with PM. The dancing needle is consistent throughout and the squeaking noise is new compared to the initial video posted. I did a spindle run at medium speed for 25 min, after which the spindle was only slightly warm to the touch with the back of my hand. The squeaking noise started not long after that and there is a marked difference in the way the machine sounds now, compared to the first video posted. Listening with headphones really makes that difference clear.

I'll send the latest video above in to PM and see what they say at this point.

Sorry, its not clear to me if you measured the runout on the inside taper immediately after doing that medium speed run for 25 min or after warming up otherwise.

If yes, and it was still over a thou with it slightly warm to touch then it probably won't go away.

I looked up the manual for the lathe to see what spindle bearings arrangement it uses. It appears the spindle has a 32011 tapered roller bearing held by a circlip and a 6010 deep groove ball bearing. I didn't see any adjustments that could be loose (other than the main spindle locknut).

I think it would be useful for other owners of similar lathes to say what is a typical runout for them.
There's no discernable difference I can tell warmed up or cold. I switched to my .0005 DTI and still the reading is erratic and inconsistent, the needle just doesn't swing as far due to the reduction in resolution.

If I can't turn a circle free of the persistent inconsistency in readings no matter where I measure, or mount the DTI stand. I can't maximize the benefit of any of my adjustable chucks, including the 4 jaw. Again it's not the runout, it's the inconsistent boundaries, one rotation is 5 tenths out, and the next might be in excess of .002 and it alternates back and forth in that range randomly.

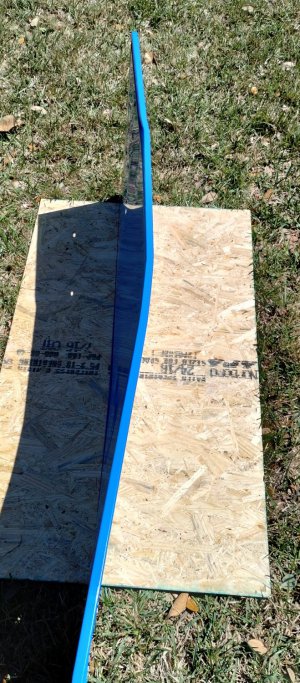
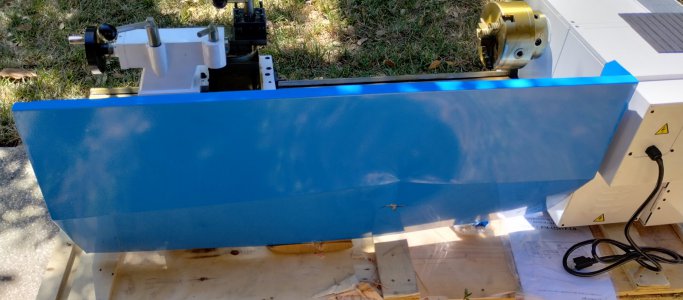
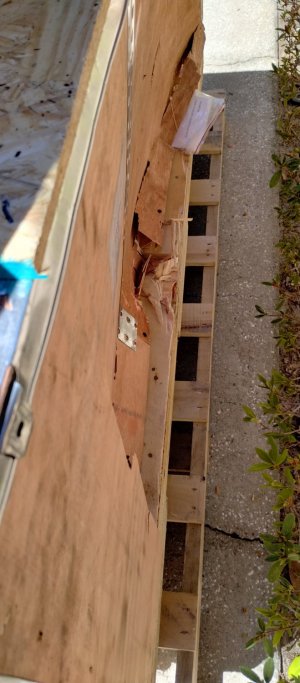
I was hoping the damage to the tray and panel would be the worst of it, but at this point without any definitive answers at 2 weeks out from receipt for the inconsistent readings and so far nothing back on what the shipping company has to say about the "birth marks" they left on the equipment, I don't feel good at all about having spent $7000, including the Ultra 4 jaw purchased from PM separately ahead of the lathe arrival.

I understand the effects of the rotating components warming up and the effect on tolerances, but no one has come on and said, "My lathe does/did that". I'm still waiting on a response from PM regarding the latest results submitted this morning.


IMG_20230316_131246802_HDR.jpg

IMG_20230316_131536341_HDR.jpgIMG_20230316_130305112_HDR.jpg
 
Last edited:
Back
Top