Pin Gage Question

A B grade is all you need unless you are making medical, aircraft, nuclear, or similar high precision parts. For a hobby shop, grades above are nice, but a waste of money, unless one walks up to you and says take me home honey, I'm yours. Then run, there's always a catch :laughing:
 
I would expect that the straightness falls into the over/under, otherwise the pin would not register correctly. Imagine a -.0002 being bent by a slight amount, it would now be a + size, and be out of spec.
A closed ring can have a diameter spec but it is definitely not straight. Given that pin gages are made by centerless grinding, I would expect that they are straight and treat them as such. However that is an assumption. Unless something has a specified tolerance, the default is there is no tolerance spec.

The GD&T specification for straightness of a rod or cylinder is cylindricity. It basically states that two concentric virtual cylinders are superimposed on the object and that the object separated by a radial distance equal to the stated tolerance and the object must totally lie within the space between the cylinders.

Incidentally, meeting a specified diameter tolerance, as measured with a micrometer does not imply roundness. A Reuleaux triangle is one example of an object having a constant width but not being round. https://en.wikipedia.org/wiki/Reuleaux_triangle. To fully specify a pin, in addition to diameter, roundness and cylindricity must be specified. Throw in surface finish for good measure.

However, for the purposes of a hobby machinists, trusting the manufacturer to meet these implied but unspecified requirements is usually sufficient. I use my pin gages, trusting these unspecified requirements are met and in truth, I have no practical means to adequately challenge them.
Whewwwww... glad we got that out of the way.
 
I would like to chime in here and ask a similar question. Starting out, what sizes would most likely be the most useful to buy first?
I use my .061" - .250" set and my .251" - .500" set about equally. I use them for more purposes than to check hole diameters so having the complete range is useful for me. The smaller set is less expensive so maybe the first one to buy. I would like to add the .501" - .750" set but the cost is significantly higher. I had written in a previous post about combining three pins to measure over range holes which gets me by. https://www.hobby-machinist.com/thr...o-extend-measurement-range.96790/#post-903491

As mentioned above, when I am measuring runout, I usually use wrist pins. They are dictated by their use to have a tight diameter and straightness tolerance. A local small engine shop, marina, or implement dealer would be a good source.
 
Okay I have done some sampling measurements of the gage pin sets I have.

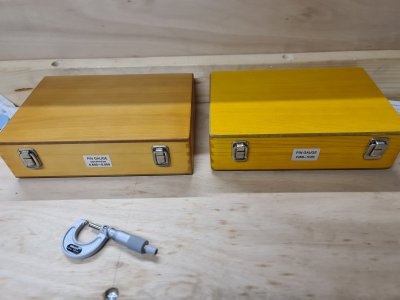
Let's have some piccies:

20240123_151149.jpg
Oh that's the mic I used to do the measuring with. It's a Mitutoyo with a resolution of 0.001 mm.

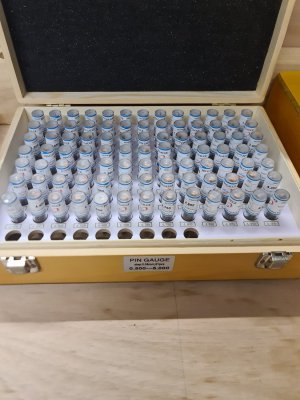
The 0.5 - 5 mm set

20240123_151050.jpg

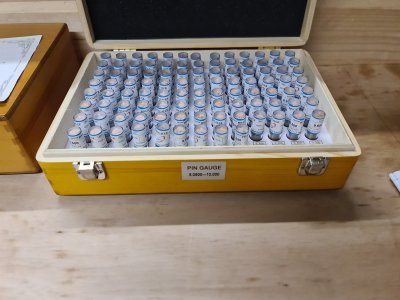
The 5.5mm to 10mm set
20240123_151132.jpg

I measured 18 of the little buggers (of about 180) at reasonably spaced intervals. Each pin was measured on each end, and in the middle (or thereabouts), 3 measurements for each pin.

I'll put the actual numbers up later (got some work to finish first!) but from my measurements, all but one individual measurement was within 0.004 millimetres of the specified diameter.

That one departure was a middle of the pin reading of 0.007 millimetres over the specified diameter. Interestingly that pin was also the only one to have a reading under the specified diameter (one of the ends); all the rest were over the specified diameter.

0.004 mm is about a tenth and a half.

I think that's probably good enough for most hobbyist use.

If one needs better than that then yep, a reputable named brand is what one should get.

Oh and here are links to the AliExpress page for my sets:

 
I've got import sets from Shars. .011 to .500 by .001" & up to .0002 under. I've used them more than I ever thought I would. By using two pins, I can measure to 1". I've measured them with a micrometer and they have been very good. Good enough for my use. I don't have a way of measuring small holes by any other means. They are very helpful when trying to get a press fit sized. Used way more often than my gauge blocks.
 
I have .061 up to 1.00. I got the sets from Shars. I use mine quite often. They are minus sets. I would buy a set at a time as you need until you cover the range you use. The smaller sizes are cheaper than the larger sized pins sets.
 
I bought two sets of Vermont gauges on a local machinery auction for $80. They are in excellent shape, so that is another option,.
 
A closed ring can have a diameter spec but it is definitely not straight. Given that pin gages are made by centerless grinding, I would expect that they are straight and treat them as such. However that is an assumption. Unless something has a specified tolerance, the default is there is no tolerance spec.

The GD&T specification for straightness of a rod or cylinder is cylindricity. It basically states that two concentric virtual cylinders are superimposed on the object and that the object separated by a radial distance equal to the stated tolerance and the object must totally lie within the space between the cylinders.

Incidentally, meeting a specified diameter tolerance, as measured with a micrometer does not imply roundness. A Reuleaux triangle is one example of an object having a constant width but not being round. https://en.wikipedia.org/wiki/Reuleaux_triangle. To fully specify a pin, in addition to diameter, roundness and cylindricity must be specified. Throw in surface finish for good measure.

However, for the purposes of a hobby machinists, trusting the manufacturer to meet these implied but unspecified requirements is usually sufficient. I use my pin gages, trusting these unspecified requirements are met and in truth, I have no practical means to adequately challenge them.
I just finished three days of GD&T training. Interesting stuff. Now I have an "Ultimate GD&T Pocket Guide" sitting on my desk.
 
I just finished three days of GD&T training. Interesting stuff. Now I have an "Ultimate GD&T Pocket Guide" sitting on my desk.
Who did you do the training through? I’ve been self teaching myself GD&T for the past 10 years, but it would be helpful to take a class. I was going to register for a class through the community colleges here in CT, but don’t want to drive 1.5 hours each way for the next few months.
 
Back
Top