

-
Welcome back Guest! Did you know you can mentor other members here at H-M? If not, please check out our Relaunch of Hobby Machinist Mentoring Program!
You are using an out of date browser. It may not display this or other websites correctly.
You should upgrade or use an alternative browser.
You should upgrade or use an alternative browser.
POTD- PROJECT OF THE DAY: What Did You Make In Your Shop Today?
- Thread starter wachuko
- Start date


- Joined
- Jul 14, 2017
- Messages
- 2,448
Last couple of weeks i've been off and on this car, but most of the work sending has been done by my brother. This is white elephant No: 2, it used to be wrapped white, with the wrap failing and piling up with the glue left. So me and my brother pulled the rest had very hard time getting off the glue and started preparing it for paint. My brother bought a bunch of used parts, things like headlight, taillight, front fenders, rear bumper, new front bumper and a bunch interior plastics. The body has couple of dents and the used panels he bought have damage. I'm not sure why is he dumping so much money in this car, i've done so much work on it that there will be nothing left from the factory.


- Joined
- Nov 26, 2015
- Messages
- 4,788
Well this has been a month long on and off project. You see when I finally got power to my new to me Jet lathe and turned it on it made a horrible racket. I traced it down to the belt drive pulley. The retaining nut had backed off at some point and the pulley backed off the tapered shaft and was flopping around. Instead of fixing it the previous owner just ran with it. Well it damaged the tapered bore in the pulley pretty good. So over the course of several weeks I have bored out the pulley, made a new bushing with a tapered ID and a straight OD. Made a tapered broach bushing so I can broach the new bushing. Press the bushing into the pulley and broach it. Test fit it and finally get it right with the world. Now the lathe runs nice and quiet. A 3 part video series will be coming out soon on the repair.


- Joined
- Oct 31, 2016
- Messages
- 2,645
I picked the remains of a runners stroller (I don't know what you call them) on Friday. Free. I wanted the wheels to make a dolly for my canoe. Thought this would be an all day project. Drilled out a couple of rivets to separate the back wheel section from the rest of the stroller. Looked at the back section and thought that looks like it might fit the way it is. Test fit with a couple of straps to hold it in place and wow. It works as is. No need to make anything. I will have to work on the straps a bit. Can't do that until I get my sewing machine set up.

With this project out of the way I decided to finish the electrical in the garage/shop. I now have electrical outlets on the work benches and to the lathe, mill/drill and drill press. Also squared away the lighting. No pictures. Didn't see the point in taking a picture of emt and outlets.
104 in the shade. Siesta time.
- Joined
- Sep 28, 2013
- Messages
- 4,308
so that's what you were making the tapered broach bushing forWell this has been a month long on and off project. You see when I finally got power to my new to me Jet lathe and turned it on it made a horrible racket. I traced it down to the belt drive pulley. The retaining nut had backed off at some point and the pulley backed off the tapered shaft and was flopping around. Instead of fixing it the previous owner just ran with it. Well it damaged the tapered bore in the pulley pretty good. So over the course of several weeks I have bored out the pulley, made a new bushing with a tapered ID and a straight OD. Made a tapered broach bushing so I can broach the new bushing. Press the bushing into the pulley and broach it. Test fit it and finally get it right with the world. Now the lathe runs nice and quiet. A 3 part video series will be coming out soon on the repair.
")
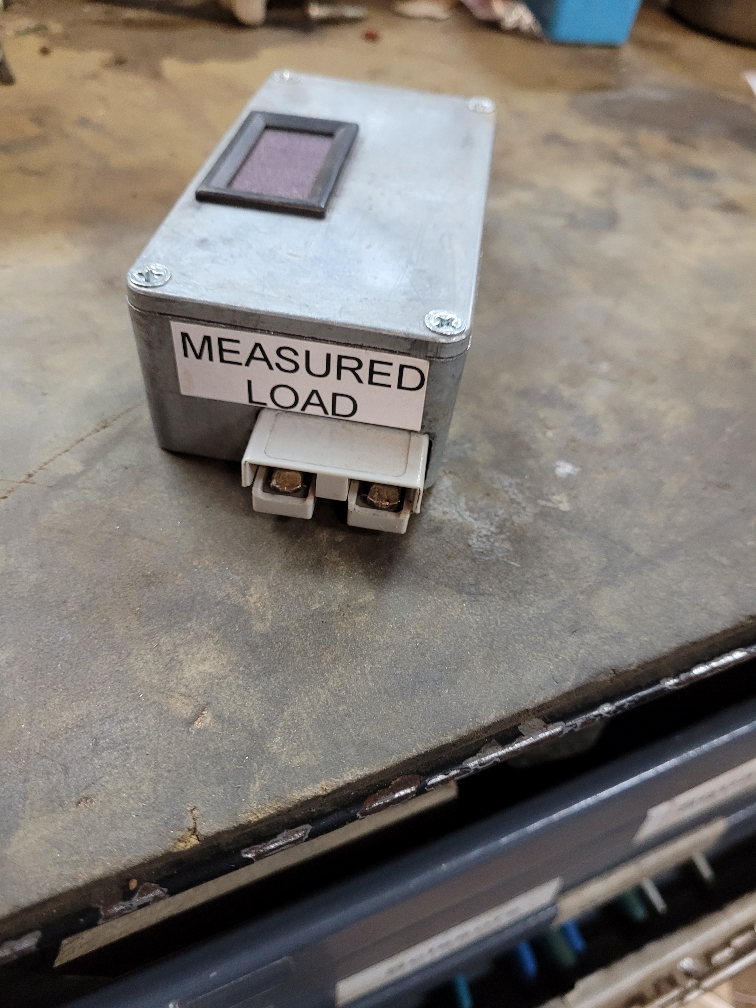
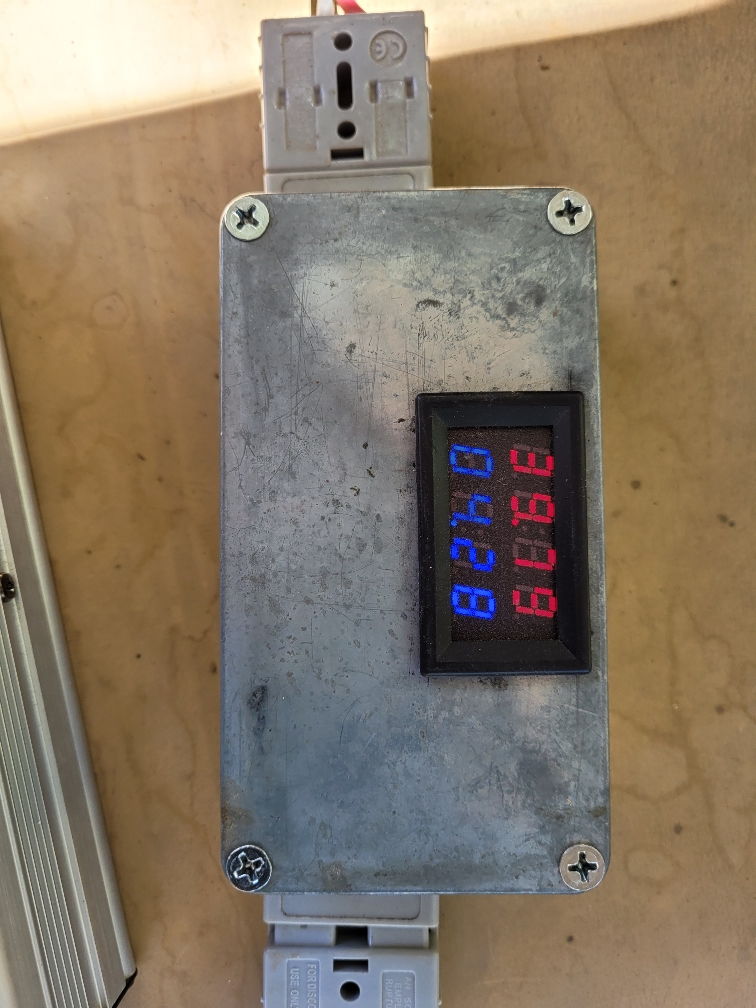
Built a "universal" charging display.
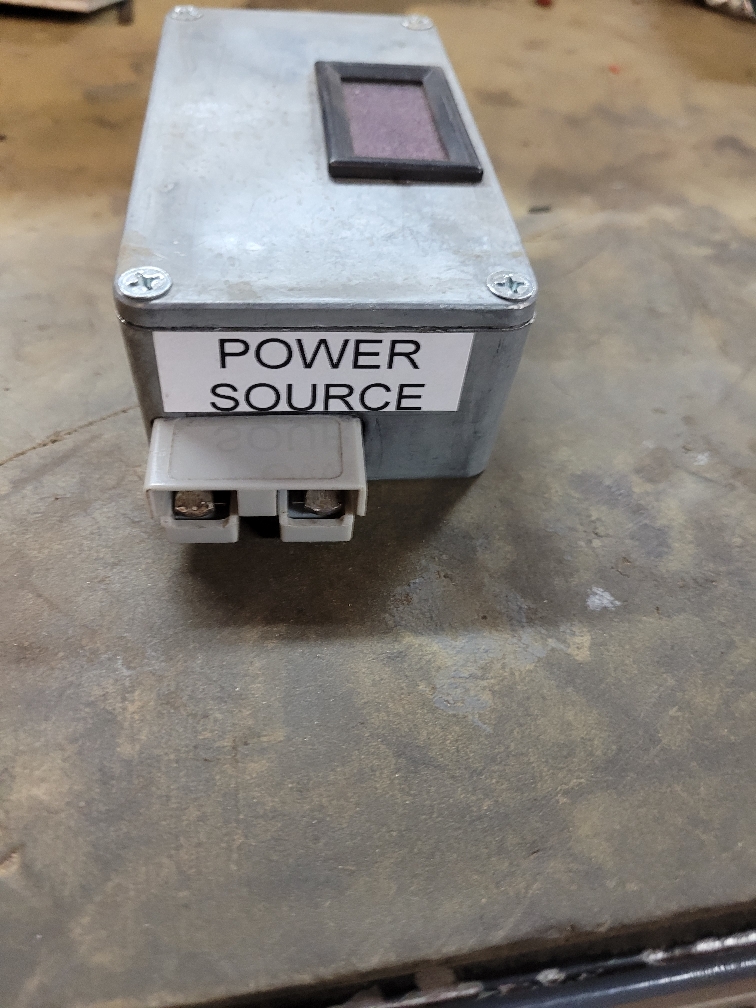
We use Anderson connectors of assorted sizes for various things and use the 50 Amp size for auxiliary chargers and main power for smaller things.
We have 36 volt forklift and golf car used for yard work, 36 volt electrolysis tank as well.
12 volt yard compressor for tree pruning.
For chargers we have a compact forklift charger but the voltage is too high, same for golf car charger, AGM batteries do not do well with the high rate.
The compressor has a batterymaintainer type but it is used for other items.
Got tired of getting voltmeter to to check things and not knowing charging voltage so we made an adaptor box with metering.
Years ago we got some "2 wire panel voltmeters", these are great little devices, just 2 wires and they both power the unit and show the voltage.
Problem is most are only good for about 22 volts.
We found one good for 100 VDC so it is in Golf car to sow battery voltage.
We found some that are 3 wire voltmeter with 2 wire ammeter.
For the3 wire unit it is ground, 5 to 20 volt supply and measure.
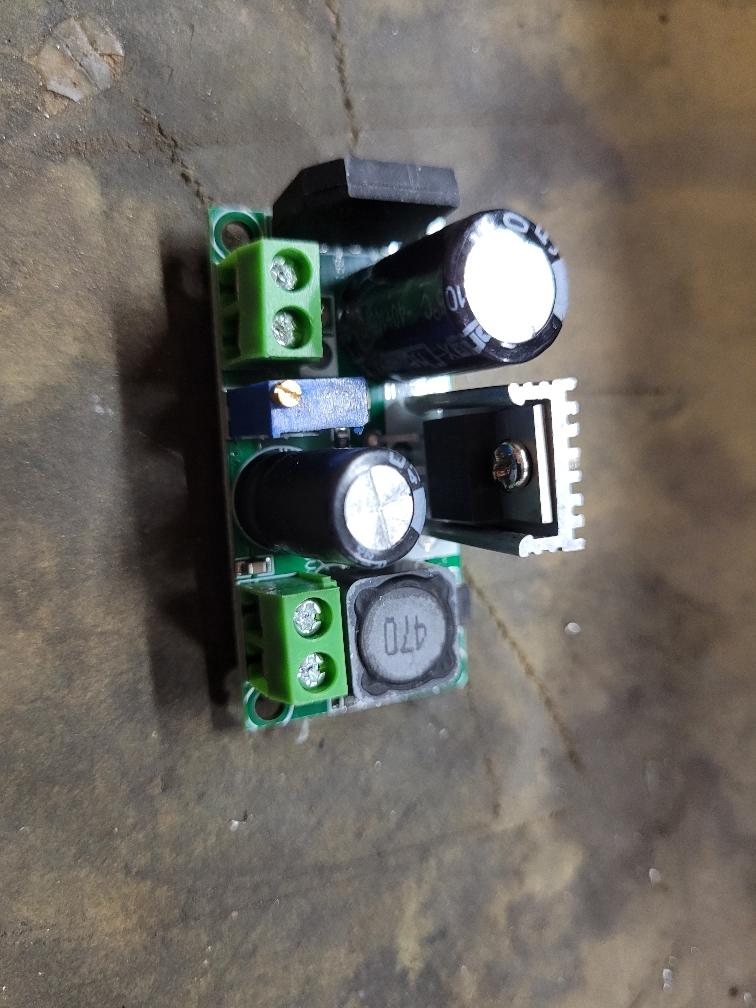
We found some switching buck/boost units good for about 1 Amp, give them 4 to 50 VAC or DC and they have regulated output adjustable anywhere in there, 6 vac in can be 12 VDC out.
Only issue is no isolation so you cannot have common ground for ac input, DC is fine.
While cleaning up a corner of doom the other day we stumbled on a metal project box, the light lit, been wanting to build this for years but was busy doing other things and no box so other things got done.
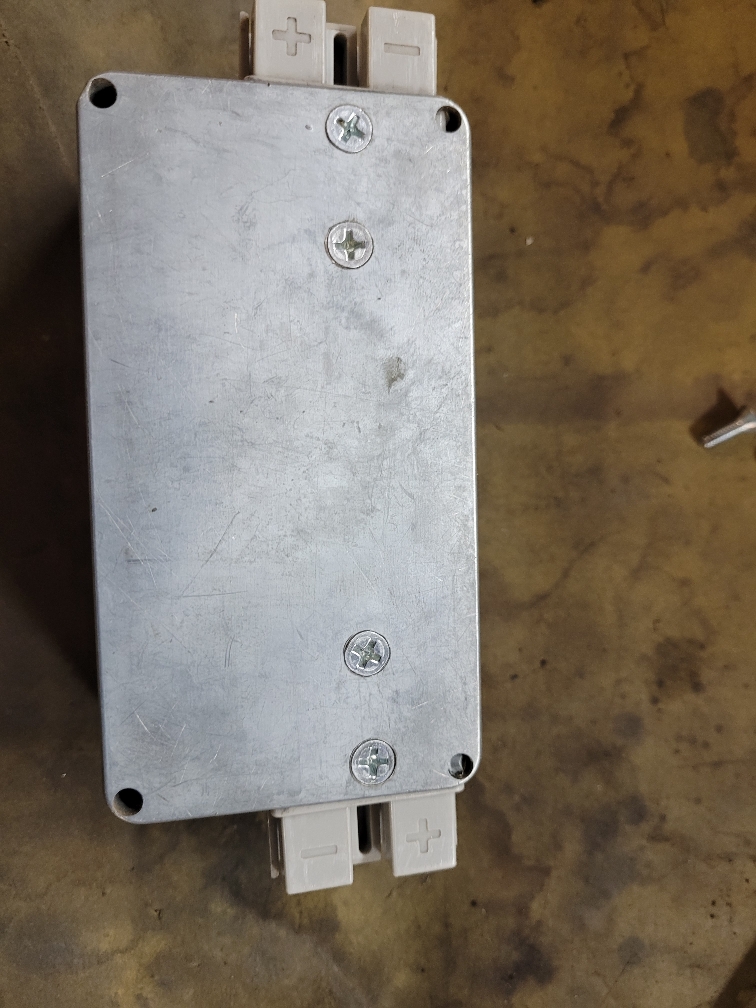
Determined the Anderson connectors would fit in the ends and the shunt bar would fit between them so to the mill we go to make holes in the ends of the box.
Held in place and drilled the hole in the box through the holes in the Anderson.
Holes in Anderson are perfect for 8-32, countersunk the bottom, a center drill is perfect size, angle close enough.
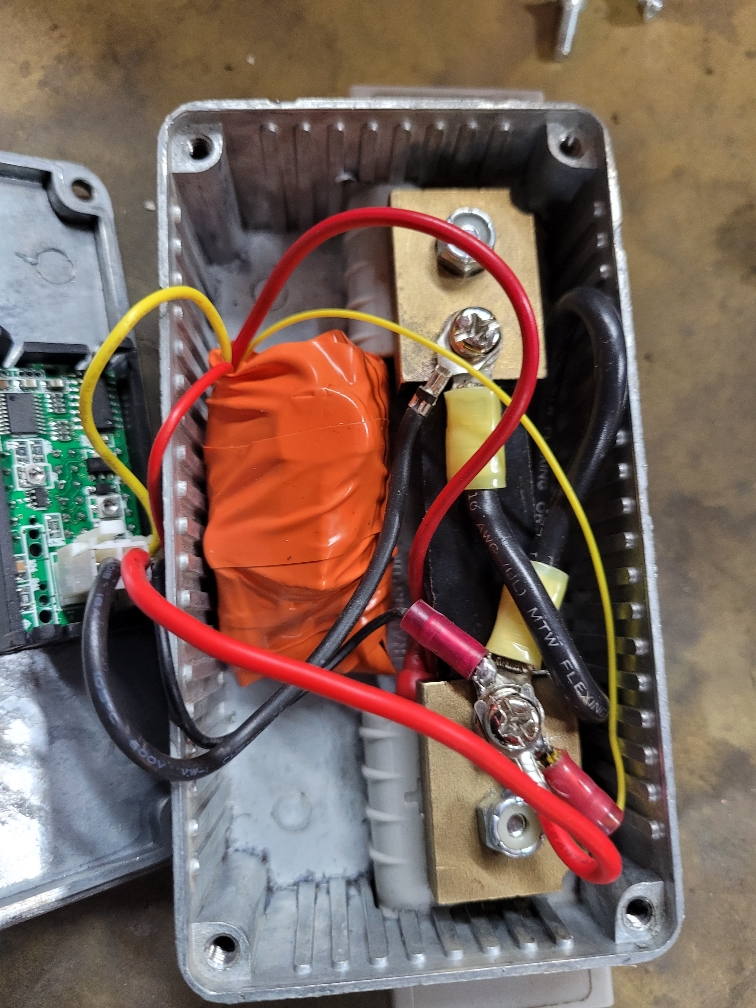
Placed the shunt in the box, marked for hole and drilled mounting holes for the shunt, the holes were for cable lugs so enough room to not need to be perfect.
Removed Andersons and countersunk from bottom deep so screws are well above the bottom, tapped 8-32 and inserted some screws.
The screws for the meter connections were used for both ammeter and power supply.
The positive wire is direct through, added a pig tail to go to power supply and meter input.
Cut the hole in the lid for the meter to snap in.
The ground connects to the ends of the shunt.
Power supply wrapped in tape and stuffed behind meter.
Works great.
We can see the operating current and voltage for the battery operated compressor or fit it to connect to charger and see charging current with voltage.
Did not get photos of milling, just end product.


Sent from my SM-G781V using Tapatalk
We use Anderson connectors of assorted sizes for various things and use the 50 Amp size for auxiliary chargers and main power for smaller things.
We have 36 volt forklift and golf car used for yard work, 36 volt electrolysis tank as well.
12 volt yard compressor for tree pruning.
For chargers we have a compact forklift charger but the voltage is too high, same for golf car charger, AGM batteries do not do well with the high rate.
The compressor has a batterymaintainer type but it is used for other items.
Got tired of getting voltmeter to to check things and not knowing charging voltage so we made an adaptor box with metering.
Years ago we got some "2 wire panel voltmeters", these are great little devices, just 2 wires and they both power the unit and show the voltage.
Problem is most are only good for about 22 volts.
We found one good for 100 VDC so it is in Golf car to sow battery voltage.
We found some that are 3 wire voltmeter with 2 wire ammeter.
For the3 wire unit it is ground, 5 to 20 volt supply and measure.
We found some switching buck/boost units good for about 1 Amp, give them 4 to 50 VAC or DC and they have regulated output adjustable anywhere in there, 6 vac in can be 12 VDC out.
Only issue is no isolation so you cannot have common ground for ac input, DC is fine.
While cleaning up a corner of doom the other day we stumbled on a metal project box, the light lit, been wanting to build this for years but was busy doing other things and no box so other things got done.
Determined the Anderson connectors would fit in the ends and the shunt bar would fit between them so to the mill we go to make holes in the ends of the box.
Held in place and drilled the hole in the box through the holes in the Anderson.
Holes in Anderson are perfect for 8-32, countersunk the bottom, a center drill is perfect size, angle close enough.
Placed the shunt in the box, marked for hole and drilled mounting holes for the shunt, the holes were for cable lugs so enough room to not need to be perfect.
Removed Andersons and countersunk from bottom deep so screws are well above the bottom, tapped 8-32 and inserted some screws.
The screws for the meter connections were used for both ammeter and power supply.
The positive wire is direct through, added a pig tail to go to power supply and meter input.
Cut the hole in the lid for the meter to snap in.
The ground connects to the ends of the shunt.
Power supply wrapped in tape and stuffed behind meter.
Works great.
We can see the operating current and voltage for the battery operated compressor or fit it to connect to charger and see charging current with voltage.
Did not get photos of milling, just end product.
Sent from my SM-G781V using Tapatalk
- Joined
- Mar 25, 2013
- Messages
- 4,617
That is slick. But this is a little hard to follow. So this box is used to measure voltage and current flowing to the battery from it's designated charger? The internal voltage converter just supplies the drive current for the meter assembly? They also make displays that can integrate the entire charge cycle so you could see total AmpHours. Not sure you could find one that would cover the entire range.
Yes, the converter is just power supply for the meter.
NOT needed if you only do less than 20 volts.
Built it with a meter stating good for viewer voltage but the notfound not present fine print indicated the separate power source needed for that.
No need for totalizing, those are larger units that may not fit.
Sent from my SM-G781V using Tapatalk
NOT needed if you only do less than 20 volts.
Built it with a meter stating good for viewer voltage but the notfound not present fine print indicated the separate power source needed for that.
No need for totalizing, those are larger units that may not fit.
Sent from my SM-G781V using Tapatalk