POTD- PROJECT OF THE DAY: What Did You Make In Your Shop Today?

My Grade 4 science teacher, Miss Parmar, showed us that trick. Or tried to. She used a peeled hard boiled egg and some burning newspaper in the milk bottle. Sucked the egg in but it broke apart when it hit the bottom. I don’t know what impressed us the most — seeing the egg inside the bottle or somebody having real flames in the classroom!
 
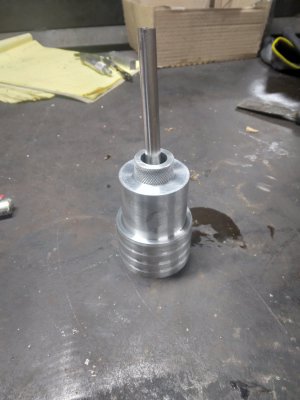
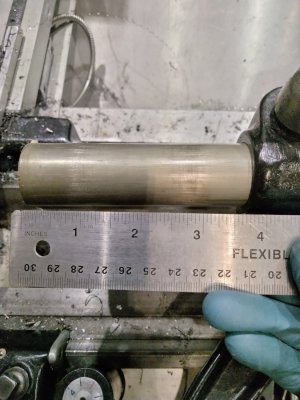
Little more messing with the home made cylinder square. It check the same place it did last night. Honed it a little more on the 600 grit diamond plate. Now the big problem, it seems that it's getting pretty flat on the bottom too. Trying to spin it slowly to watch the indicator, and it stick slips on the plate.

That vibration makes the indicator want to puke. Puzzling over that, I grabbed a little bottle of synthetic lamp oil (synthetic kerosene?) and put just a drip on my finger and wiped it around on the surface plate under the square. It was just enough to keep let the cylinder glide around 360 degrees with out wanting to vibrate on the plate. Took a few more light passes on the honing plate, and I can spin cylinder 360 degrees and the needle on the indicator doesn't move. (OK, you can just hardly see the needle move, maybe a bit less than a needle width. But basically nothing...)

This is promising. 10 minutes in the lathe and maybe an hour of honing a cylinder can be made square. I think the next step will be getting material to make a lap to lap the diameter to take the middle down to the ends. It's not really much, but if it can be measured it's too much! ;)
Also need to figure out how to gauge round items properly...
 
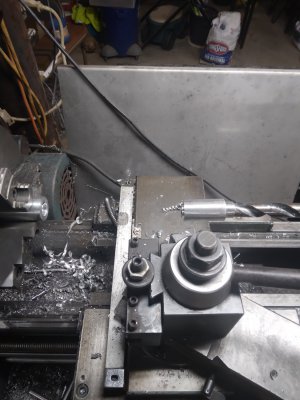
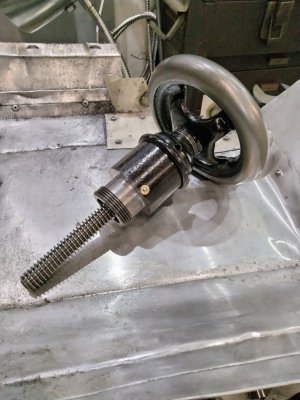
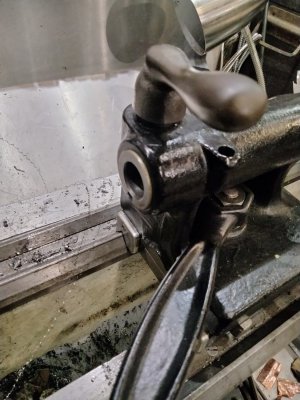
Did a little fettling on the tailstock and got 3/8" of travel back AND my drill chuck pops off a 1/4" before the quill stops. Super happy with it now. Even managed to keep the oiler in a sort of useful place, more by luck than judgement IMG20230131215237.jpgIMG20230131215354.jpgIMG20230131215443.jpg
 
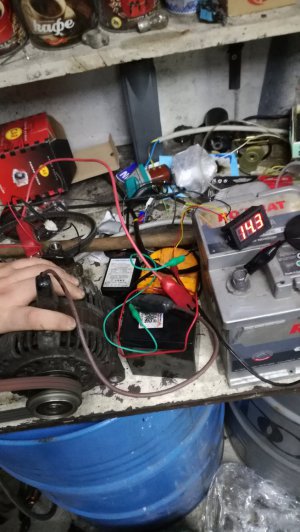
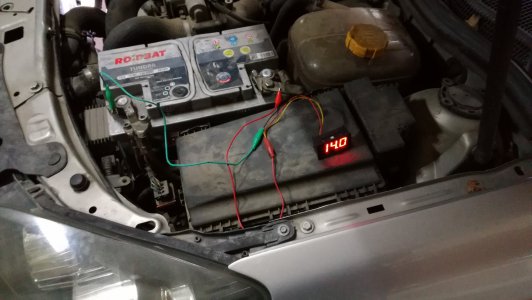
Today i finally managed to get the astra fixed. Took the originally broke alternator to a friend who fixes electric motor, starters and alternators. He had new diode board on a shelf, just replaced it everything else was fine. Got it home and tested it on my work bench and it made 14.3v then i spent an hour and a half wrestling it back in the astra, fire it up ad is charging at 14v. With that confirmed i assembled everything, test drove it is working, then talk to my brother and he agree this car needs to go.
IMG_20230120_174315_1.jpgIMG_20230120_184835.jpg
 
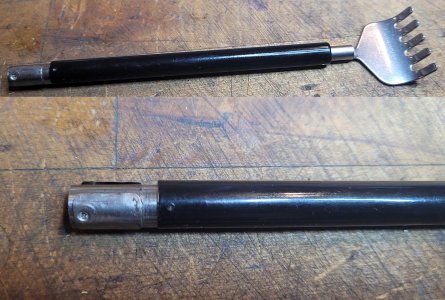
POTD was repairing my back scratcher. Yup, I spent over $40K in shop tools so I could work on a $1.50 “claw”!

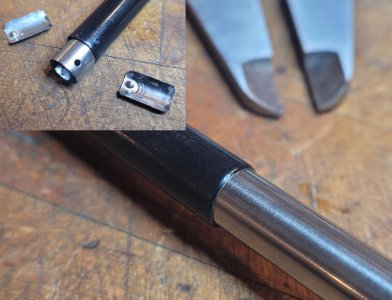
Problem was, the cap on the end of the extension tubes popped off and was lost. The cap on the end secures the black-painted tube. Without the cap, the black tube slides off the next smaller tube costing me about 6” of reach.

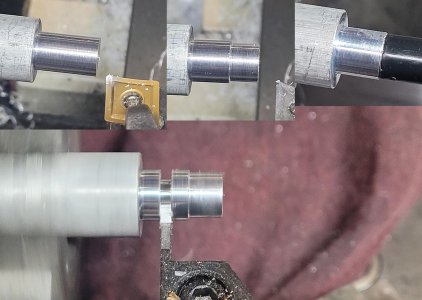
Simple lathe job to satisfy my itch to get in the shop. Chucked up a chunk of 5/8” aluminum and turned a shoulder down to the OD of the black-painted tube. Next, turned a shoulder to fit into the ID of the tube and parted.

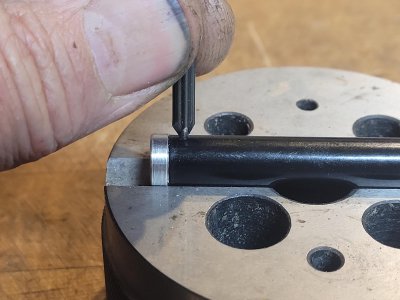
I ground a concrete nail to a sharp point for a punch. Set the new end cap in place and hammered away. If it pops off again, I’ll drill a hole and run a pin through the end cap.

I didn’t show it, but I also took advantage of having the scratcher in the shop and sanded the fingers to a sharper edge. Tried it out - OW, too sharp?!?! Couple of hits with a Scotchbrite wheel dialed in the coarseness for satisfying the itch.

Thanks for looking, Bruce


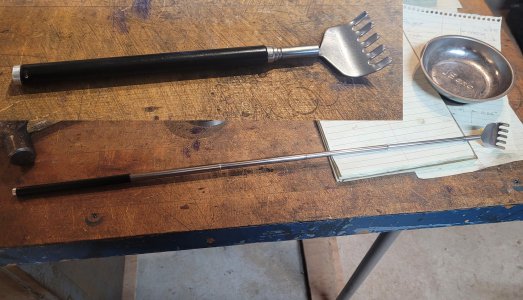
Lost the end cap of my back scratcher. The cap keeps the black tube from sliding off the scratcher.
20230129_110640.jpg

The front end of the tube is rolled to a smaller ID. The two loose plates with the peened pins set in holes in the next-smaller tube. When the larger tube is pulled back, the two plates hit the smaller ID end of the tube and keep it from pulling off.
20230129_111024.jpg

5/8" aluminum turned to the OD/ID of the outer tube.
20230129_112616.jpg

Peened the outer tube to the new cap using a hardened concrete nail as a punch
20230129_113607.jpg

All better!
20230129_113713.jpg
 
POTD was repairing my back scratcher. Yup, I spent over $40K in shop tools so I could work on a $1.50 “claw”!

Problem was, the cap on the end of the extension tubes popped off and was lost. The cap on the end secures the black-painted tube. Without the cap, the black tube slides off the next smaller tube costing me about 6” of reach.

Simple lathe job to satisfy my itch to get in the shop. Chucked up a chunk of 5/8” aluminum and turned a shoulder down to the OD of the black-painted tube. Next, turned a shoulder to fit into the ID of the tube and parted.

I ground a concrete nail to a sharp point for a punch. Set the new end cap in place and hammered away. If it pops off again, I’ll drill a hole and run a pin through the end cap.

I didn’t show it, but I also took advantage of having the scratcher in the shop and sanded the fingers to a sharper edge. Tried it out - OW, too sharp?!?! Couple of hits with a Scotchbrite wheel dialed in the coarseness for satisfying the itch.

Thanks for looking, Bruce


Lost the end cap of my back scratcher. The cap keeps the black tube from sliding off the scratcher.
View attachment 435833

The front end of the tube is rolled to a smaller ID. The two loose plates with the peened pins set in holes in the next-smaller tube. When the larger tube is pulled back, the two plates hit the smaller ID end of the tube and keep it from pulling off.
View attachment 435834

5/8" aluminum turned to the OD/ID of the outer tube.
View attachment 435835

Peened the outer tube to the new cap using a hardened concrete nail as a punch
View attachment 435836

All better!
View attachment 435837
Imagine the terror of not having a lathe, and having to live with a defective back scratcher. Oh, the horror!

Rick "loving it" Denney
 
My project of the day (week) has been the repair (again) of my dryer. We bought this Kenmore HE3 dryer in 2002 or 2003, so it is well past it's use-by date. But here's the thing: Whirlpool-made appliances are well-supported at least in the secondary market with parts and advice on various forums. I had already replaced the heating element twice, a couple of the thermostats, and the control board after a lightning surge got the old one. The new symptom was the dryer would just stop, or would fail to start the motor (after clearly trying). I tested the thermistor, the overtemp fuses, and the overheat thermostat to no avail, but they are also cheap so I have replaced them. I've also replaced the door hinge and the plastic window in the door when the old one cracked.

The motor is an open-frame induction motor of maybe 1/4 HP. Open-frame motor in a dryer? Really? What could possibly go wrong having an open frame motor in an environment where moist lint is always flying around? :mad:

The motor has its own overload self-resetting breaker, plus a centrifugal switch that not only switches out the starting coil but also tells the control board when the motor is not running. And there is a belt switch that shuts down the dryer if the belt breaks--that switch also serves as the belt tensioner.

Lots of safeties in these things. There is the thermistor that tells the control board how hot the air is, and when it's too hot, it turns off the heating coil for a while. Then there is a thermal fuse right next to it in the blower path that breaks if the thermistor control fails and the air overheats. The heater stove also has an overtemp thermostat that is self-resetting, and backing that up is another thermal fuse that opens the heating coil circuit in case the thermostat doesn't work. All this is designed to keep it from burning down the house even if stuff fails. There's another switch in the blower path that detects when the lint screen is not in place or clogged, and a switch in the door to pause the dryer when the door is opened.

Basically, every one of these switches can be replaced for well under fifty bucks.

The motor was for me the main culprit, however. I think that motor was so packed up with lint that the centrifugal switch was not working properly, or the motor and drum bearing drag was so high (those drum bearings were packed with two decades of red hair and cat fur and barely turned) that the motor was overloading. I sourced a new motor that is not a knock-off from you-know-where, but actually is a Whirlpool OEM replacement made in Mexico that cost about twice as much.

And I vacuumed out the vent system. Much vocabulary was required during that activity. :mad:

Basically I had it apart down to its elements. The drum was out, the top was off, the front was off, and the control panel and control-board enclosure were set aside without disconnecting anything. As I was reassembling, the control panel slipped off of where it was sitting and fell, which cut a six-conductor ribbon cable between the front panel and the control board.

More vocabulary. :mad: Hey, I went to public school. I have a good vocabulary. :burned up:

So, now I have ribbon cables on the way. Sure, I could have made up my own wiring harness, but by this time I was tired of the project, which requires me to stand on my head while working, sorta like most plumbing jobs.

All in, I'll be out about $250, assuming my time is worth nothing, which is an accurate assumption. Why didn't you just buy a new dryer you ask?

1. New dryers are even crappier than this one, no matter how much you spend.

2. New dryers of this type are $600.

3. A new dryer requires a new washer, because the source of that red hair (aka She Who Must Be Obeyed) says so.

4. We'd probably end up with Samsung or LG and those would be unmaintainable in the future.

$250 and a couple of evenings versus a coupla grand for nice-looking disposable junk seems like a no-brainer to me. And fixing it earns Red-Head Bonus Points. Her comment: "So, we have basically a new dryer for $250?" Yup.

Rick "could not find a single aspect of this project that required the lathe :mad:" Denney
 
My project of the day (week) has been the repair (again) of my dryer....

...The motor was for me the main culprit, however. I think that motor was so packed up with lint that the centrifugal switch was not working properly, or the motor and drum bearing drag was so high (those drum bearings were packed with two decades of red hair and cat fur and barely turned) that the motor was overloading. I sourced a new motor that is not a knock-off from you-know-where, but actually is a Whirlpool OEM replacement made in Mexico that cost about twice as much.
We had a Frigidaire washer and dryer. The dryer was on of the last 'high temp' units from the about the turn of the century (2000, not 1900!). That dryer required a rebuild about every two or three years. Nothing serous, just replacing the felts, and nylon glides, cleaning, etc. Eventually the motor quit. Same open frame motor in a dryer you mentioned...

So, my trick for these bronze bearing motors (repaired several this way) was to clean out the bronze as best as possible. Pick the junk clean off the edges, use various solvents, then apply fresh high quality mobile No 6 spindle oil. After a while the oil soaks into the bronze, and everything spins again. Motors that were literally stuck, have run a decade or more after fresh oil. I think these high purity oils are better quality than a lot of other oils you can get. That and they don't have the detergents and other things that engine oils have. If you still have your old motor might be worth trying, maybe keep it for a spare! ;)

I had to live without a lathe for a while this summer/fall. I didn't think I used it that much, boy was I wrong!
 
Back
Top