POTD- PROJECT OF THE DAY: What Did You Make In Your Shop Today?

It's very strange that prying the head casting caused the pin to get deeper into the hole.
It indicates, to me, that the pin had been messed with before or improperly installed in the first place.
If you have pried the headstock into the pictured condition while other pins or fasteners are still engaged . . . (me) Check please.
It's unfortunate that factory didn't drill and ream the hole completely through.

Prying up the headstock would not have been my choice, but at the point . . .
I suggest tapping the headstock back down and asking "what do I need to drill and tap the pin?".

If not, use 4 wedges (1 at each corner) to lift the head uniformly.

The hacksaw approach is rational enough, if you can minimize damage to the (normally) faying surfaces. Once the headstock is out of the way, drilling and tapping the pin remnant (in the bed) should be pretty simple.

All of your cosmetic work has seemed so thorough and precise that the decision to pry up the headstock seems incongruent and unfortunate.
After all, pretty paint is nice but it won't create a more precise machine tool.
Sometimes it is difficult to keep buba at bay in my "real self" while my "ideal self" would show more patience :)
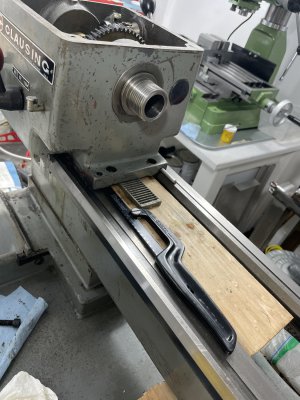
Prying up the headstock was done gently with a couple of plastic wedges, a series of aluminum rods on the V to keep somewhat level and a pry bar.
Four bolts and the tapered pin are all there is holding it in place.
The 3/16" of lift came with minimal pressure and you could feel a solid stop at that point so just let it be. Remove the wedges, a tap with the plastic hammer, it drops right back into place.

Sawing the pin should leave me with about 3/32" of a stub sticking out of the bed. Twenty minutes and beer then I can move onto the next challenge.
IMG_7374.jpeg
 
I think sawing the pin as you show would allow you to access the stuck part of the pin to drill and tap it. It could then be easily pulled.
That looks like a beautiful machine!
 
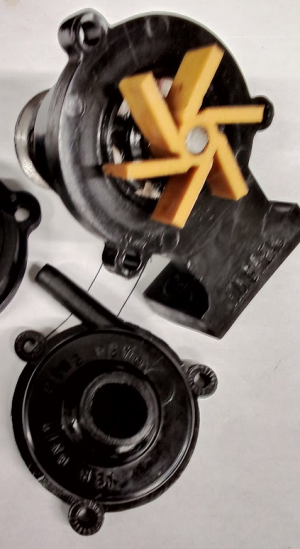
I bought a Grizzly Power Hacksaw in the fall. The coolant pump was leaking like a sieve.

1701922583445.png

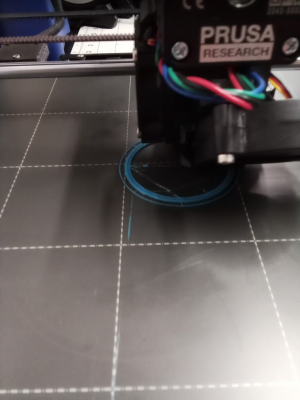
First attempt was to print a gasket for the existing pump:
1701922304586.png
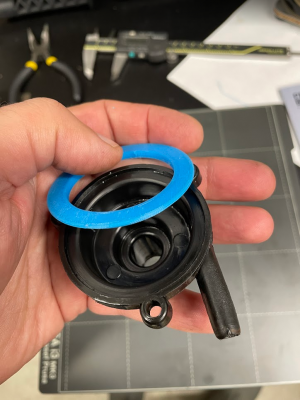
Finished TPU gasket:
1701922347386.png

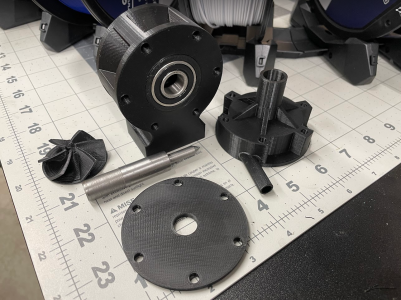
Leaked worse. Upon closer inspection, the cover was not really that flat and not enough pressure to bridge the distortion in the cover. Any attempt to tighten it up just distorted the plastic flanges more. OK, I'll make my own coolant pump. It is pulley driven, so I had some 1/2" bearings, turned up a shaft and modeled a slick little pump in Fusion 360. Couple days later I had all of my parts printed...
1701922511293.png
The pump cranked coolant REALLY well, with my modeled and assuming more efficient vanes in the printed impeller. But the dang thing still leaked, not as bad as my attempt to repair the original, but it still leaked.

Not a successful build in the shop today and I'm not quite sure what I learned about leaks and seals as of yet, but it was fun designed, printing and building the pump itself. In the meantime, I'll set up a little submersible pump in a bucket so I can get the saw cutting again unattended.
 
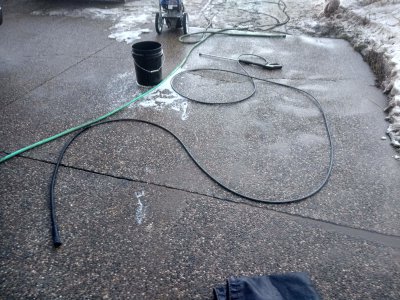
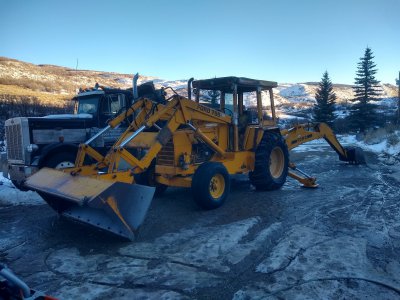
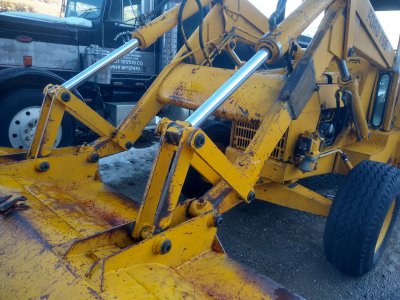
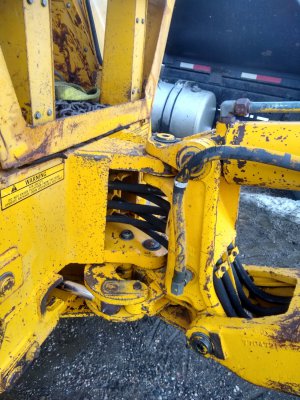
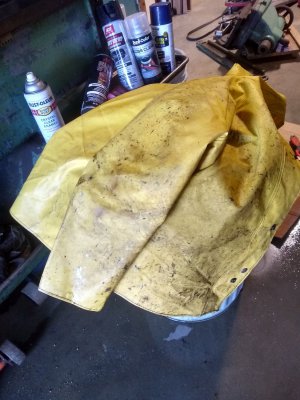
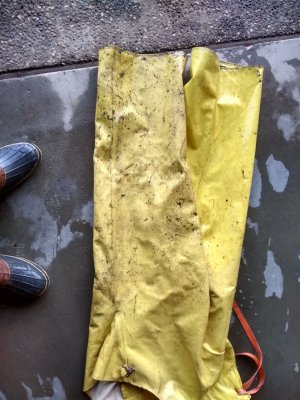
Well, not in the shop, but outside. In the shop would have been too horrible to even contemplate. The weather has been in the 40's the last few days, so I decided it was now or never to power-wash the backhoe before it comes in for a major rebuild. This is probably the second time it's been cleaned since it was new in 79 (second owner). Used my little gas powered 2700psi pressure washer hooked up to the on demand water heater (140deg), which worked amazingly well. Went over it several times paying special attention to the sixty or so grease fitting areas getting all the worst of it off the machine with most of it seemingly ending up on me. Then sprayed it down with a 5 to 1 mix of oil eater, and let it sit for an hour or so and went over it a few more times. Hardly recognize the old girl. Should make working on it a whole lot more enjoyable. Spent a few hours cleaning up all the grease covered hoses for the pressure washer, driveway, garage floor, and anything else that was within 30' or so. On the pic of the foul weather pants you can see the one leg that I wiped down with oil eater compared to the other one which is about what my face looked like (some might call that an improvement). Mike

IMG_20231206_153503125_HDR.jpgIMG_20231206_153513722_HDR.jpgIMG_20231206_153523359_HDR.jpgIMG_20231206_153535728_HDR.jpgIMG_20231206_153748559_HDR.jpgIMG_20231206_153801832_HDR.jpg
 
Sometimes it is difficult to keep buba at bay in my "real self" while my "ideal self" would show more patience :)
Prying up the headstock was done gently with a couple of plastic wedges, a series of aluminum rods on the V to keep somewhat level and a pry bar.
Four bolts and the tapered pin are all there is holding it in place.
The 3/16" of lift came with minimal pressure and you could feel a solid stop at that point so just let it be. Remove the wedges, a tap with the plastic hammer, it drops right back into place.

Sawing the pin should leave me with about 3/32" of a stub sticking out of the bed. Twenty minutes and beer then I can move onto the next challenge.
View attachment 469710
as long as you don't touch the bottom of the head. any marring you do there will translate to the alignment of the head when you reclamp it down.
 
I bought a Grizzly Power Hacksaw in the fall. The coolant pump was leaking like a sieve.

View attachment 469723

First attempt was to print a gasket for the existing pump:
View attachment 469720
Finished TPU gasket:
View attachment 469721

Leaked worse. Upon closer inspection, the cover was not really that flat and not enough pressure to bridge the distortion in the cover. Any attempt to tighten it up just distorted the plastic flanges more. OK, I'll make my own coolant pump. It is pulley driven, so I had some 1/2" bearings, turned up a shaft and modeled a slick little pump in Fusion 360. Couple days later I had all of my parts printed...
View attachment 469722
The pump cranked coolant REALLY well, with my modeled and assuming more efficient vanes in the printed impeller. But the dang thing still leaked, not as bad as my attempt to repair the original, but it still leaked.

Not a successful build in the shop today and I'm not quite sure what I learned about leaks and seals as of yet, but it was fun designed, printing and building the pump itself. In the meantime, I'll set up a little submersible pump in a bucket so I can get the saw cutting again unattended.
very cool that you can just print a pump, albeit a leaky one, but still ..maybe just make the cover out of AL.
 
Thinking an O-ring might be a better sealing option for a pump. Good effort though. Mike
 
Continuing to learn about sheet metal bending - and making all the mistakes.

A while back, I did some precision bends in a custom sheet metal enclosure.

The trick here was to mill V grooves about half way through the material, in this case aluminum. I first did a test piece with two grooves, and measured the actual width compared to groove spacing. Then use that correction to offset the for the wanted size box. Box bent up nicely using no tools. Very well controlled bends, fairly sharp corners. The target dimension was hit within single digit thousandths, although the box was only 2x2x6 or so. It did have a bunch of other holes in it, which were milled before the bending.
 
I bought a Grizzly Power Hacksaw in the fall. The coolant pump was leaking like a sieve.

View attachment 469723

First attempt was to print a gasket for the existing pump:
View attachment 469720
Finished TPU gasket:
View attachment 469721

Leaked worse. Upon closer inspection, the cover was not really that flat and not enough pressure to bridge the distortion in the cover. Any attempt to tighten it up just distorted the plastic flanges more. OK, I'll make my own coolant pump. It is pulley driven, so I had some 1/2" bearings, turned up a shaft and modeled a slick little pump in Fusion 360. Couple days later I had all of my parts printed...
View attachment 469722
The pump cranked coolant REALLY well, with my modeled and assuming more efficient vanes in the printed impeller. But the dang thing still leaked, not as bad as my attempt to repair the original, but it still leaked.

Not a successful build in the shop today and I'm not quite sure what I learned about leaks and seals as of yet, but it was fun designed, printing and building the pump itself. In the meantime, I'll set up a little submersible pump in a bucket so I can get the saw cutting again unattended.
Permatex gasket in a tube?

However, that would have eliminated the fun you had working out an improved solution.
 
A while back, I did some precision bends in a custom sheet metal enclosure.

The trick here was to mill V grooves about half way through the material, in this case aluminum. I first did a test piece with two grooves, and measured the actual width compared to groove spacing. Then use that correction to offset the for the wanted size box. Box bent up nicely using no tools. Very well controlled bends, fairly sharp corners. The target dimension was hit within single digit thousandths, although the box was only 2x2x6 or so. It did have a bunch of other holes in it, which were milled before the bending.

Yeah that’s a great way to do it -particularly predating the holes


Sent from my iPhone using Tapatalk Pro
 
Back
Top