POTD- PROJECT OF THE DAY: What Did You Make In Your Shop Today?

Needed a stand/base for the anvil... saw this video and decided to give it a try... Easy to make and I can make it in two afternoons after work.

Unfortunately, the local Lowes does not do project cuttings... only two cuts per piece... since they were out of 2x12x10', I had them cut two 2"x12"x12' into 4' pieces... I then did the rest of the cutting at home... it was late, so garage door close, fan on high... still it felt like being in a sauna... Cut to 24" since the recommendation of having the anvil face at knuckle height.


View attachment 455015

Looking at the photos, looks like I added one more piece than needed. I will remove it tomorrow before securing everything... Should have been 9 pieces instead of the 10 in the photo. The base of the anvil is only 6.5"x 9"

View attachment 455016

I will finish it tomorrow after work... forgot to buy wood glue... do not want to only use screws...

I did get some wheels... at the end, it should look something like this, but lower, the guy that made this one, is 6'3" tall:

View attachment 455017

View attachment 455018

Question: What is the chain for??
nicely done. I think two purposes.
One of course to restrain it.
and also to take some of the ping out of it. The chain is loose and will absorb the sound (think tuning fork) it's loose so it can't vibrate like it would if hard... That's my story and I'm sticking to it.. but others may know for sure.
 
@wachuko

I'm interested to read your feedback on that anvil.

In the video, I see only 8 vertical 2xs, however can you have too many slots to hold tools?

The chain might be for lifting/mobility. If I wanted to damp acoustic ringing I think I'd wrap it with bicycle/motorcycle innertubes.
 
@wachuko

I'm interested to read your feedback on that anvil.

In the video, I see only 8 vertical 2xs, however can you have too many slots to hold tools?

The chain might be for lifting/mobility. If I wanted to damp acoustic ringing I think I'd wrap it with bicycle/motorcycle innertubes.

Anvil should be here Saturday. Two main issues I have seen on videos with feedback on it. One, @G-ManBart already pointed out, the round pritchel hole location is not good. Pretty much makes it useless. The second one is the shape of the horn. Would be better if it was narrower… but that one still works. For the price, and being 88lbs and cast steel, for me it is just fine. Harbor Freight sells one, same material, without those two issues I mentioned… it is 65 lbs and costs more, and was not in stock in the stores around me here in Ocala and Orlando…. Even if it was a bit lighter, I probably would have gone with it simply because I could have picked it up today.

The video…he built his for a smaller anvil. In another video he made another base with 10 for a larger anvil.

The two photos of a finished based with the anvil and chain, that one is another build where that other guy only used 9. I hope that makes sense.

Will report back once everything arrives and it is installed… then, I will make fire!!!!!
 
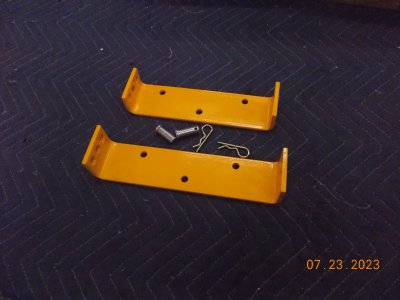
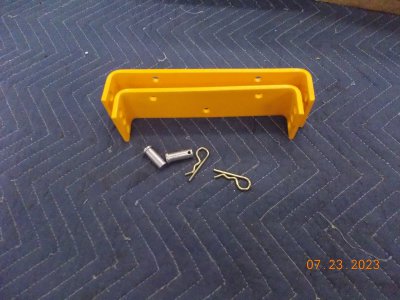
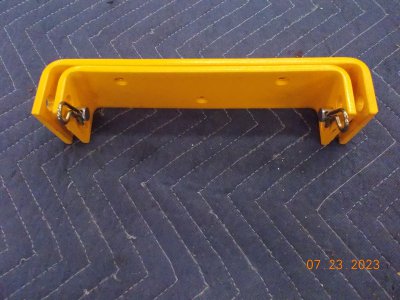
Finished up 4 pair of these the other day.
Tandem lower 3 point bracket for the IH Cub Cadet rear three point set ups.
Adds a bit more stability for rear mount sleeve hitch implements.
 

Attachments

  • DSCN8535.JPG
    DSCN8535.JPG
    441.9 KB · Views: 8
  • DSCN8537.JPG
    DSCN8537.JPG
    524.3 KB · Views: 8
  • DSCN8539.JPG
    DSCN8539.JPG
    524.2 KB · Views: 8
Finished up 4 pair of these the other day.
Tandem lower 3 point bracket for the IH Cub Cadet rear three point set ups.
Adds a bit more stability for rear mount sleeve hitch implements.
You selling on OCC ? Haven't visited lately .
 
Anvil should be here Saturday. Two main issues I have seen on videos with feedback on it. One, @G-ManBart already pointed out, the round pritchel hole location is not good. Pretty much makes it useless. The second one is the shape of the horn. Would be better if it was narrower… but that one still works. For the price, and being 88lbs and cast steel, for me it is just fine. Harbor Freight sells one, same material, without those two issues I mentioned… it is 65 lbs and costs more, and was not in stock in the stores around me here in Ocala and Orlando…. Even if it was a bit lighter, I probably would have gone with it simply because I could have picked it up today.

The video…he built his for a smaller anvil. In another video he made another base with 10 for a larger anvil.

The two photos of a finished based with the anvil and chain, that one is another build where that other guy only used 9. I hope that makes sense.

Will report back once everything arrives and it is installed… then, I will make fire!!!!!
I don't think the wider horn shape will be an issue. In fact, some of the really best anvils out there have similarly proportioned horns. A lot depends on what you're doing. For someone doing horse shoes, which are fairly small diameter, a thinner, pointier horn might be a benefit. For folks really drawing out material (think taking a block of tool steel and drawing it out into a knife blank) forging on the horn can be efficient so having more mass there is a benefit. An anvil is really just a bunch of shapes to be used so variety is a good thing. Heck, I have a beater anvil with a chunk broken off the face leaving a small strip of top plate in one spot...it's absolutely the perfect width for straightening things with a tight arc and I use it all the time....and that anvil is on the floor in the corner!

The chain above is intended to dampen the ring. Sometimes it helps, sometimes not so much...kind of depends on the anvil and the stand combo. A friend of mine has a full-time blacksmith shop with half a dozen anvils set on wooden stands. He uses a router to open up the top of the stand in the shape of the anvil base, makes it slightly oversized and lays a couple of sheets of lead in the recess before securing the anvil to the stand....very quiet. I put all my anvils on tripod steel stands that I make and once the anvils are clamped down they aren't terribly loud even though a couple have a pretty loud ring by themselves.
 
There is trickle charge then float charge.

Not even close to same thing.

Trickle charge is just that, a limited current source.

Float charge is voltage controlled.

My switch had a 2000 Amp "float charge" after a commercial power outage...

There is actually other stages, bulk snd absorption, float is when the battery is fully charged so it just floats.

It is a precise controlled VOLTAGE.

VRLA battery is happy with .1% C, where C is the 8 hour rate.

A 100 Amp battery is happy with 0.1 Amp float.

Battery minder is voltage controlled and floats well.

Battery tender brand run a bit hot and may ruin the battery.


Sent from my SM-G781V using Tapatalk

I agree! Lead acid batteries are extremely fussy and can be ruined and or life reduced if they are not kept happy. I have about 15 of these. https://www.amazon.com/gp/product/B074KK8RCW/ref=ppx_yo_dt_b_search_asin_title?ie=UTF8&psc=1 Always on batteries that sit for extended periods. I also have a service station type charger (30 years old) on wheels, but only use it if there is a need to get going fast, as in I left something on and killed the battery in a vehicle that is needed NOW. A battery should always be recharged at the same rate it was discharge if you want it to last. Sometimes there is just no other way to go but the fast charge.

Aaron
 
Another dump run in a minute . Steel and plastic . Will try to get the large table in the garage later today , wish me luck ! :grin:
 
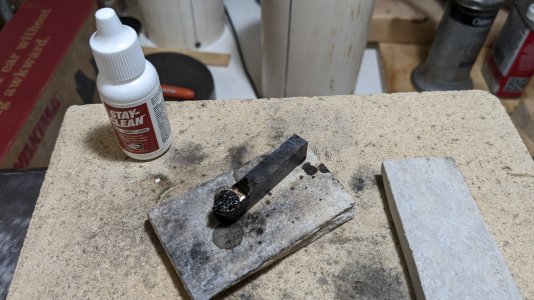
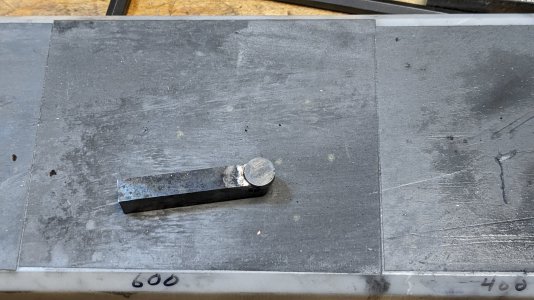
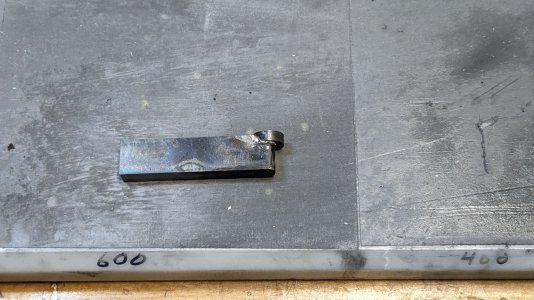
so I tried my hand at making a carbide braze up.
I have these round 3/8 carbide cemented pieces. I wanted to test brazing them with simple propane and silver solder.
so I took a small piece of hot rolled, cleaned it up a bit (wish now I had cleaned it up more), pocketed it with a 3/8 end mill and silver soldered the carbide in.

I put two tiny pieces of silver solder under the carbide (real tiny) and wetted the area with flux. I heated the piece up, and added more solder to the back edge.

I'm amazed how long that piece was hot after. I could move it around with a tweezer for 5 to 10 minutes. So that carbide really held the heat in.
But that gave me time to add more solder, and use a q tip to clean up the solder with flux without causing the carbide to crack from shock.

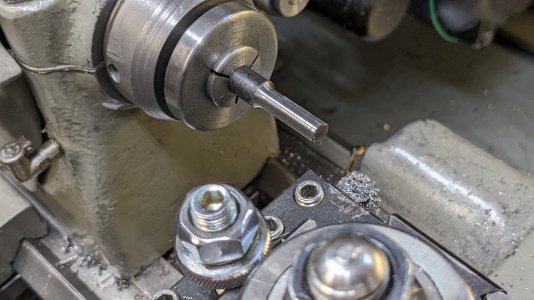
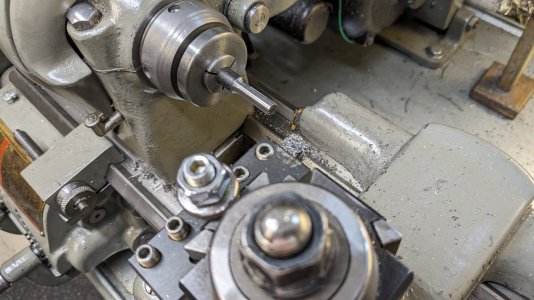
To my surprise the low temp silver solder (Harris) works well. And it held up on an interrupted cut too.

I was thinking of putting a negative rake on so it has relief, but I can tilt the tool to play with that. If I like that, I can build a new one.
so now I know, I can do it without Acetylene/Ox or propane / ox.

I have some other shapes that I can use too.

PXL_20230726_143728690.jpgPXL_20230726_143925503.jpgPXL_20230726_143929177.jpgPXL_20230726_144330508.jpgPXL_20230726_144336580.jpg
 
To my surprise the low temp silver solder (Harris) works well. And it held up on an interrupted cut too.
What solder alloy did you use? There are silver solders = brazing, and silver solders = electronics soldering. I've used both for mechanical purposes. One is significantly hotter and stronger than the other.
 
Back
Top