Pretty sure I need a mill part 2 cleanup

Great job! I hadn't realized that it has forward/reverse. The manual that came with mine suggested that this was a factory option. Can you tell if yours was delivered that way or if a prior user modified it?

What is your slowest RPM? Mine is 120 RPM and I'm starting to understand that that can be a limiting factor with HSS tooling. For example, a 4 inch HSS slitting saw should be run at about 85 RPM, AIUI. The same for a fly cutter with HSS.

Craig
Thanks Craig
As far as I know the mill came with F/R switch. Appears to match the one in Pontiac 428's picture so thinking it was standard on this era drill/mill.
120 RPM is the lower limit on mine also, I'm so new to this I just learned something about spindle speeds!
steve
 
I have an older hf model. Are the brass buttons only on newer models?


Sent from my iPhone using Tapatalk Pro
Mikemil,
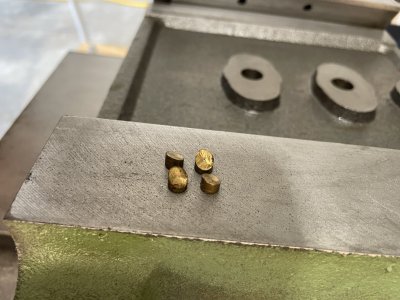
I'm just gaining knowledge on these mills so don't have an answer on that. Does appear that there a number of variations out there though. The brass inserts protect the gibb from damage from the adjuster screw, would make sense that it was a standard part of the design.
If you know what year your mill is there may be a chance of finding the original parts diagram to verify. Mine was built in 1998 according to the stamp on the motor.
steve
 
Now you need a power feed and a DRO. The RF mill really comes alive with these capabilities. Here's a pic, just so you can see how I mounted the quill scale for the DRO, because a picture is worth a thousand words. Best mods ever!

View attachment 416092
Such an enabler :)
Been going over the touchDRO info and thinking I will go down that path so it's on the agenda. Have to keep myself from ordering parts and get the house move out of the way.
Power feed I can understand now, keep in mind I have never cranked a handwheel in my life until this and it was a eye opener the first time I went end to end with the table. That's a lot cranking.
Thanks for the visual and the input!
 
Last edited:
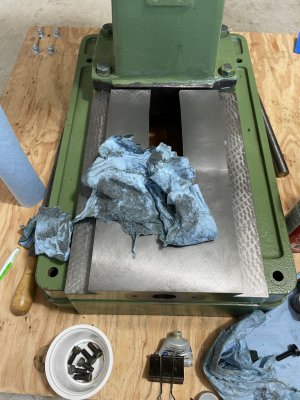
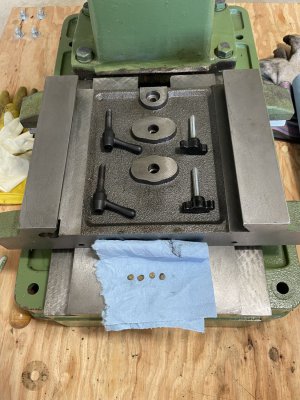
Wrap up on the cleanup.

For me the process was more to educate and it fit into my time allowed for short work sessions so why not.

Hope the pictures combined with the other RF30 work threads will be a good artifact for others who might come along. Guessing these machines are going to be around for some time as they seem to have a niche.

Could have structured things better, it is what it is though.

As an FYI my mechanical background is need based, have spent many years with a wrench in my hand and not intimidated by basic mechanics.

Observations
  • Outside of the spindle internals these are fairly basic machines
  • Handwheels – mark and check orientation before removing , looks like they are drilled on the shaft and not interchangeable.
    • Lot of drill swarf still inside the wheel
    • SAE allen head
  • The amount of machine grit embedded into everything was surprising although I don’t know why. Obviously not a lot of factory time spent on cleaning.
    • Green ScotchBrite is you friend here (gentle hand scrubbing), trust me there is no surface finish so fine that it’s going to damage it.
    • The actual V’s and table top were not bad from a grit perspective.
    • Blue Scotchbrite simply did not work to get the grit out.
54E9D64A-75D3-40D9-B97B-8504C99B044B.jpeg
  • The infamous brass button inserts – Behind the gibb fine adjustment knobs on the saddle. No way to access or remove without some futzing around (maybe fishing with some sticky grease on a probe)
    • Was not clear in my mind where these were and got lucky when I removed the saddle, no chase across the garage floor at least.
    • Orientation going back in is important
AFDFD9B4-4745-4B2C-850F-8A503E091DD1.jpeg

8FBE4801-FB50-41E5-B4A8-4BEE81D2782D.jpeg
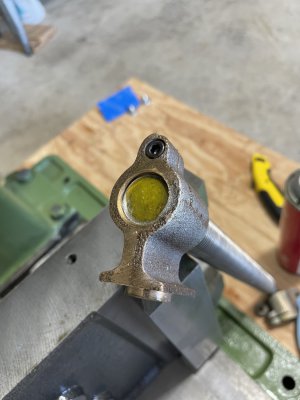
  • Spindle nut is lefthand thread (as called out by others). Had it been tight it could have been a buba moment as my tool set does not include fancy flat jaw monkey wrenches and my big ass crescents, ¾” drive sockets are at the other house. Buba avoided by shoddy assembly work.
  • Majority of the non-critical bolts/screws were finger tight
  • Both leadscrew nut adjustment screws were sitting loose in their holes
    • removing the leadscrew lets you fine tune the adjustment nicely
      F9381B7F-2ED6-4FC8-8C3F-CCF06F99F19C.jpeg
  • Knocking the harsh edges off things with a file was a plus
  • The machine has never been used, not a single chip was found while cleaning
And a big thanks to all those who contributed and helped along the way!

steve
 
DeadGuyAle, It's been a while since you posted this thread, but I wanted you to know it has been invaluable to me. I just picked up an older RF-20 and had to disassemble it into manageable size chunks for me to manhandle it down into my basement. Your pics sure saved me a lot of guess work and errors. Thank you!
 
DeadGuyAle, It's been a while since you posted this thread, but I wanted you to know it has been invaluable to me. I just picked up an older RF-20 and had to disassemble it into manageable size chunks for me to manhandle it down into my basement. Your pics sure saved me a lot of guess work and errors. Thank you!
UtTex
Good to know that the wandering collection of posts was of help!
Really glad I didn't have to move mine up or down stairs, just getting it out of the truck was challenging enough.
Thank's for chiming in and have fun with your mill.
 
Really glad I didn't have to move mine up or down stairs, just getting it out of the truck was challenging enough.

As a guy who did move his RF-30 down stairs, I can say it's "easy with a couple asterisks".
* Completely disassembled. Almost all the pieces can be hand-carried, by one big person, or two wimps. ;)
* The heaviest piece is the base, which was definitely too heavy for me to hand-carry alone. Probably would have been do-able with a helper, but I rolled it down on a wheeled dolly, with ramps over the stairs to make them wheel-friendly. No winch needed, I just held onto the rope and fed it out by hand, it's not that heavy.

The steel table that I welded outdoors was probably about as heavy, with "large and awkward" thrown in. I honestly don't remember how I got that down, maybe I had help.

Re-assembly down in the basement was also a one-person job. Putting the main head casting on over the column after the column was bolted to the base was a bit scary to do alone, so I recommend enlisting a helper for that one step. Others have put the head on with the column horizontal, then lifted the subassembly, but then you need something like an engine hoist, or chain fall from the ceiling. Both of which I have, but it seemed expedient to just lift it up "freehand". But then midway through lifting it, I started thinking of all the ways that could go wrong, and started to sweat a bit. So do as I say (get a helper), not as I do...
 
Back
Top