Problem with mule ears on old Colt shotgun

ScrapMetal

Active User
Registered
Joined
Apr 6, 2011
Messages
2,082
Looking for some suggestions about how to deal with a little issue I'm having with Colt. I need to remove the mule ears to repair a broken spring on one and to replace both the "ears". As you can see, someone in the past has "repaired" it before and left it with mis-matched hammers.


I have a matched set of the correct Colt hammers to replace them with but the hammers are on tight. The small hex nuts that are "holding them on" come off easily enough and the threads are fine but it seems that they are almost pressed on.


There are a few thousandths between the hammers and the side plates but not enough to get a real puller under there. I've considered trying thin strips of brass to make a "basket" around the post and yank on it but would rather hear some better ideas. I'd really, really like to avoid jazzing up the side plates any more than they are.

Note: Yes, I know it's a damascus barrel and no I don't plan on shooting it. (Well, not unless I have it checked out and also make some blackpowder loads for it. ;))

Any ideas?

Thanks,

-Ron
 
How about a couple thin wedges that you can work in behind and slowly push in from both sides. Kind of like a ball joint separator. It would have to be thin to start. And a little heat on the hammers.
 
Ron,

First and foremost, don't do anything that would be liable to leave marks on the hammers or on the finish of the side plates. This is an old gun and the last thing you want to do is leave your mark on it. Also, I would not recommend the use of heat because these parts are hardened and as little as 400F will start to temper them.

The square hole in the hammers and the shafts they mount on are likely tapered, so I would suggest making a threaded pin to screw on the pivot and tap on it with a hammer to knock the hammers loose. laying the gun on a table and lifting it a bit by the hammer while someone taps on the pin that would make it easier to loosen them. Use a pair of channel locks with a piece of leather wrapped around the hammer for protection Make the pin just long enough to hold on to and maybe crown the end of it to keep the force of the hammer blow on axis with the hammer pivot. You may need to shop around a bit for the right size tap since threads used on guns can be unusual, but places like Midway and Brownell's should have them.

I was just looking at the pics again and an alternative plan to avoid the need for a special tap would be to make a punch with a clearance hole for the thread and taper the end of it to a square shape so it clears the hammer and bears against the hammer pivot. Use something tough like drill rod and maybe even harden it a bit.

You probably already know, but this shotgun was manufactured in 1878 and is safe for black powder ONLY.

Let us know how it works out.

Tom
 
Last edited by a moderator:
How about a couple thin wedges that you can work in behind and slowly push in from both sides. Kind of like a ball joint separator. It would have to be thin to start. And a little heat on the hammers.

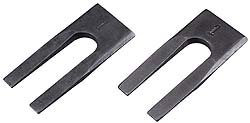
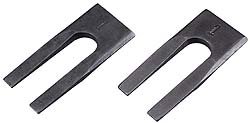
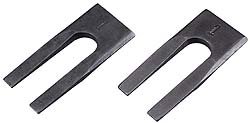
Using wedges had crossed my mind but I was concerned that anything hard enough to work could put scrape marks in the old bluing. If I wasn't worried about the finish something like these Jacobs drill chuck wedges would be perfect.

0859290-11.jpg


Ron,

First and foremost, don't do anything that would be liable to leave marks on the hammers or on the finish of the side plates. This is an old gun and the last thing you want to do is leave your mark on it. Also, I woul dnot recommend the use of heat because these parts are hardened and as little as 400F will start to temper them.

The square hole in the hammers and the shafts they mount on are likely tapered, so I would suggest making a threaded pin to screw on the pivot and tap on it with a hammer to knock the hammers loose. laying the gun on a table and lifting it a bit by the hammer while someone taps on the pin that would make it easier to loosen them. Use a pair of channel locks with a piece of leather wrapped around the hammer for protection Make the pin just long enough to hold on to and maybe crown the end of it to keep the force of the hammer blow on axis with the hammer pivot. You may need to shop around a bit for the right size tap since threads used on guns can be unusual, but places like Midway and Brownell's should have them.

I was just looking at the pics again and an alternative plan to avoid the need for a special tap would be to make a punch with a clearance hole for the thread and taper the end of it to a square shape so it clears the hammer and bears against the hammer pivot. Use something tough like drill rod and maybe even harden it a bit.

BTW, you probably already know, but this shotgun was manufactured in 1878 and is safe for black powder ONLY.

Let us know how it works out.

Tom

I like the idea of making a "pin" to thread onto the pivot. Seems like there would be less chance of slipping or deforming the square pivot post. I'll get out my thread gauges tonight and see where I'm at on it. I may try a combination of these two suggestions even. Not exactly a "wedge" but at least something to fit snuggly between the hammer and the side plate to direct the force (But Yoda... ;)) and keep the hammer from becoming skewed as it's forced off. Just in order to try and keep the square post as "square" as it should be. May be over-kill but I dearly love this gun and it would kill me to cause any harm to it. You know the feeling.

-Ron

0859290-11.jpg

0859290-11.jpg
 
If you have an olde tyme soldering copper, or a high wattage gun, you could warm up the hammer a bit if it were stubborn. As long as you only touch the hammer with the iron, no marking of the side plate. A small difference in temp can make a big difference in fit. It may even fall off.
 
A soldering gun or copper may just be the ticket (Depends on which I find first. :eek:), and would be the least amount of work. :) I'll certainly give that a try first.

Thanks Tony.

I'll post an update later tonight after the wife goes to bed and I go into "putter around" mode.

-Ron
 
Even a hot air gun will give you enough heat.
 
One would think so anyway. I was able to heat it well past the point where I could touch it with my bare hand, at least not without raising a nice blister. Unfortunately it's still on as solidly as ever. :(

Time to move on to "plan B". Best I can tell (there aren't a whole lot of thread to work with) the post is 36 tpi and the threaded portion is 0.160", so 5/32"? The thread are worn down a good deal but it's definitely not 3/16". Somewhere in between maybe but 11/64"?

Time to stare at it for a while and hope the brain kicks in. :thinking:

-Ron
 
Likely #8-36, which is UNF. Not super-special, but not going to find it at Lowe's. Drill a hole in a piece of stock to fit over it, and give it a tap or two. I still like the heat.
 
Not to sound too obvious, but have you tried Kroil?
Of all the stuff I tried over the years this one is close to miraculous.:cool:
 
Back
Top