Problem with mule ears on old Colt shotgun

Likely #8-36, which is UNF. Not super-special, but not going to find it at Lowe's. Drill a hole in a piece of stock to fit over it, and give it a tap or two. I still like the heat.

Thanks Tony. I don't have any taps or dies that are 36 tpi let alone a #8 but that should give me something to work with. Application of heat may still be in the cards but it doesn't look like it will do it on it's own. Third times a charm? ;)

Not to sound too obvious, but have you tried Kroil?
Of all the stuff I tried over the years this one is close to miraculous.:cool:

I'll have to admit, as much as I swear by Kroil, it didn't really cross my mind. The area I'm dealing with is so small and there is no "corrosion" (okay, okay, "bluing" is technically rust but....) to speak of so I figure I'm dealing with metal on metal. I'm not sure if a penetrant would do a lot of good in this case. Interesting suggestion though. I will definitely mull it over.

Thanks,

-Ron
 
Ron,
Are you looking to keep the old hammers in a reuseable condition?
If not, how about drilling the hammer down the flank of the square hole and splitting it open. Or can you get a dremel disc in there to slice it open? I dont think you have a mill do you? Could set up and mill the hammer off.

Cheers Phil

I'm not too worried about the old hammers but getting a dremel/cutting wheel anywhere near my guns gives me the "heebie-jeebies" (nervous as all get out :) ). Same for a mill. Just seems like too much potential for catastrophic damage on an irreplaceable item - or I'm just a coward. :p

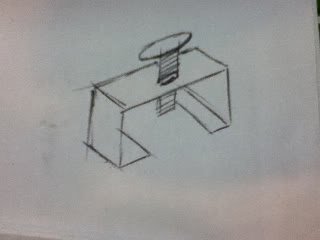
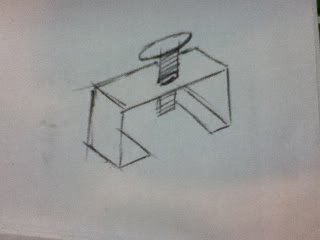
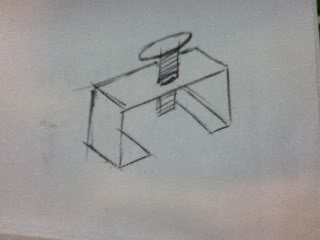
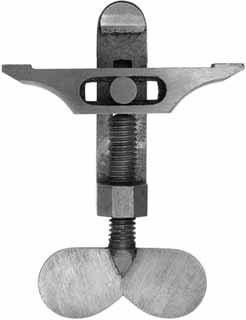
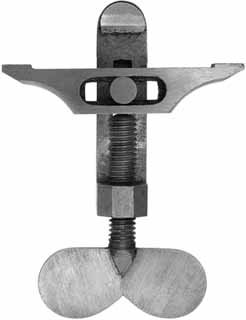
here`s a REALLY bad drawing of what my brother has just for those kind of hammers. he`s all into black powder.

that thing in the top is supposed to be a thumbscrew.

1332715110.jpg

I've thought about making a puller quite a bit actually. I just don't think that there is enough clearance between the hammers and the side plates to slip in something thick/strong/rigid enough to be effective. Kind of funny, this is the very first thing that came to mind when I saw this post: http://www.hobby-machinist.com/showthread.php/5826-Little-pullers about the "Little Pullers".

I don't think I'll have time to play with my toys tonight. Need to install a couple of p.i.t.a. ceiling fans. :rolleyes: Something about "keeping the wife happy". ;)

Thanks guys,

-Ron

1332715110.jpg

1332715110.jpg
 
One factor not yet mentioned is the spring tension the hammer is under. It may be that in the cocked position there would be one less force at work here. A few taps with a brass punch at angles to the axis may serve to loosen it up then.
 
I like the wedge idea. I believe you said you are disposing of the hammers anyway and you have a few thou of clearance between the hammers and the reciever. Why not scarafice a few feeler guage leaves to protect the receiver and let the wedges slide under the hammer on top of the hardened feeler guage stock.
 
Please don't use wedges, pullers etc.
Remove the locks from the gun and begin to disassemble properly. Once all parts are removed from the inside except the tumbler (the part the hammer is mounted to),soak the
tumbler/hammer in Kroil. Support the lock plate on a couple of bench blocks, reinsert the hammer screw most of the way and tap the hammer screw to dislodge the tumbler from the hammer. This is the normal way to remove hammers from a side lock.
Bobby


Makes sense Bobby. The only "deviation" from that, and it's a minor point, is that there are no hammer screws. The hammer sits on a square post that is round and threaded on the end. There are hammer "nuts" that retain the hammers in this case. With the threads on the posts so worn I don't think it would be a good idea to hammer a nut screwed on to them. That's pretty much where the "making of a hollowed out pin to screw on the posts and tap out of the hammers" came from. Basically replacing the nuts with a narrow nut that would fit within the "square" of the hammers.

Now, since I've never worked on this kind of action before, are you saying that I can pull both side plates/assemblies by just unscrewing the one screw on each plate? If so, that would certainly make life easier. I had just figured that one would have to remove the hammers before pulling the side plates.

Thanks,

-Ron
 
Just an "update". I haven't yet accomplished what I had originally set out to do but (thanks to Bobby's post) I have changed the working parameters a bit. Here is where it sits now...

(Just some "glamor" shots if you're interested in the inner workings. :))


Going to find out if Evapo-rust will be safe on what bluing there is (doubt it) before trying to do anything with these. You can tell where the one spring has been replaced as you can still see a slight outline of the original. That and the replacement spring was made without quite as much care.


A beautiful job on routing out the stock for the hammer mechanisms.


Still need to remove the hammers. :p :lmao:

-Ron
 
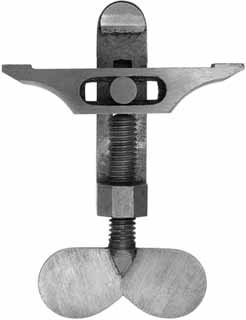
Ron, Lookin' good. That is a nice set of locks. If you don't have one, buy or borrow a mainspring vise to remove the mainsprings. Useing a pair of pliers or such has resulted in many broken springs.
Bobby
 
Will do Bobby. Anything to keep this old girl in good condition. *Warning: Possible rhetorical question here - Hmmm, now, do I buy one or make one... :thinking:

They aren't really expensive but they are a fairly simple design. Here's a "deluxe" model from "Track of the Wolf" http://www.trackofthewolf.com/List/Item.aspx/1038/1:

tool-vise-dx_1.jpg

Feck! I could really use my shaper or future mill now. :p


I really appreciate the advice.

Thanks,

-Ron

tool-vise-dx_1.jpg

tool-vise-dx_1.jpg
 
Last edited:
Back
Top