-
Welcome back Guest! Did you know you can mentor other members here at H-M? If not, please check out our Relaunch of Hobby Machinist Mentoring Program!
You are using an out of date browser. It may not display this or other websites correctly.
You should upgrade or use an alternative browser.
You should upgrade or use an alternative browser.
Procedure/methodology question on simple project
- Thread starter devils4ever
- Start date
- Joined
- May 13, 2019
- Messages
- 1,016
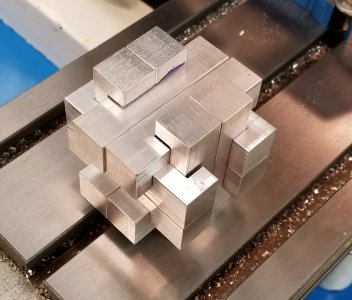
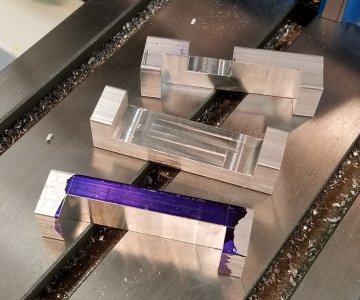
Here's a couple of quick pics. Note there is still some layout blue on one. I just used a file to break the edges, but you can see the finish on the surfaces needs a little buffing/polishing.
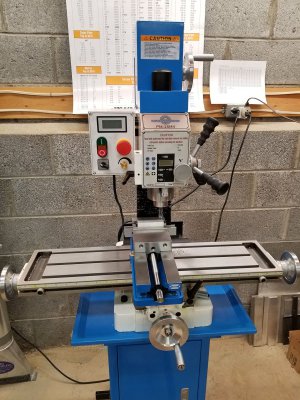
The first pic show my mill and a piece in the vise ready to get milled. BTW, I made extras "blanks" in case I screwed up. Luckily, I didn't!
This pic shows the puzzle assembled. Note the surface finish.
Here's closeup view of three of the pieces.
The first pic show my mill and a piece in the vise ready to get milled. BTW, I made extras "blanks" in case I screwed up. Luckily, I didn't!

This pic shows the puzzle assembled. Note the surface finish.

Here's closeup view of three of the pieces.

- Joined
- Sep 22, 2019
- Messages
- 940
Looks good!
Thanks for posting the pic's!
I'd be tempted to use some 400 grit paper on a thick piece of glass to smooth them up and just round the edges a bit.
I have used that method to resurface the aluminum heads for these Cub Cadets I work on.
Thanks for posting the pic's!
I'd be tempted to use some 400 grit paper on a thick piece of glass to smooth them up and just round the edges a bit.
I have used that method to resurface the aluminum heads for these Cub Cadets I work on.
- Joined
- Jul 8, 2018
- Messages
- 880
ThinWoodsMan: I don't have an air grinder, but I do have a Dremel. Would these work? Dremel
A bit pricey but should work.
I haven't (yet) tried these on the Dremel, but they work great on an air grinder and a Foredom:
80 roloc sanding discs
...and for the Foredom or Dremel you need a 1/8 arbor:
1/8 roloc arbor
unless you want to make one by turning down the arbor that comes with the sanding disks. I used amazon links as they stay live longer, but I'm sure you can find the same thing all over ebay. I have yet to see roloc disks in any brick-and-mortar store, though.
The rolocs are fast to use and have fairly close steps in grit. Maybe I'll get tired of them after awhile; for now, I'm finding them an easy way to get a decent polish on things. I even use them on lathe tools to smooth the faces after grinding. I tell myself it reduces friction during the cut, but really it's just because I like the look
As for the project, it looks good already, and really you can just hit the local true value for some maroon and grey scotchbrite (as mentioned above) to take the edge off the, er, edges.
- Joined
- May 13, 2019
- Messages
- 1,016
I stopped at the local HD and found this: Ryobi Buffing Kit
It was only $10 and I'll see how it works. Otherwise, I'll try the roloc system.
It was only $10 and I'll see how it works. Otherwise, I'll try the roloc system.
- Joined
- May 13, 2019
- Messages
- 1,016
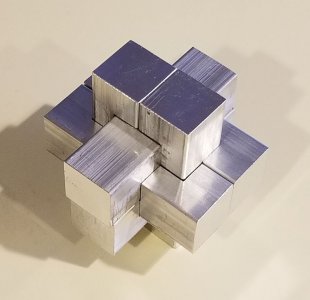
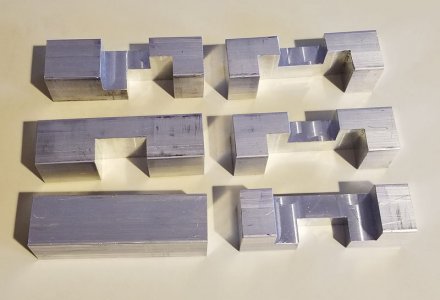
Okay, I've completed another Burr puzzle in the hopes of honing my skills. My goal was to keep tolerances within 0.001" and I think I did it. This one is 6 pieces with 3 of them identical. I didn't rely on the hand wheels or quill DRO on the mill. I used them as a rough guideline and kept using my outside mics and depth mics to get it as close to perfect as possible. I found that the hand wheels and quill DROs were close but off by at least a few thousandths (or more).


- Joined
- May 13, 2019
- Messages
- 1,016
Yes, I changed the clearance on this one. The first one had 0.010" clearance and on this one I used 0.005" clearance on all dimensions.
I'm surprised you could tell.
I'm surprised you could tell.
- Joined
- Dec 7, 2018
- Messages
- 653
It was easy to see looking at the gaps in the photos.....but really nice....perhaps go for 0.0025” clearance.....Yes, I changed the clearance on this one. The first one had 0.010" clearance and on this one I used 0.005" clearance on all dimensions.
I'm surprised you could tell.

