

-
Welcome back Guest! Did you know you can mentor other members here at H-M? If not, please check out our Relaunch of Hobby Machinist Mentoring Program!
You are using an out of date browser. It may not display this or other websites correctly.
You should upgrade or use an alternative browser.
You should upgrade or use an alternative browser.
Rear mounting a parting tool ... if you can
- Thread starter mikey
- Start date

- Joined
- Dec 20, 2012
- Messages
- 9,422
All this science, and not a single picture?
I don't got a lot of pics of parting - it's sort of a non-event, you know? What are you interested in?
I do have some shots from that article I cited and that might suffice.
Here is the tool making a grooving cut in 12L14 mild steel. The work piece is around 1-1/4" OD at the cut. The blade is a P1-N, about 0.040" wide. Depth of the groove is 5/16". In this shot, I was trying to get the blade to chatter by extending it out to near max extension:

As you can see, the blade cuts cleanly - see the finish in the groove? I made side by side cuts so I could fit a LH turning tool in there.

Speed was around 1200 rpm:

So, you have a tool that can be put into action in under 10 seconds. Center height is already set solidly and accurately by the tool post itself so you aren't fussing about getting the tip on center. The blade is automatically perpendicular to the work because the tool post is fixed in that position. The blade is held very rigidly by the post and the girder-like construction of a P-type blade allows it to extend without much flex at all so extension is not critical and cuts are very accurate. Because of the rigidity and alignment of the tool, cutting speeds can be much higher so feeds are easier to achieve and chatter is non-existent. Because of the rotation of the work, cutting oil gets to the point of cut instead of being carried away by chips so the cut is cleaner and cooler.
What's not to like?
I use this tool to part, groove, demarcate and create space for turning tools. One use that really speeds things up is creating a shoulder cut to depth. Say I need to create a class 3 thread up to a shoulder that is located at a precise distance from the tip of the work piece. As you know, this requires the work to be accurate to within a few tenths. I use the parting tool to locate that shoulder at the desired location while also feeding in to the desired OD + a thou or two. I usually make two side by side grooving cuts and then I can just rough the work down to the level of those cuts without having to measure or worry about going too deep. As I near the cuts made by the parting tool I can begin to measure and cut to come in dead on size. Then I come back in with the parting tool to create a thread relief and turn the thread, then part the work piece off . It's all seamless and fast because the parting tool is already in place; I just need to turn the cross slide hand wheel to bring it into action.
This parting tool is the most useful accessory I have made for this lathe and I use it on almost everything I turn. It works without calling attention to itself or requiring much from me while enabling me to work faster and more accurately. One of the reasons I bought my Emco Super 11 is because it has t-slots along the entire cross slide. I probably would have bought it anyway because it is a superb lathe but the t-slots all but sealed the deal, and it was my experience with my Sherline parting tool that made me feel that way.
Last edited:
 Going to make one for Emco Compact 8 project
- Joined
- Apr 10, 2021
- Messages
- 593
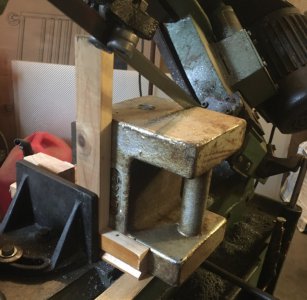
Here is my rear post set up for a Smart Brown 1024. I'm a hobby woodworker fairly new to machining so take it for what little it is worth. The slide has six BSW 5/16 threaded holes for a rear post that must have been an option at the time. The first piece was drilled to use those holes. The center ones are through and can be nutted which is good since cast iron likes compression. The block is recessed to help with any torque and not depend on the bolts.
The. Second piece has about 3/4" of lateral adjustment and I turned a 20mm post to accept the Multifix size A. I also have a Dickson that came with the lathe that may be a better choice. I'll make a sleeve if i decide to use it.
I had not thought about running a parting tool upside down but my 1024 is vfd controlled so reverse is pretty instant. Dave
- Joined
- Sep 1, 2020
- Messages
- 794
I think the big advantage of an upside down tool is that the cutter “unloads” with rigidity insufficiency (all lathes find this point somewhere). The normal rotation makes the tool “dig in”. Reduction in chatter seems inevitable.
- Joined
- Sep 1, 2020
- Messages
- 794
Talk about buying metal by the pound!Alright. I'm convinced. Here I go!!!
")
I agree Rick. Kinda the same principal behind the parting tool holders some folks use, that have a slot cut in such a way that it act's like a torsion spring. The geometry is such that when the tool digs in or chatters, it allows the tool to pivot away from the work, rather than dive in harder as does a conventional tool holder. Kind of a pressure relief valve.I think the big advantage of an upside down tool is that the cutter “unloads” with rigidity insufficiency (all lathes find this point somewhere). The normal rotation makes the tool “dig in”. Reduction in chatter seems inevitable.

Gooseneck or spring-tool holder
Since I bought my mini lathe, a decade ago, I had never managed to make a decent parting-off procedure. I always put the blame on the tool so I moved from a simple blade tool (like the one in the next picture) that I have bought with my lathe... ..to a more sophisticated one with inserts...
www.hobby-machinist.com