Receiving and setting up a new Precision Matthews PM1054TV 3 phase mill

johnnyc14

Active User
H-M Supporter Gold Member
Joined
Feb 17, 2013
Messages
336
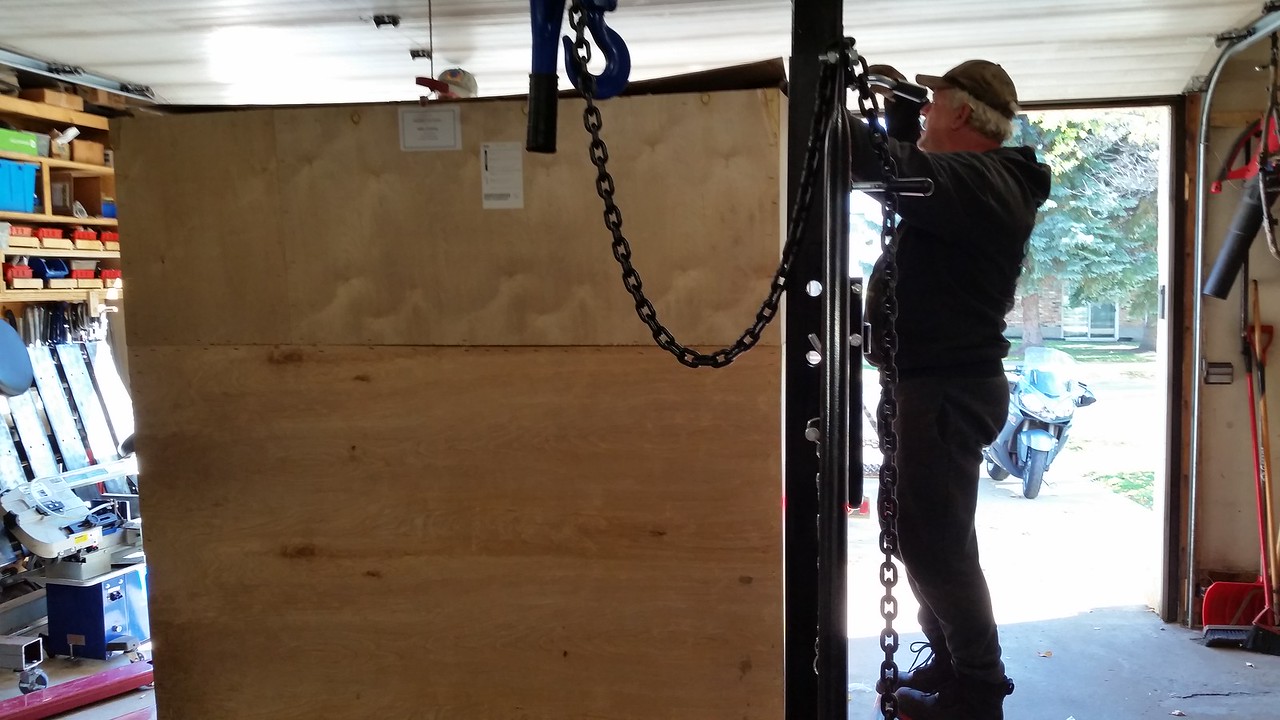
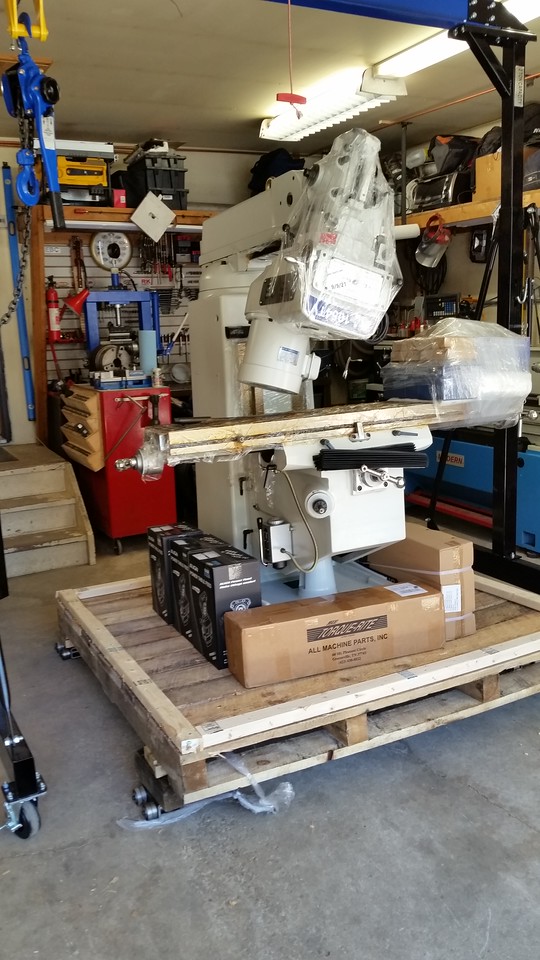
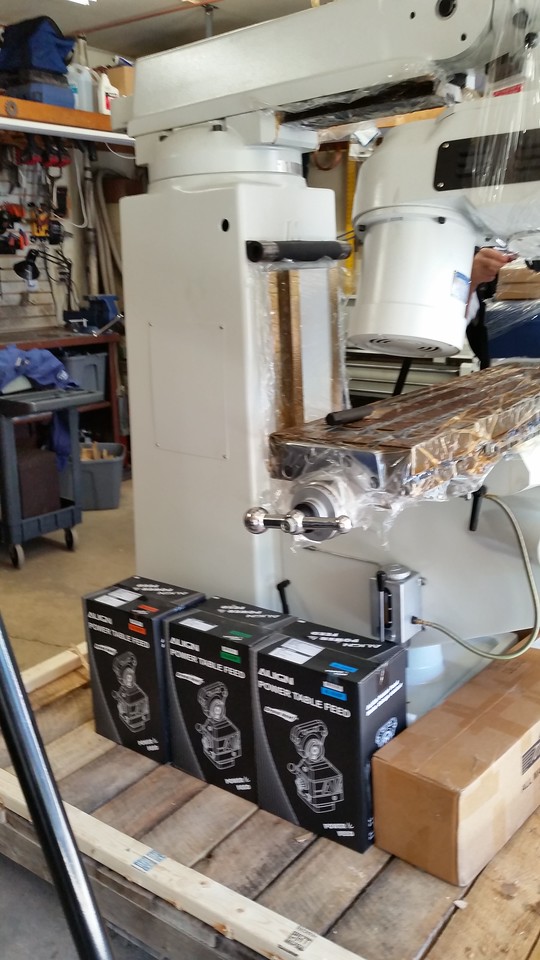
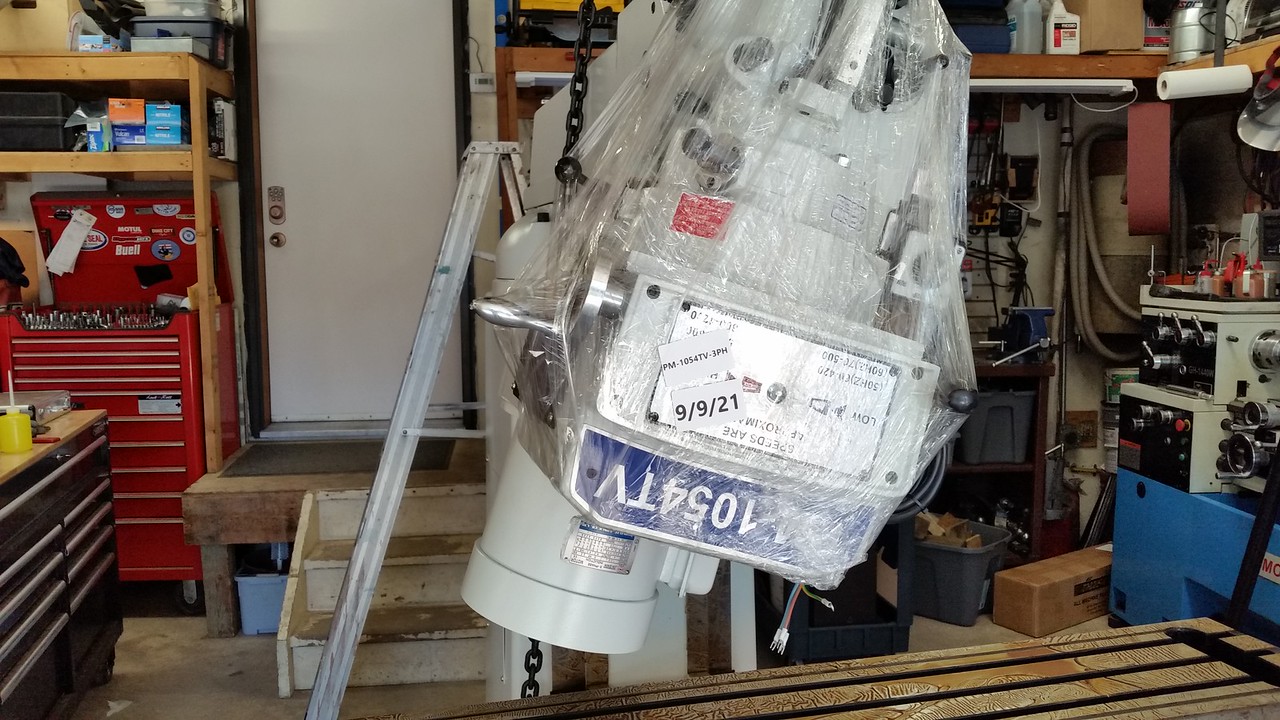
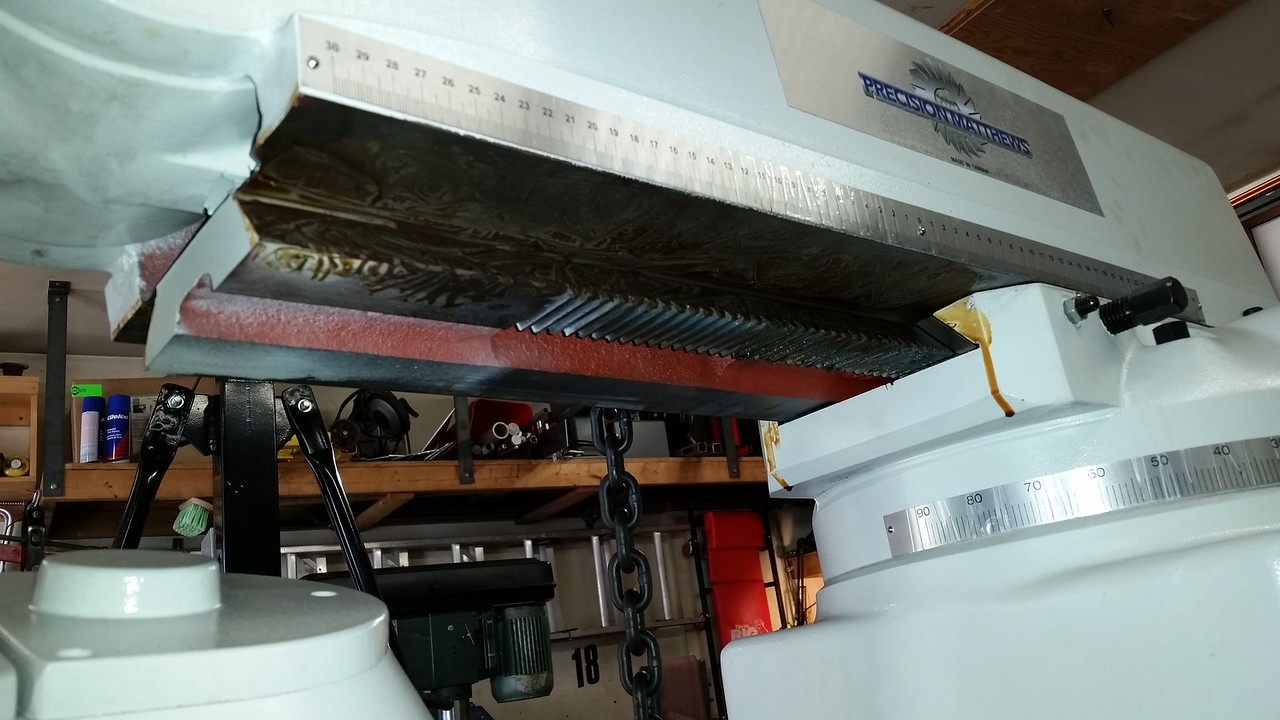
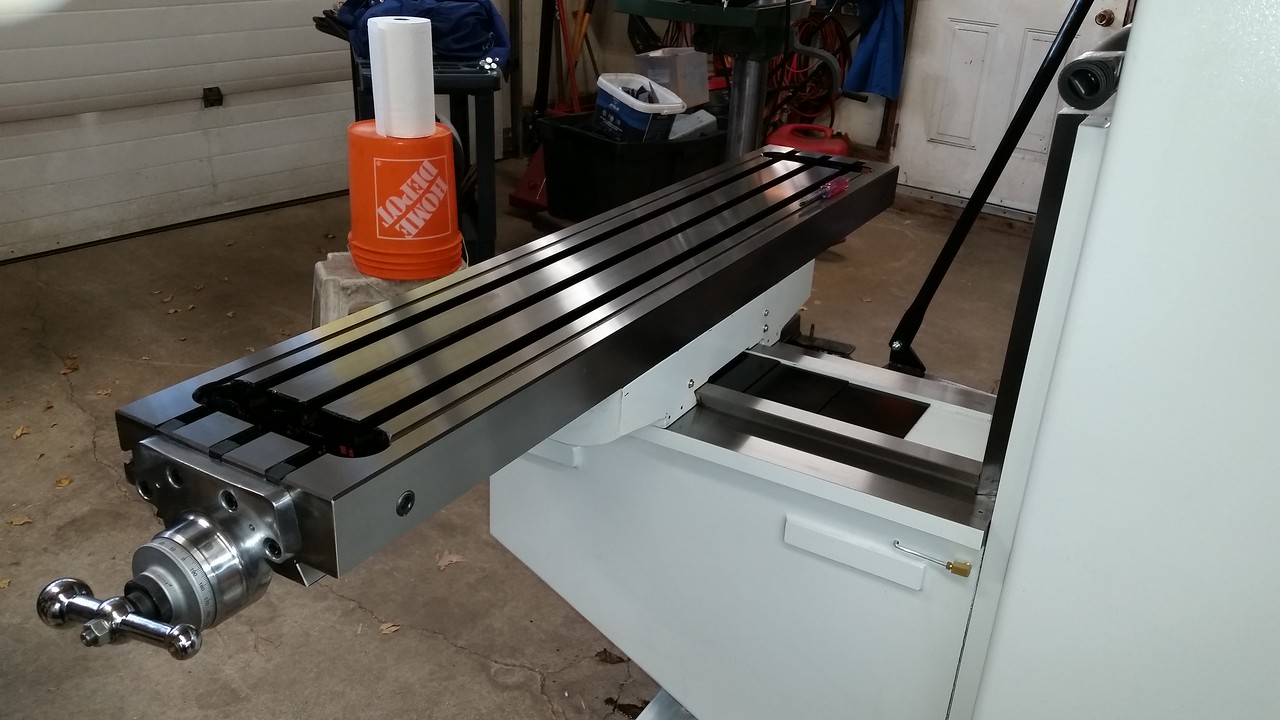
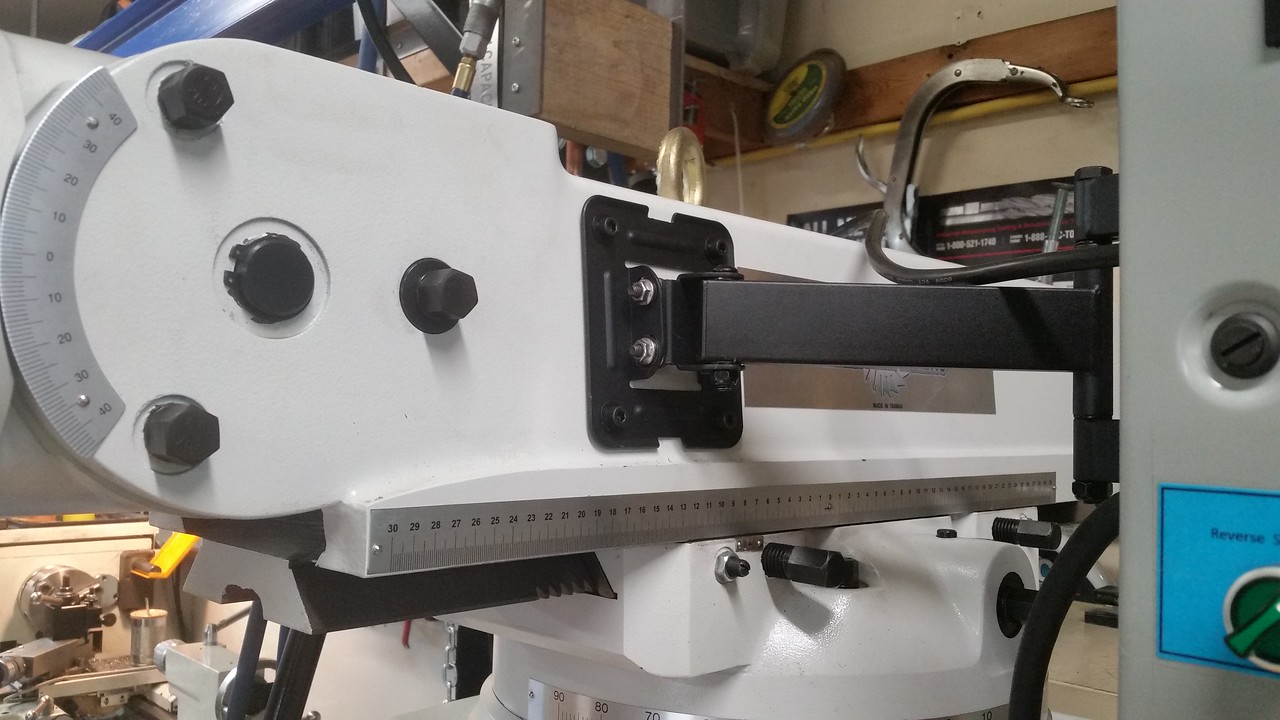
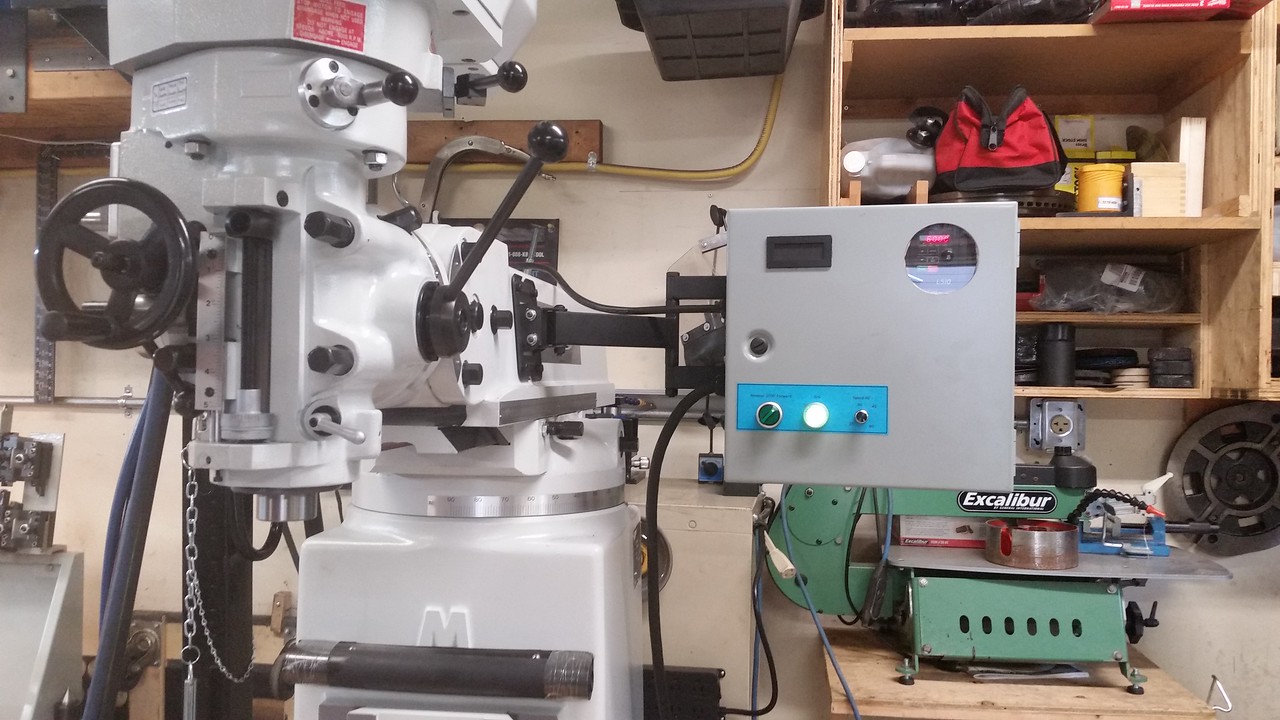
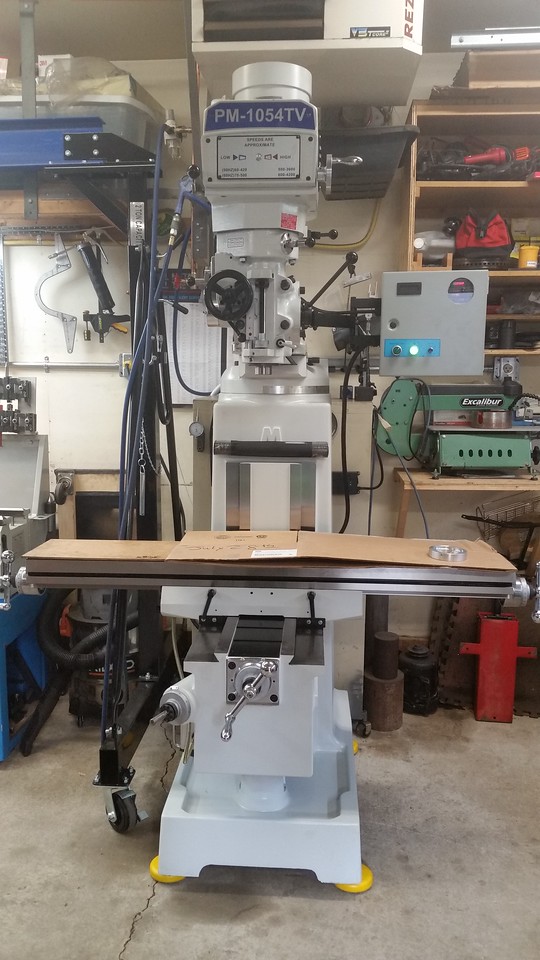
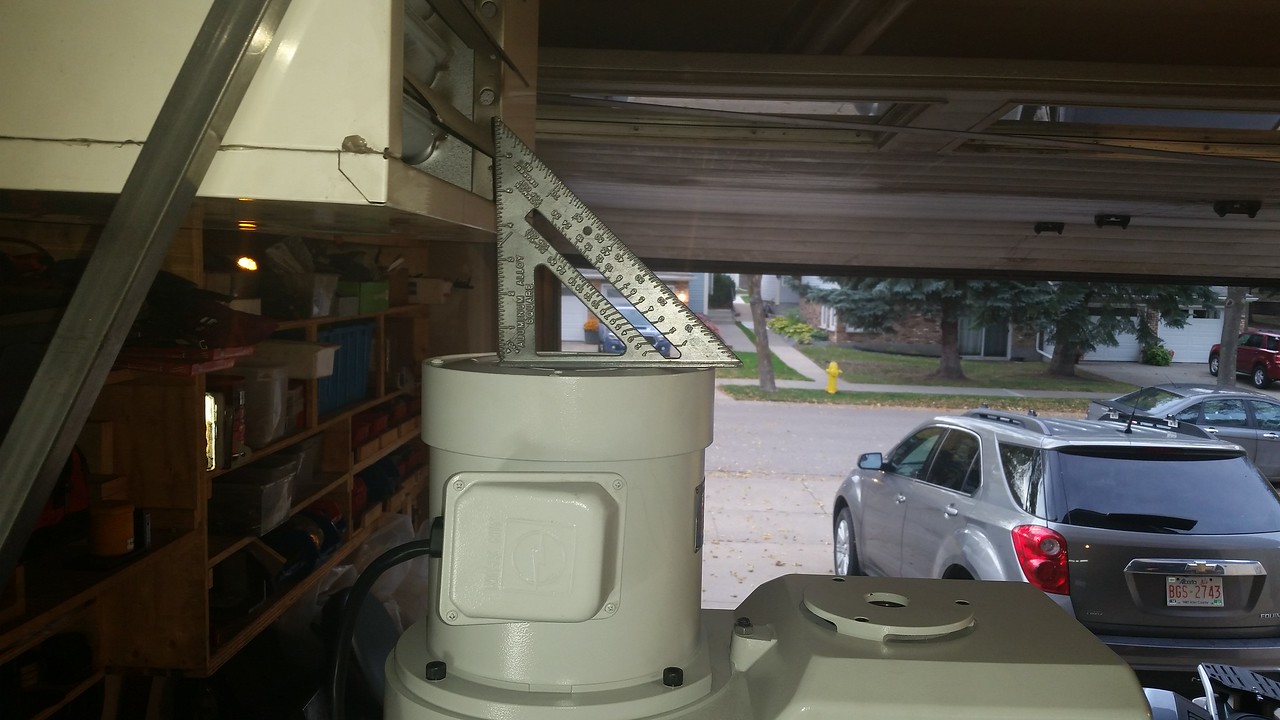
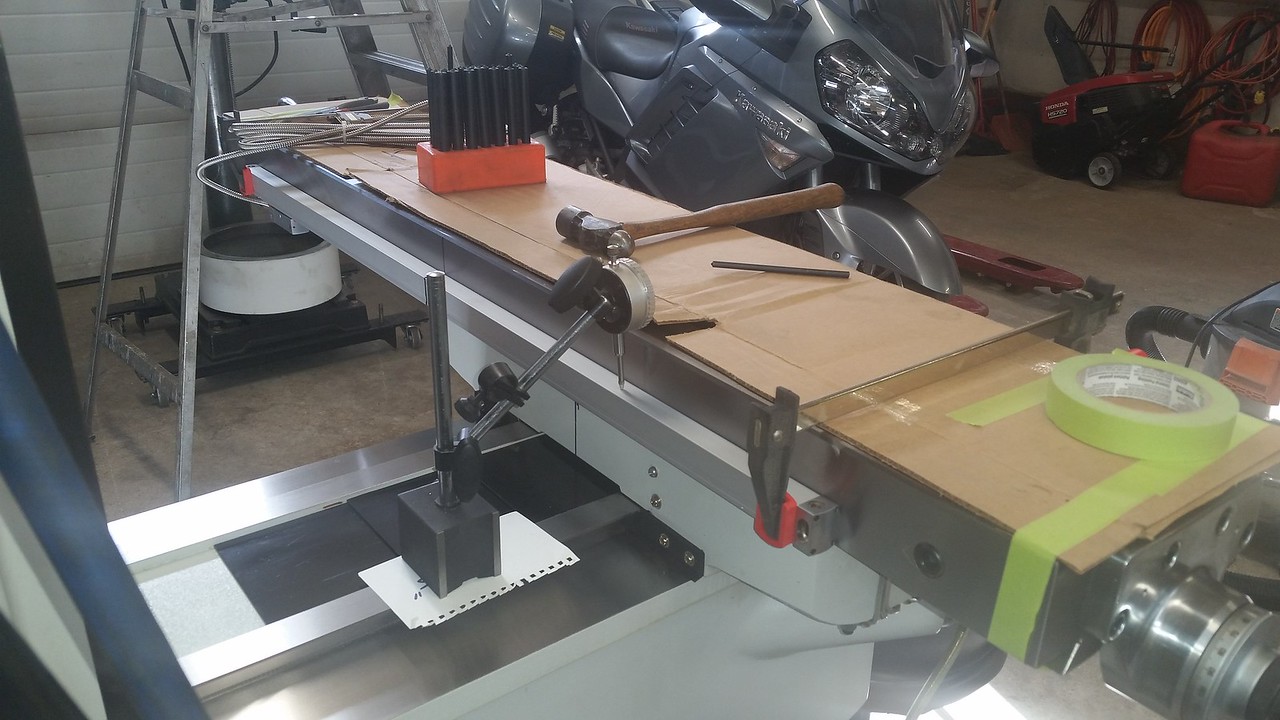
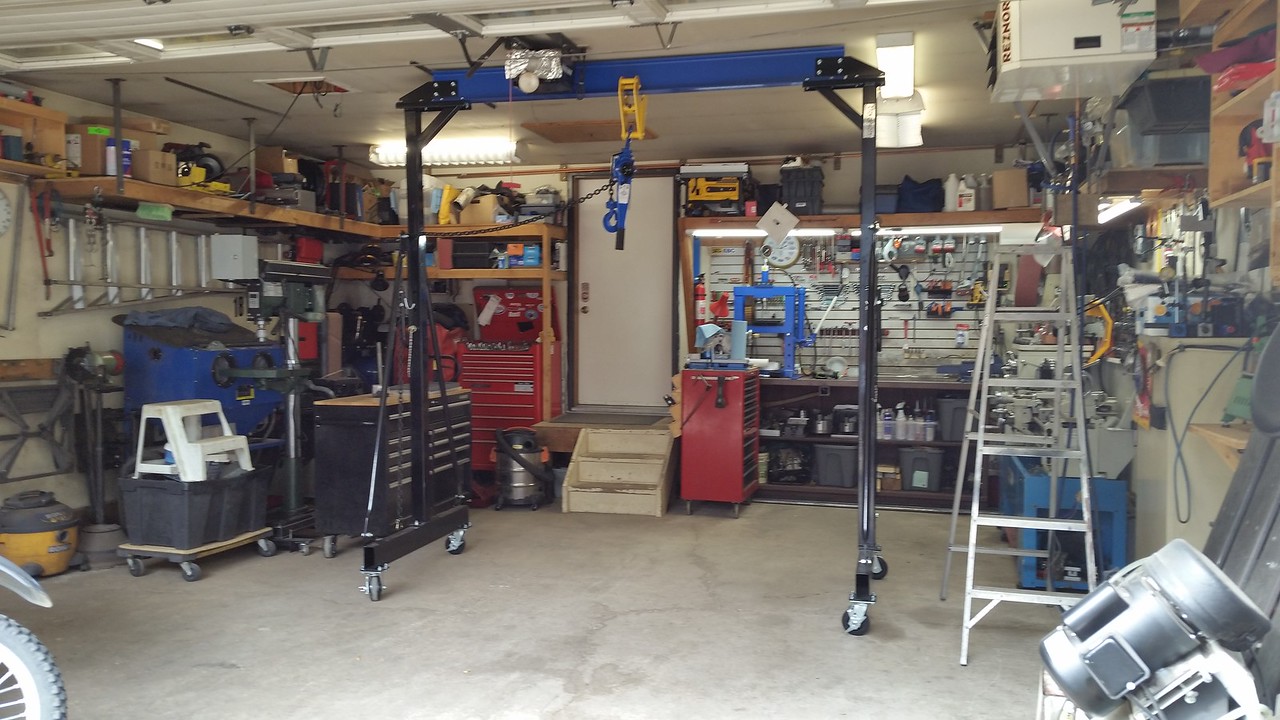
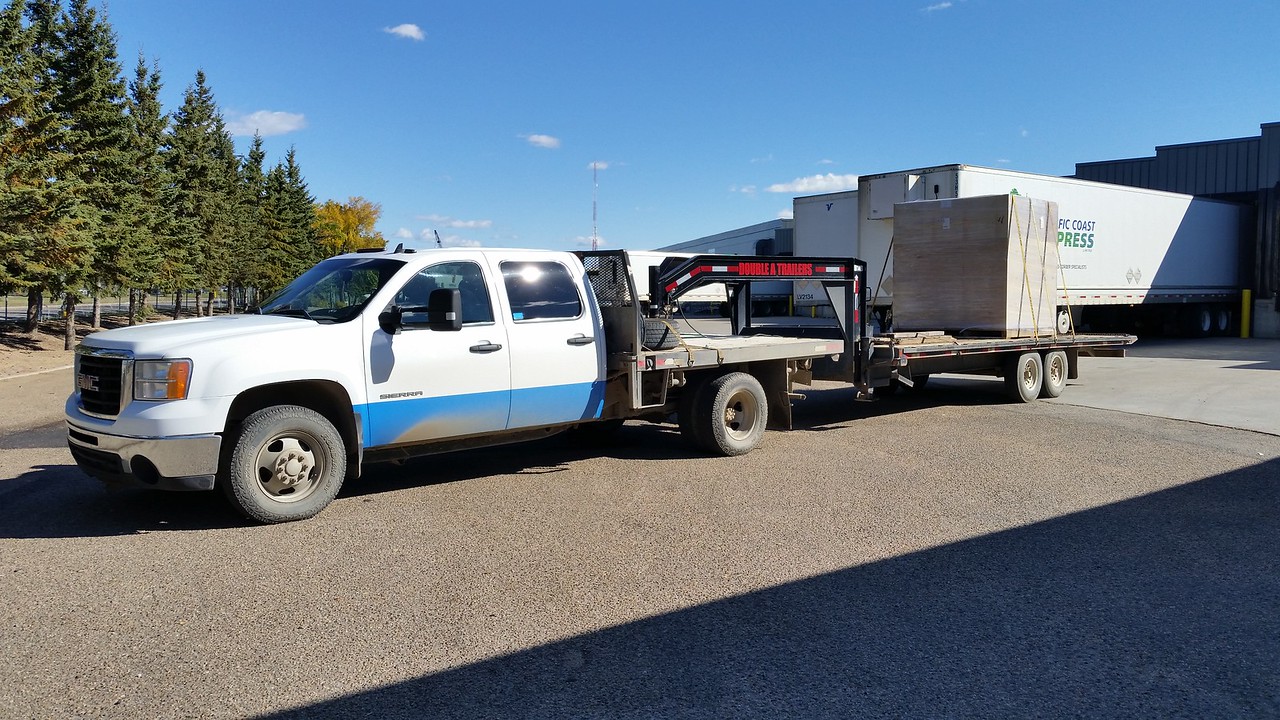
I ordered a new PM1054TV on May 17/21 and after a few shipping delays it arrived at the Pacific Coast Express trucking depot in Edmonton on September 23/21. I had arranged to have my friend Glenn meet me there with his 1 ton truck and tilt deck cargo trailer. We got the new mill home safely. I had started the day getting the gantry crane adjusted to the highest it can go in the sweet spot in the garage where there is nothing on the ceiling to hit. The beam clamp and chain hoist in place and ready to go.


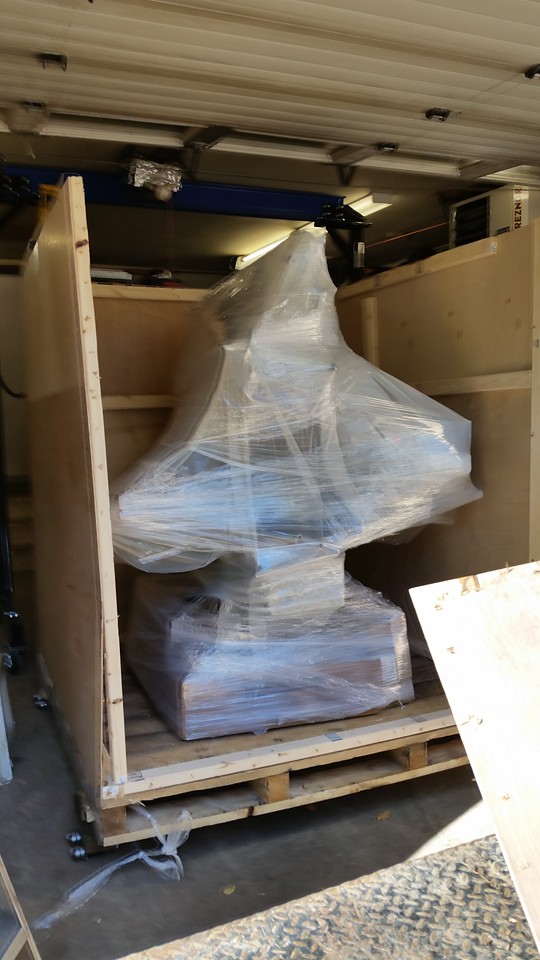
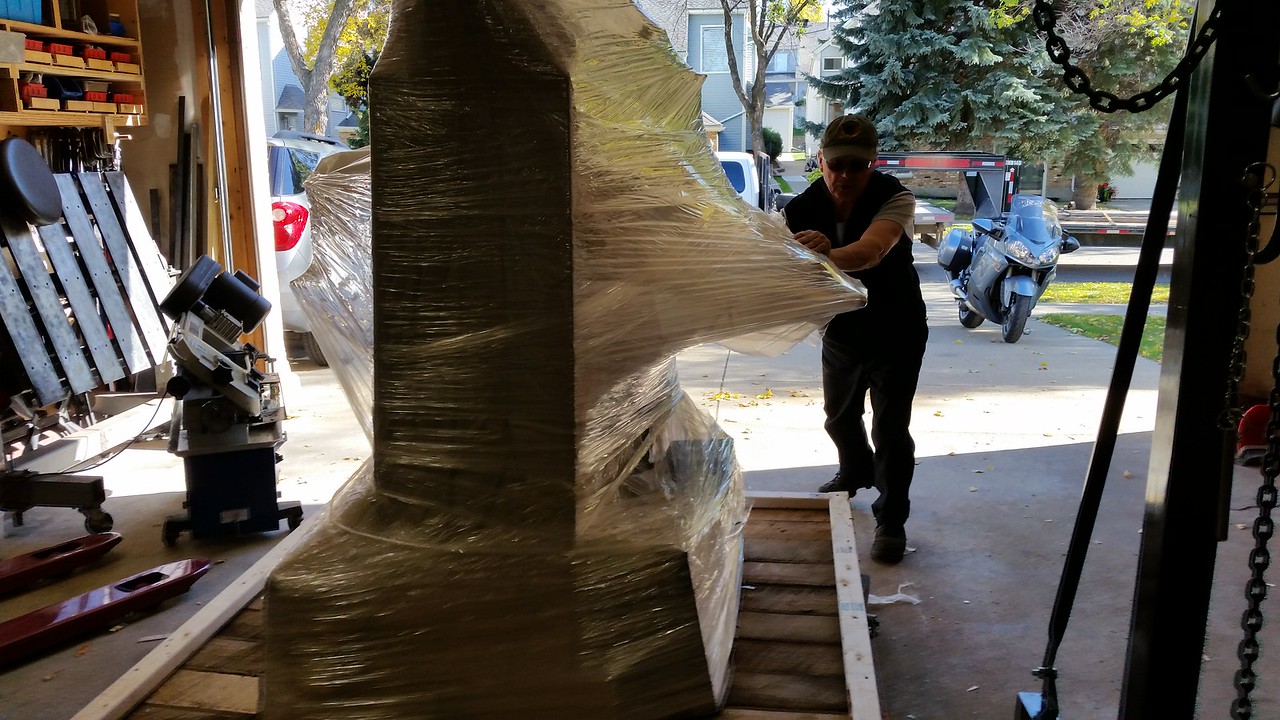
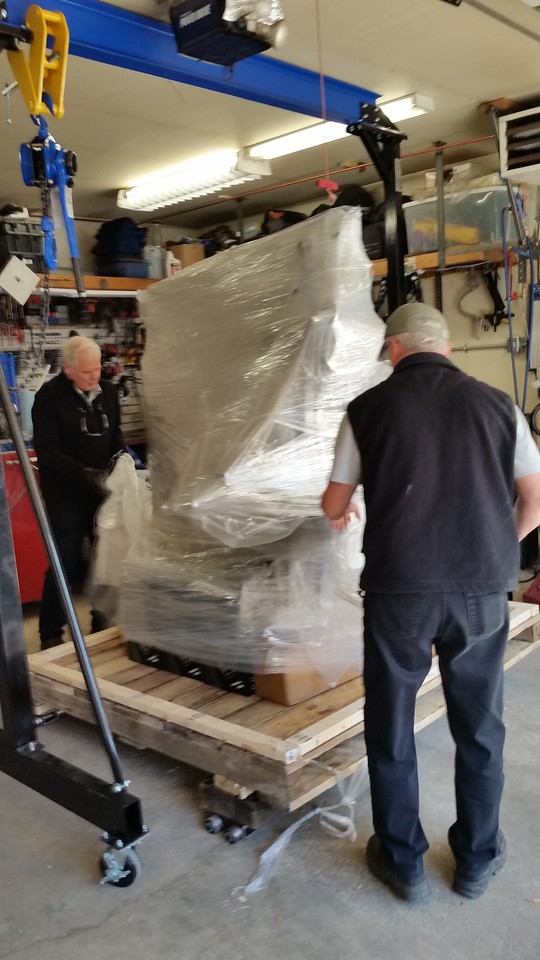
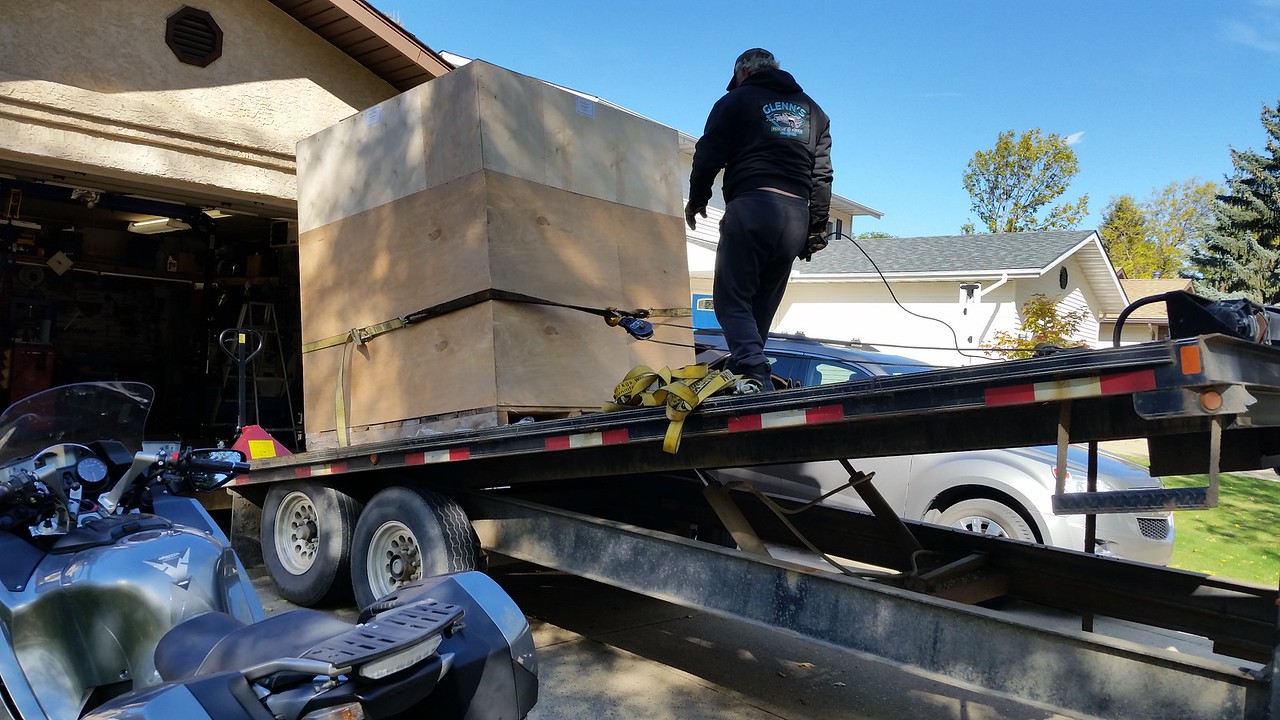
I met Glenn at Pacific Coast Express and they loaded it onto his' trailer deck. The crate was 66" X 66" X 76" tall and the fork lift operator made short work of it. The crate was in perfect condition which made me very happy.


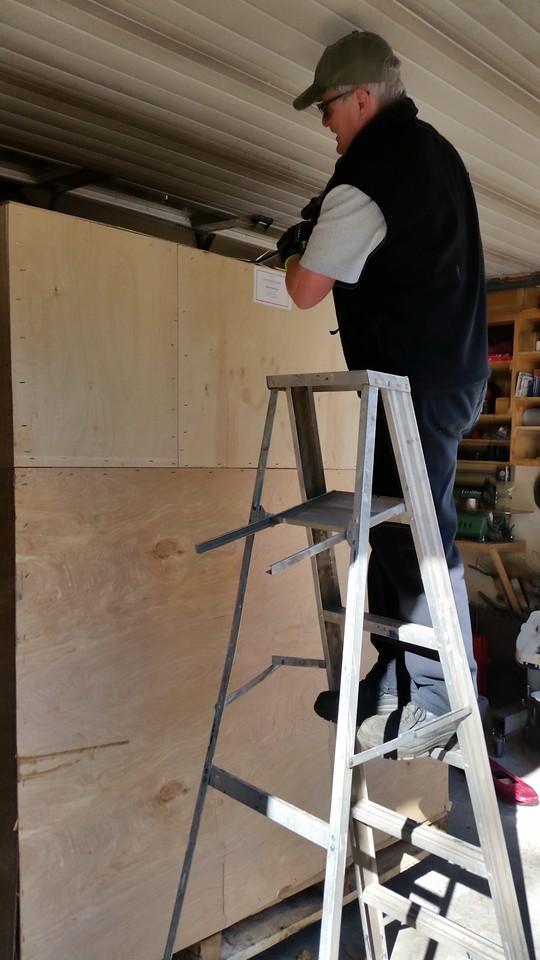
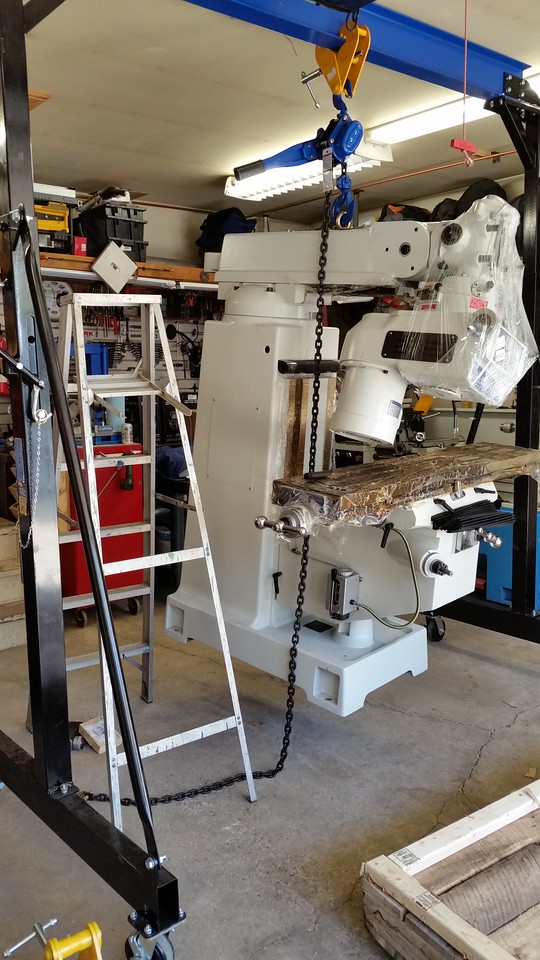
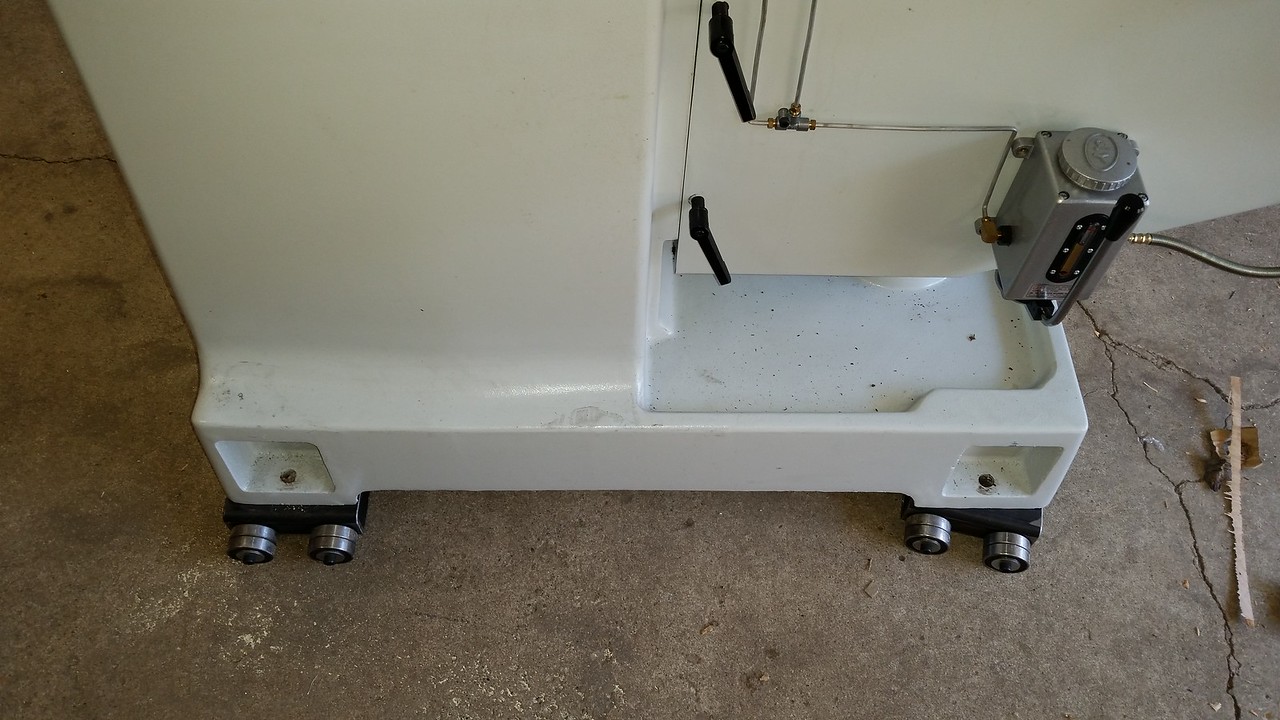
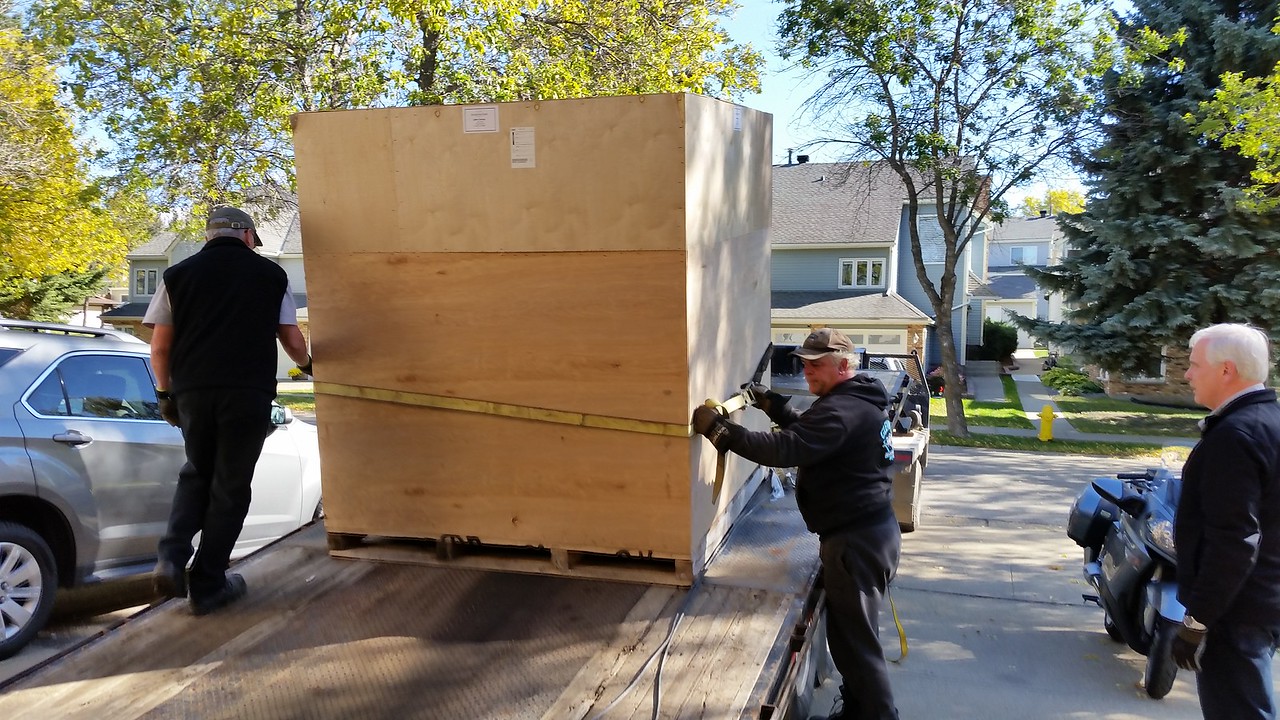
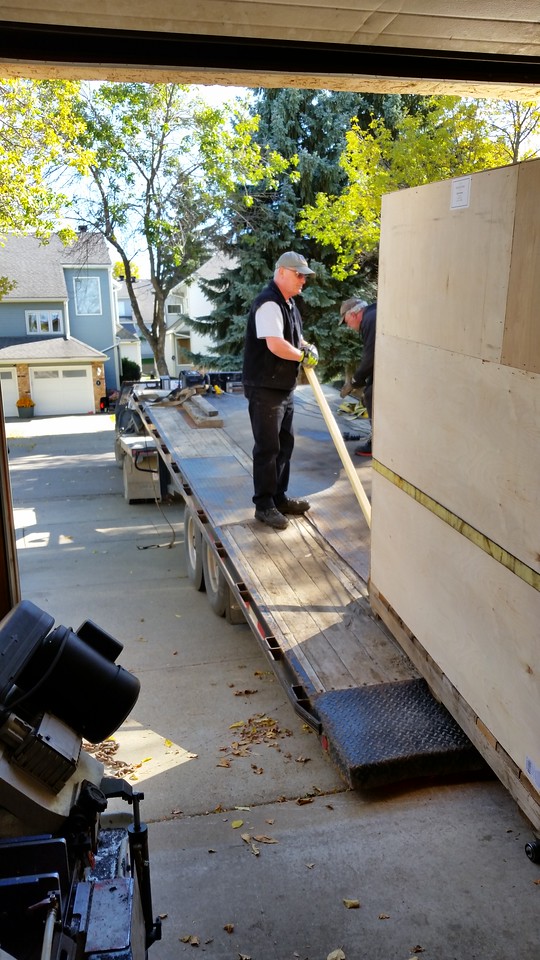
Once at my place Glenn got the trailer backed in with it's tail aligned with the door opening and we double checked the clearance through the 8' tall door opening. We put a strap around the belly of the crate and connected it to the winch cable then put the pallet jack under the downhill side. We lifted the crate just high enough so it would roll down the deck slowly as the winch was rolling the cable out until the bottom edge was off the trailer. Then with the pallet jack raised as high as it would go we put the machine skates under the bottom corners.


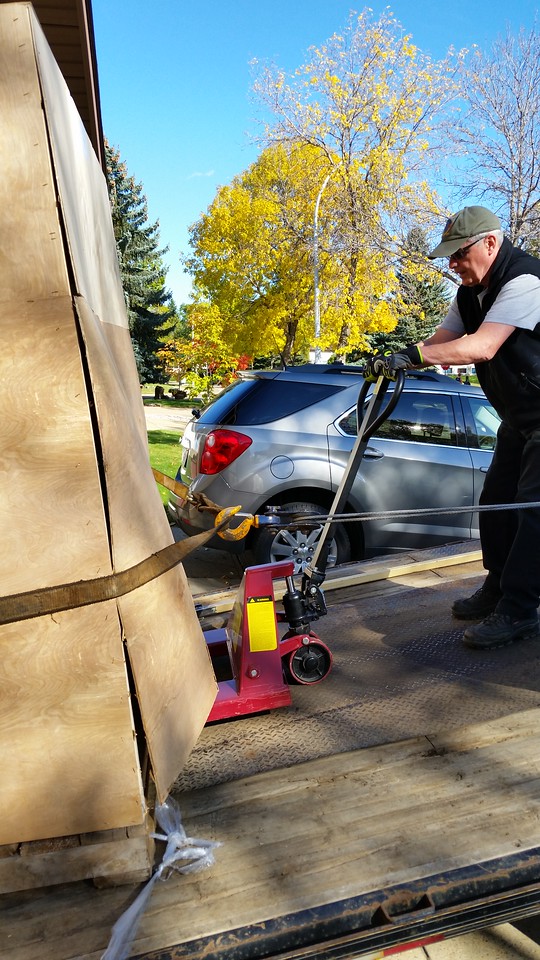
Then we moved the pallet jack to the uphill side. The skates allowed the bottom edge to roll into the garage as soon as the weight was raised and we let it down slowly with the winch.


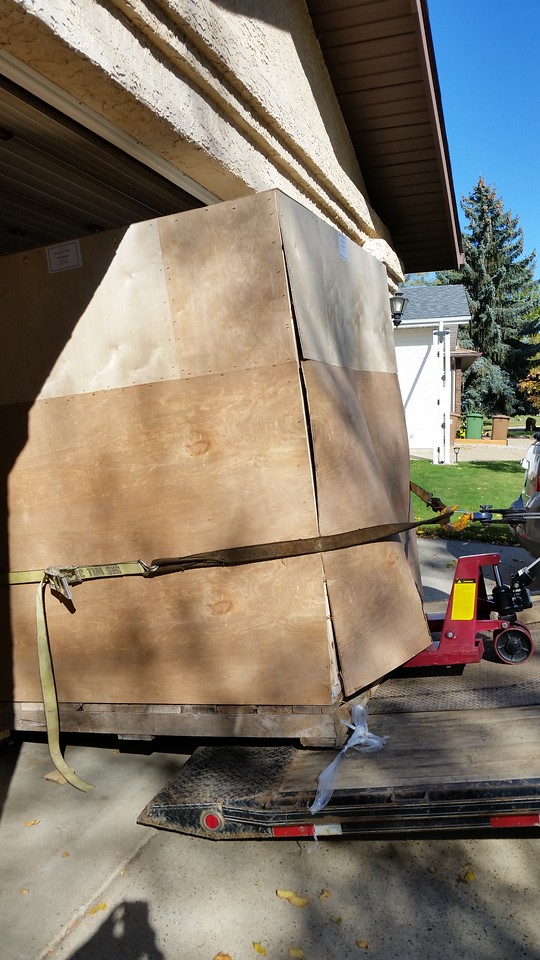
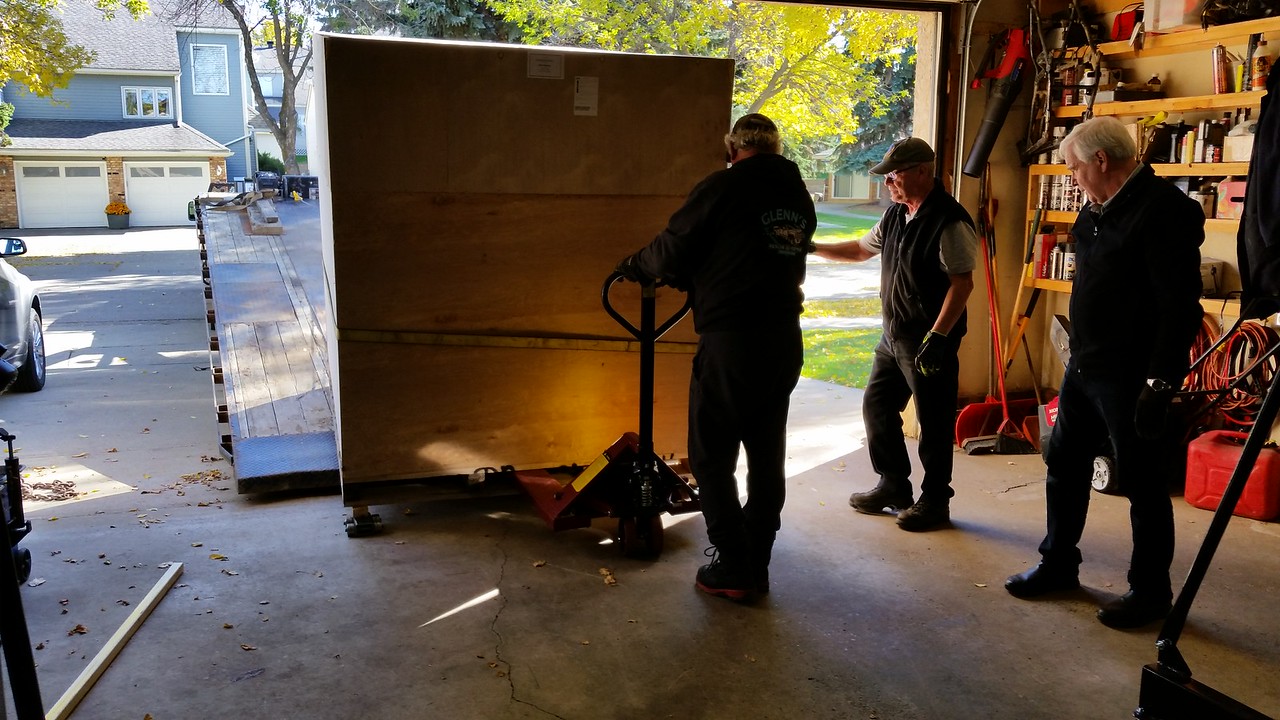
We jacked up the pallet jack as high as it would go and placed the other 2 skates under the front edge and when we lowered the jack the weight was all on the skates and it rolled easily into the garage.
 
Once all 4 corners were on skates and we rolled it into the garage we celebrated with a cold beer.


Then we popped the top and sides off the crate, which was amazingly flimsy. I think the plastic wrap around the outside was most of what was holding it together.


With the shell removed we rolled it under the center of the gantry crane and stripped off all the plastic and removed the accessories from the crate.


With all that stuff out of the way we removed the 4 half inch lag bolts holding it to the pallet and raised it with the chain hoist so we could drag the pallet from under it .


We set it down on the skates and had a close look at the machine. As far as I could tell it all looks good but I had to clean off all this packing grease to be sure.


The pre-delivery inspection was done on Sept 9 according to the tag they put on the head.


All the accessories I ordered were in the crate and now the fun begins to install 3 power feeds, a DRO, a power draw bar and the VFD.


The ER40 collet chuck I ordered for my lathe was in there as well as a R8-ER40 chuck for the mill.


The next morning the cleaning of the brown spooge began.
 
I started the next morning cleaning and it took about 3 hours with plastic scrapers, Varsol and WD40, and a toothbrush to get all the waxy stuff off. I removed all the way wipers to allow access to all the nooks and crannies and it came out looking great.


I spent the next day sorting out the leveling feet. Matt told me this is their first shipment of mills with a different design for foot mounting so he sent me ones with short 12mm studs that really don't offer height adjustability since the holes in the base are threaded 3/4"-10. I had to run a tap through all the holes to clear out all the sand, paint and other crap. I shortened the studs that came with the feet so 3/4" protrudes above the washer. I bought some 3/4"-10 X 2.5" bolts that are fully threaded and bored a 12mm hole .800" deep in the ends. The 12mm studs fits up into the end of the 3/4" bolt and I have about 1.25" of height adjustment on each corner, enough to deal with the slope of my shop floor. I machined off 1/2 the thickness of the lock nuts to allow as much adjustment as possible.


A thing of beauty! Congratulations!
Love that ER40 Collet Set, may get me one soon!
Took me a solid week, working relentlessly to get my PM-935TS setup with all her accessories, they are wonderful machines!
I opted to mount mine a spreader base Made from 2"x4" Steel channel
Almost there.jpg


You'll probably need to make a spacer like this also, from 0.060" aluminum sheet stock to space the X-axis power feed when mounting.
X spacer.jpg
 
Last edited:
Once I got that sorted I moved it to it's final resting place, exactly where my old mill was. I drilled and tapped four M6 bolt holes for my VFD enclosure mounting arm which is really meant for wall mounting a TV. I chose it so I could mount to a non vertical surface and still have the articulating arm level with the table. I had already test run this VFD but I had to change to acceleration and deceleration times from 3 seconds to 5 as I was getting over current errors occasionally on starts and stops. Other than that it runs like a top and is incredibly smooth and quiet.


I had planned on installing the 6" riser block that I had on my old mill but with the knee fully lowered there is 21" from spindle to table top, 3 more than my old mill. If I add the 6" riser block it will put the top of the motor in front of the furnace. For now I'm going to put the riser block aside as I probably won't need it with the extra room under the spindle.


I got started on the DRO next. I made a small bracket so I can mount the display on top of the VFD enclosure and got the X axis scale mounted. There were no screws in the kit so I had to use some of the M5 stainless screw I keeps around for motorcycle work. I successfully drilled and tapped the 6 required M5 holes with no mishaps. The X is usually easiest as the scale gets mounted to a machined surface but I wound up needing a .020" shim behind one end to off set what looks to be one oddball end cap on the scale. With a bunch to messing around I was able to get square within .002" in both planes over the 37 inch length of the scale.


Installing a DRO is a lot of work and very time consuming if you don't do it often. I installed the one on my old mill but had forgotten. I had to make a run to the bolt house to pick up a bunch more screws but other than that I spent the rest of the next day installing the Y axis scale and integrated the power feed end stop switch and related hardware onto the same brackets. It turned out pretty well but I forgot to take pictures until I finished. Next onto the Z axis .


I spent the next day sorting out the leveling feet. Matt told me this is their first shipment of mills with a different design for foot mounting so he sent me ones with short 12mm studs that really don't offer height adjustability since the holes in the base are threaded 3/4"-10. I had to run a tap through all the holes to clear out all the sand, paint and other crap. I shortened the studs that came with the feet so 3/4" protrudes above the washer. I bought some 3/4"-10 X 2.5" bolts that are fully threaded and bored a 12mm hole .800" deep in the ends. The 12mm studs fits up into the end of the 3/4" bolt and I have about 1.25" of height adjustment on each corner, enough to deal with the slope of my shop floor. I machined off 1/2 the thickness of the lock nuts to allow as much adjustment as possible.


Beautiful mill!!
Out of curiosity, I see you suspended the mill from the eyelet in the ram.
I believe that is for removing or suspending the ram for service.

PM may be different than other vertical mills.
 
Back
Top