RongFu RF-40 help

A picture of the drum switch would also help to decipher the wire colors coming from the switch. Also would help to remove the unused wires. The white, black and green wires that look to be from a cut off 110 volt cable and there appear to be two black wires that have some type of terminal on the end that don't connect to anything. That would clear up things up and give a better visual of the terminal block. Another thing that would help is labeling which wire numbers from the motor go to which terminal.

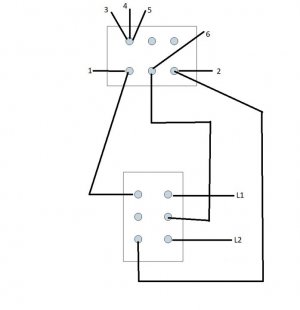
I looked at the wiring on my RF 30 clone. For 220 volt wiring there are 3 wires connected together, wire numbers 3,4,& 5. Your wiring also has 3 wires connected together but I can't see the numbers. For forward L1 from the switch connects to wire 1 and L2 from the switch connects to wires 2 & 6. For reverse wire 1 and wire 2 are swapped on the wiring diagram on my motor. I am interested in this because I have 220 in my garage and am thinking about converting my mill/drill to run on 220 with a reversing drum switch. I'll do a sketch post it.
 
Last edited:
A picture of the drum switch would also help to decipher the wire colors coming from the switch.
I'll get some shots of it tomorrow when I'm down in the shop. It's in the last stages of a rebuild/repainting.
The base, column and gear head saddle are already mounted on the new stand and dialed in.
The gear head is on the bench drying right now after a second coat and the motor still needs a clean and paint.
Can't wait to have this machine up and running again.
Jack
 
Here is the wiring diagram for how I understand 220 wiring with a typical reversing drum switch would be wired on my mill/drill.

Mill 220 wiring diagram.jpg
 
The type of drum switch may be different depending on the factory and date of manufacture, and some switches have so many terminals
it's best to buzz out the connections rather than trying to rely on color codes or even terminal numbers. There's just no standardization,
and with 230 Volts you don't want to get it wrong-
 
Last edited:
Update: I finally gave up on trying to parse our the connections. Dropped off the motor and switch at a local electric motor
repair/rebuild shop yesterday. It will be two weeks before they can even get to it.
I just didn't want to brick the motor with the wrong connections. They are going to disassemble the motor and check bearings
and everything else while they have it. Est. cost? About $150.
Once I get it back and mounted, I will get some photos of the connections to add to the knowledge base here and some
photos to show off my rebuild job.
Jack
 
You're lucky to have a motor shop nearby- they are going the way of the dodo bird unfortunately
-M
 
Especially the size of my town, maybe 25k inside the city limits.
HPS is the name of the shop. I tried to throw some extra cash into the equation to try to
get a little further up the wait list. He said sorry, he's working on a $100K rebuild.
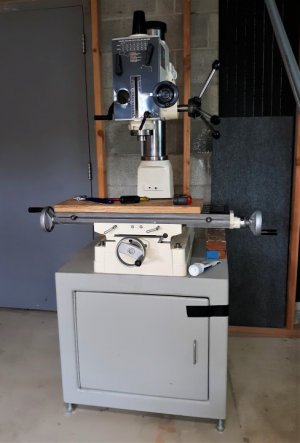
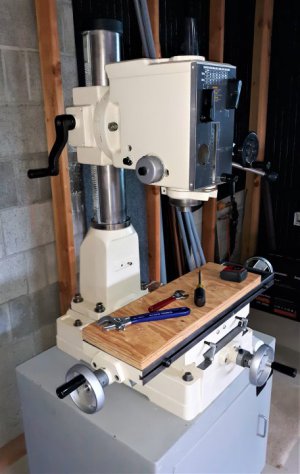
Just got the gear head back on a few minutes ago...(boy, was that fun!)coming along.
Jack
 

Attachments

  • mill1.jpg
    mill1.jpg
    50 KB · Views: 84
  • mill2.jpg
    mill2.jpg
    63.5 KB · Views: 89
Update: I finally gave up on trying to parse our the connections. Dropped off the motor and switch at a local electric motor
repair/rebuild shop yesterday. It will be two weeks before they can even get to it.
I just didn't want to brick the motor with the wrong connections. They are going to disassemble the motor and check bearings
and everything else while they have it. Est. cost? About $150.
Once I get it back and mounted, I will get some photos of the connections to add to the knowledge base here and some
photos to show off my rebuild job.
Jack
Sounds like you will be dollars ahead in the long run.
 
Back
Top