Rose Index Question

epanzella

Active User
Registered
Joined
Apr 8, 2013
Messages
1,979
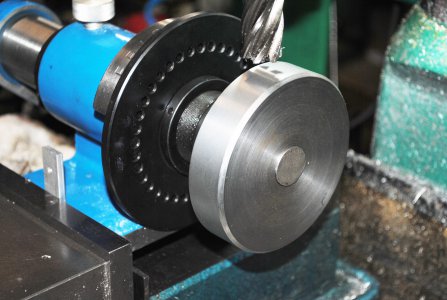
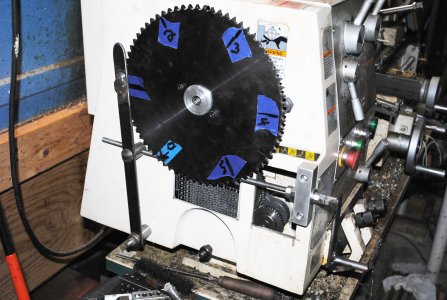
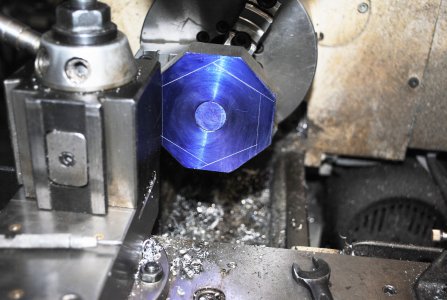
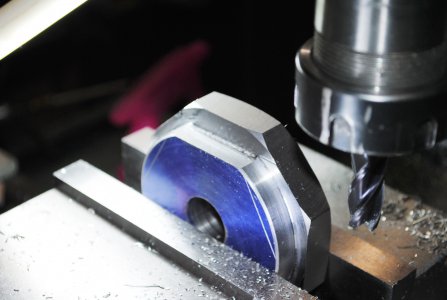
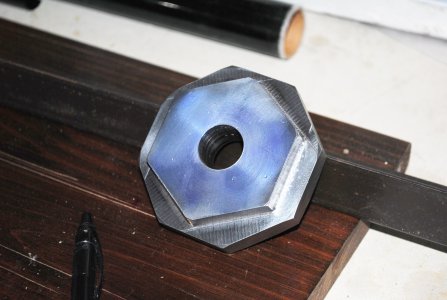
It's raining so my outdoor projects are squashed for today. Rather than watch Opra I decided to knock out a Rose index. I just sliced off a 4" x 1" hunk of steel with my bandsaw but before I start making chips I have a question. What is the purpose of having both a 4 sided and an 8 sided section on the index? You need something that's 90 degrees to index the unit anyway so why not just alternate between a 90 degree plate and a 45 degree plate? This will give you 8 sides from the 4 sided index. Another way is to just have the 8 sides and use every other one with a 90 degree plate (square) for a 4 sided part. Of course I will include the hex section as there's no way around that. Is there any reason to have BOTH the 4 and the 8 sided sections?
 
I’d think that a longer side of the 4-sided section is more sensitive than a side of the 8-sided section.
 
I thought it was a hex (6-sided) and an octagon (8-sided).......

-brino
 
Yup, just checked my D. Gray kit and it is.

The Rosenthal products one has square, hex and octagon.

-brino
 
I suppose you could do with just the square index, if you have a 30-60-90 and 45 reference triangles.
 
I think I'm gonna go with hex and octo. All I have is round stock and making it square will reduce the capacity of the finished product substantially. I'm starting with 4 inch round and I want at least 2 inch capacity. Thanks for the help.
Ed P
 
My opening salvo on this project has been a disaster. I pressed a piece of drill rod into the slab that is to become the RI so I could machine it in my spin index. The index plate of the indexer is held to the main shaft by friction and a lock ring. No matter how tight I make it the plate slips on the shaft when milling any kind of meaningful cut. Yeah, I could spend 3 months making light cuts but that's not for me. I guess the 4 inch diameter of the part is too much for the indexer. I have an indexer setup on my lathe that works really well so I think I'll have to use that for layout and the do the milling in my regular mill vice. I'm already sorry I didn't just buy this thing.
 

Attachments

  • DSC_0286.JPG
    DSC_0286.JPG
    1.2 MB · Views: 32
Well, back to the old ways and things are looking much better. I used the headstock indexer on my lathe and used the side of the QCTP as a straight edge to scribe lines. Then into the mill vice and mill to the lines. I just did the octo and the hex. All that's left is to bore out the center hole and tap for the set screw.
 

Attachments

  • DSC_0287.JPG
    DSC_0287.JPG
    1.1 MB · Views: 24
  • DSC_0288.JPG
    DSC_0288.JPG
    1.2 MB · Views: 20
  • DSC_0292.JPG
    DSC_0292.JPG
    892.2 KB · Views: 21
  • DSC_0293.JPG
    DSC_0293.JPG
    1 MB · Views: 26
Last edited:
Next project on my agenda is to make one of these things. I, too, have been going through the mental exercise of wondering about the necessity of the square. If you have an octagon, you also have a square. But it helps to have a visual reference for it. Thanks for posting.

Nice job.

Regards
 
Finally got around to making my set. I had plenty of scrap 3/4" aluminum, so I decided to make a set that includes every set of equilateral angles from three-sided to twelve-sided - a total of four plates, 3-9; 4-8; 5-10; and 6-12. The plates are roughly 4" in diameter and fit on a spool I made out of black Delrin. I also made a story-bar that contains all eight configurations. I used the angle plates themselves to make the bar. I made them on the mill using a rotary table and the circle feature on my DRO system. I used a small countersink bit to spot drilled the holes before cutting the sides. They are still visible on the five-sided index. (I started to reduce the diameter to remove them, but now I wish I had left them on all the rest.)

They work great. I've already used two of them on other projects.

Rough layout of three of the four plates (the 4-8 was a no-brainer). Like I said, 'scrap' aluminum:
IMG_1878.jpg

The four plates side-by-side:
IMG_1889.jpg

Laid out with the spool:
IMG_1897.jpg

The story-bar:
IMG_1902.jpg

Assembled:
IMG_1903.jpg

Regards
 
Back
Top