- Joined
- Feb 7, 2013
- Messages
- 2,486
Well, the day went pretty much as planned and I took a few photos of the progress. Sure enough there was
a standing dead pine so I hauled that back to the sawmill and squared it off. The ridge pole weighs in at
about 100 pounds so it was all I could do to set it up on the vertical pillars by myself. At any rate, it is up there to stay
with a few nails to hold it in place along with a couple temporary braces. I sawed up several 12 in diameter poplar to
make the rafters and got them all installed. I think I will add some plywood gussets to the rafters tomorrow to beef it
up a little. The next session will be to apply the roof boards and lay down some 30 pound felt for a temporary roof
until I can get some steel roofing material.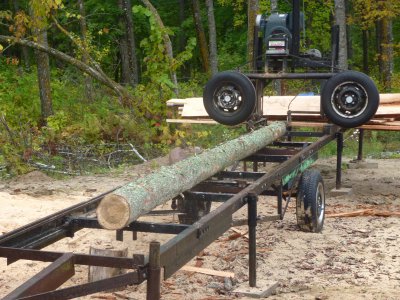
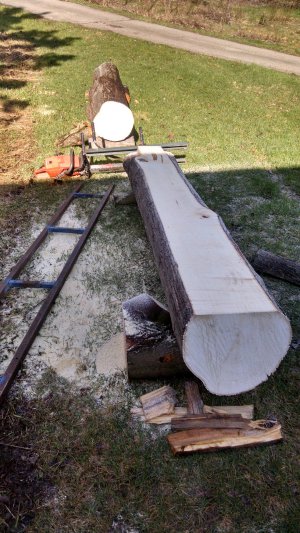
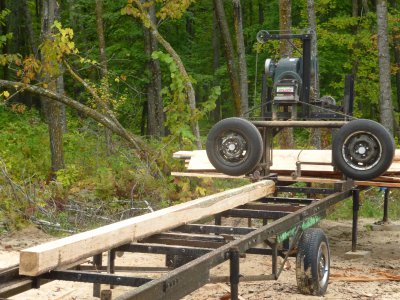
This is the ridge pole log on the saw ready for trimming up.
Well, it's not perfect but certainly good enough for the intended purpose.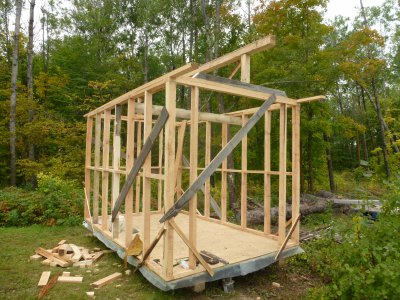
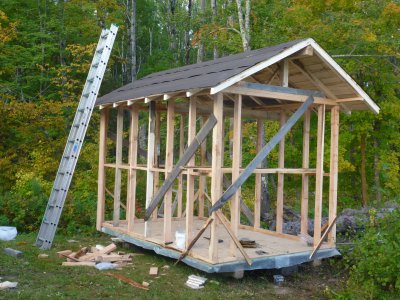
I was glad to have the ridge pole up there all nice and pretty. Several temporary diagonal braces were added
as the structure was a little unstable. It's amazing how just a couple boards added stiffen it up so one can safely
stand on the top of the sill plate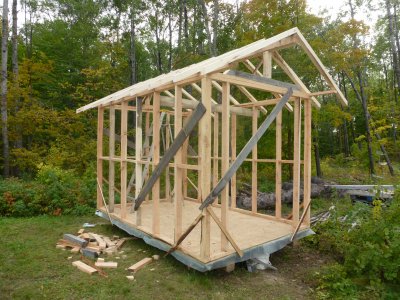
Here it is with the raftering supported by the ridge pole. Ridge poles are great but require machinery and booms
if the building gets much bigger than this. I did a log structure with a 20 foot log ridge pole a few years ago and
we really had to struggle to get a 1000 pound ridge pole mounted on top of some 4 foot vertical logs using a skid steer
with a log boom on it
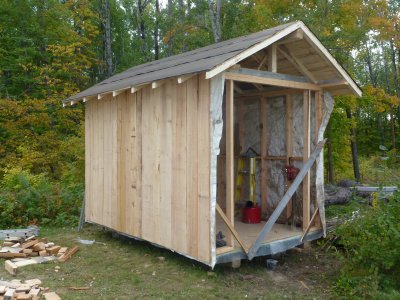
I put all the 6 foot lumber for the roof under cover in case it rains and tomorrow I will be working on that. It's a stickered
pile of poplar and fir of various widths so expect it will take a while to apply the roof boards. The rafters were set a little less than two feet on center so the 6 foot boards will easily fit with some trimming. Plywood would be easier of course but
would be more expensive. There will be some waste and resawing involved but that goes with the job I guess. I have a
14 inch wood vertical bandsaw that will be a big help in dimensioning the width and a table saw to cut stuff to length.
One could just do purlins of course but at least on a small building it is nice to look at a roof of solid wood. All the waste
will be used for kindling so it will not go unused. Also, the slab pile is now up to about a cord so will have to cut that up to
lengths to use in the wood stove for this winter.
One other thing I forgot to mention was the horizontal 2x4s half way up the wall. They are needed when applying the
vertical wall board as they need to be supported top, bottom, and in the middle to be skookum.
a standing dead pine so I hauled that back to the sawmill and squared it off. The ridge pole weighs in at
about 100 pounds so it was all I could do to set it up on the vertical pillars by myself. At any rate, it is up there to stay
with a few nails to hold it in place along with a couple temporary braces. I sawed up several 12 in diameter poplar to
make the rafters and got them all installed. I think I will add some plywood gussets to the rafters tomorrow to beef it
up a little. The next session will be to apply the roof boards and lay down some 30 pound felt for a temporary roof
until I can get some steel roofing material.

This is the ridge pole log on the saw ready for trimming up.

Well, it's not perfect but certainly good enough for the intended purpose.

I was glad to have the ridge pole up there all nice and pretty. Several temporary diagonal braces were added
as the structure was a little unstable. It's amazing how just a couple boards added stiffen it up so one can safely
stand on the top of the sill plate

Here it is with the raftering supported by the ridge pole. Ridge poles are great but require machinery and booms
if the building gets much bigger than this. I did a log structure with a 20 foot log ridge pole a few years ago and
we really had to struggle to get a 1000 pound ridge pole mounted on top of some 4 foot vertical logs using a skid steer
with a log boom on it

I put all the 6 foot lumber for the roof under cover in case it rains and tomorrow I will be working on that. It's a stickered
pile of poplar and fir of various widths so expect it will take a while to apply the roof boards. The rafters were set a little less than two feet on center so the 6 foot boards will easily fit with some trimming. Plywood would be easier of course but
would be more expensive. There will be some waste and resawing involved but that goes with the job I guess. I have a
14 inch wood vertical bandsaw that will be a big help in dimensioning the width and a table saw to cut stuff to length.
One could just do purlins of course but at least on a small building it is nice to look at a roof of solid wood. All the waste
will be used for kindling so it will not go unused. Also, the slab pile is now up to about a cord so will have to cut that up to
lengths to use in the wood stove for this winter.
One other thing I forgot to mention was the horizontal 2x4s half way up the wall. They are needed when applying the
vertical wall board as they need to be supported top, bottom, and in the middle to be skookum.
Last edited:


