Sheetmetal dreams.

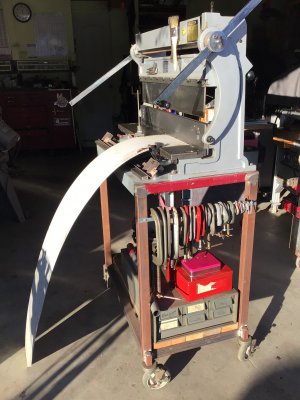
Just like sharpening snips it’s easy as long as you have a way to accurately hone the mating ends of the blades. They are not curved on the mating surface. Pulled the two blades and honed them flat. I used a progressive diamond hone. Then reinstall and adjust the bottom blade. I can cut paper now with mine. It worked ok when I got it but it looks like it was never sharpened. Now it cuts really easy.
 
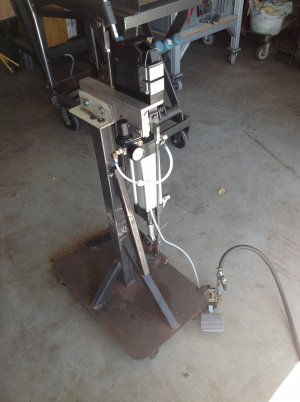
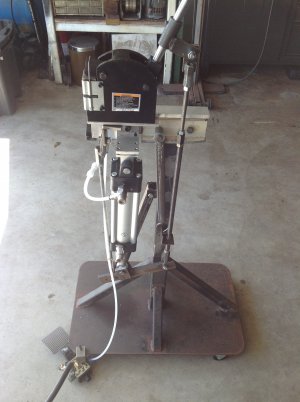
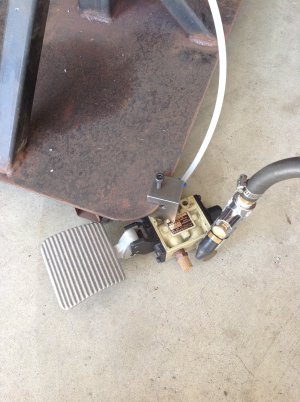
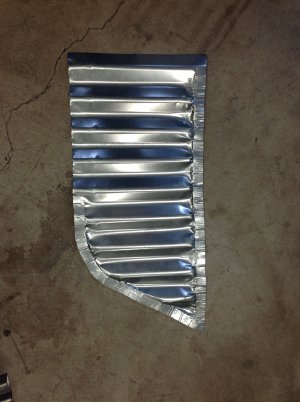
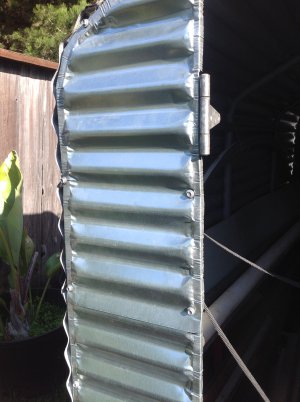
The really crucial machine tool to getting the bulkheads straight was the shrinker/stretcher. There’s many ways to do shrinking/stretching and these I guess are called Lancaster type as that’s who made the originals. I opted for the HF version(shock!) because I’m cheap and they had good reviews. For those who don’t know they have jaws in them that are on a ramp. Shrinkers squeeze and stretchers pull apart. They come as a really awkward hand operated mechanism where the handle pushes away from the jaw end. But most folks use a foot operated linkage. I did the corrugated sheetmetal on the end of my storage shed on the edges and it about left me lame. So I decided to go air operated as it easier but is also way easier to be consistent. I learned quickly slow and small change. i have a tendency to get impatient and go too hard and then I’m over correcting. Most times I set the regulator at around 25-30psi. It’s easy to change the jaws from shrink to stretch so I just swap jaws instead of mounting separate heads. The stand was what my beader originally came on. When I finally get a dawning I’ll mount the shrinker/stretcher to the EW.
 

Attachments

  • A2BD76C3-0928-49C5-AF26-36AA9815D68A.jpeg
    A2BD76C3-0928-49C5-AF26-36AA9815D68A.jpeg
    707.2 KB · Views: 82
  • 19E11D9F-3098-49F0-9279-73CF90001BF1.jpeg
    19E11D9F-3098-49F0-9279-73CF90001BF1.jpeg
    703.7 KB · Views: 68
  • 7F583BD9-44F0-40EC-96ED-E3A12B48A91B.jpeg
    7F583BD9-44F0-40EC-96ED-E3A12B48A91B.jpeg
    1.1 MB · Views: 57
  • 65DB5821-E99F-440F-AF3D-66085C2495D3.jpeg
    65DB5821-E99F-440F-AF3D-66085C2495D3.jpeg
    771.4 KB · Views: 56
  • 3044EA88-CF60-4665-8E34-9469874B8D9F.jpeg
    3044EA88-CF60-4665-8E34-9469874B8D9F.jpeg
    751 KB · Views: 64
In an effort to be less haphazard I’d like to post what I’ve done to my HF 3n1. I posted parts of this in reply to another thread I think but couldn’t find it. Sorry if you’ve seen it before.

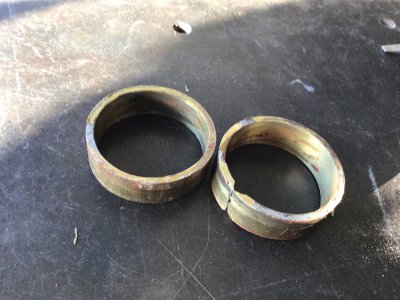
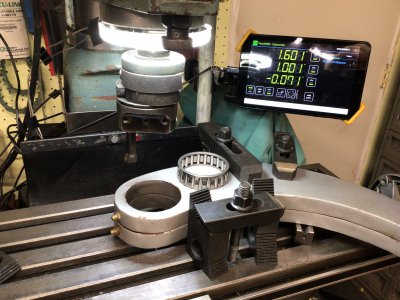
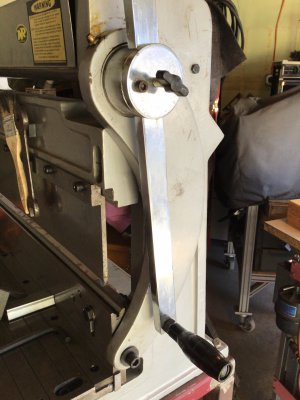
I found this 3n1 on CL brand new, never been used still on the original skid covered in cosmolene. It had two handles and was made in the 90’s. Everything I’d read was wildly varying so I took a chance. Nothing was adjusted and there was a lot of cleaning and paint removal on sliding surfaces that was mentioned in reviews. I used it but it seemed overly stiff. I pulled one of the arms that operates off a big cam and the brass bushings looked like they were done by a kid. The keys were badly done too. I found roller bearing replacements on eBay. Stacked and clamped the arms together and bored them on the mill. The roll forming mechanism which is integral to transferring torque to the other side of the machine is still stiff but that would required splitting the frame and I decided later. Assembled and tried it and it seemed better but it was thin aluminum. So it was put back in its cubbyhole.

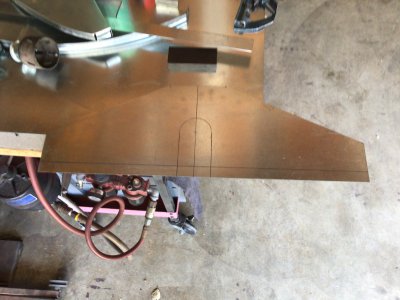
I needed to shear the top for hood. 23x29 22ga galvanized. I don’t use the worthless spring hold down instead mark and clamp the work. Both cuts went smooth no problem and not until later did I remember I’d done that mod. I know it wouldn’t have done this nice and easy before. I also used it to make the bends in the base of the two bulkheads.
 

Attachments

  • E288A55E-D9F6-4E90-9903-7159C6ED5FA7.jpeg
    E288A55E-D9F6-4E90-9903-7159C6ED5FA7.jpeg
    1.6 MB · Views: 49
  • 8976965C-99F2-4D8D-81AC-6354011FE3D6.jpeg
    8976965C-99F2-4D8D-81AC-6354011FE3D6.jpeg
    1.9 MB · Views: 44
  • B4727310-882A-436A-B0EA-879DD2E3713E.jpeg
    B4727310-882A-436A-B0EA-879DD2E3713E.jpeg
    915 KB · Views: 47
  • FA4E9365-A553-4862-8ACC-828D8D27C810.jpeg
    FA4E9365-A553-4862-8ACC-828D8D27C810.jpeg
    965.6 KB · Views: 58
Last edited:
I’m also working toward a coffee roaster that will need some sheet-metal parts.
It’s interesting you are wanting to do roasting as the guy I got my beader from was doing the same thing. Very interesting guy that we had a lot of common experiences in that he had been a car mech and got out about the same time I did. He somehow got into doing coffee with a couple for his own cafes. He was doing his own roasting and was shocked how expensive they were for no reason he could fathom except there are not a lot roasting machines. He had made a prototype through various shops and after testing it wanted to start making them as he was approached by others who saw his and wanted one. I never did get around to asking him why he was getting rid of this beader. It wasn’t what was needed as i think you can only form up to 18ga, or he was getting a more expensive model or what?
 
Last edited:
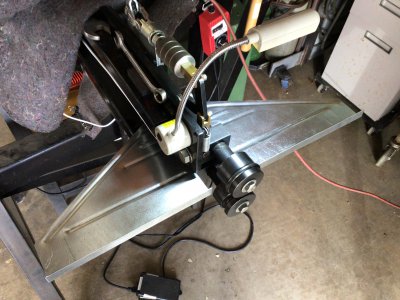
As usual I had to interrupt the hood fab to make a tool. Actually finish making the fence for the beader. The one thing i had the most of sheetmetal because I had a brain cloud when I ordered the initial couple of sheets. So the fence is going to be 22ga galvanized also. Laid out the shape and sheared the basic shape on the 3n1. If it looks odd it’s because the lead in fence is larger than the lead out on purpose to help get stuff started straight.

I should have called this thread adventures in warpage as beads, especially close to the edge cause all kinds of chaos. Once again the homemade blade on the arbor press saved the day and got it unschwangle. That and a lot of hammer and dolly work.
I‘ve not gotten the divine inspiration for the adjustable mount but here it is held in place with a welding magnet.
 

Attachments

  • FBD96B02-48FB-4763-A210-766A4515A1CC.jpeg
    FBD96B02-48FB-4763-A210-766A4515A1CC.jpeg
    1.4 MB · Views: 48
  • 46B0F139-FE75-4042-9A75-6054A4E6A1F0.jpeg
    46B0F139-FE75-4042-9A75-6054A4E6A1F0.jpeg
    1.8 MB · Views: 56
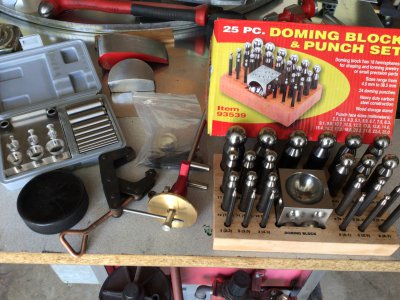
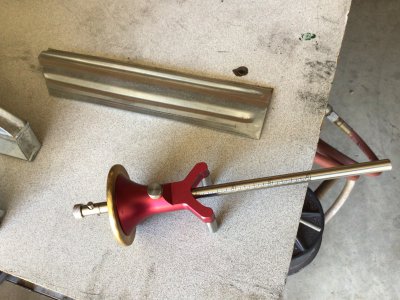
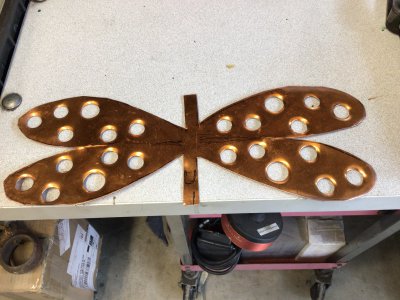
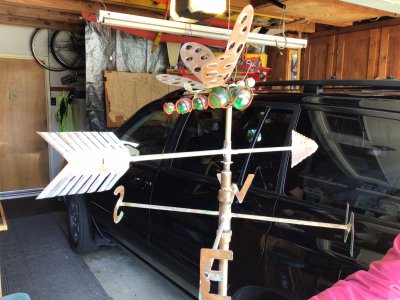
This is a group pic of some of my favorite budget layout and detail tools. L to R, HF carbide hole punches, hockey puck, 2” eBay clamps, edge guide, doming( I‘ve heard them called dapping blocks) set. I used the punches and the doming blocks on the last weathervane my buddy Horst and I did.
 

Attachments

  • 150D5D6E-EFA9-41DA-877C-DECFC6669400.jpeg
    150D5D6E-EFA9-41DA-877C-DECFC6669400.jpeg
    1.8 MB · Views: 64
  • 39D200E7-A31E-458C-AB31-554F0A6B8CD1.jpeg
    39D200E7-A31E-458C-AB31-554F0A6B8CD1.jpeg
    2 MB · Views: 59
  • C9D44A14-6233-425A-9469-B8CD80CE6795.jpeg
    C9D44A14-6233-425A-9469-B8CD80CE6795.jpeg
    2.5 MB · Views: 56
  • 87B82702-E1E7-4A07-AA86-235EDF7CA9B3.jpeg
    87B82702-E1E7-4A07-AA86-235EDF7CA9B3.jpeg
    1.8 MB · Views: 64
Last edited:
awesome art !!!! :eagerness:

i have yet to buy a doming set, i usually brutalize the poor metal with different sized ball-pein's
the doming set is waaay to civilized, :cautious:
but- not anywhere as cool and elegant as the (what i can only imagine is a) marking device
 
Thanks Mike. My 85yrld neighbor down the street loves weathervanes and this was our second restoration. The first was the whale. Both he fished out the trash can. Both had the frame and masts made out of steel so corroded away. I think the wings were his idea along with the arrow head and feathers. I’m just glad to get him away from the boobtoob and out making stuff. Of course I’d been eyeing those doming blocks for years and finally had an excuse. :) I’m finding more and more reasons for using them.
 
Good looking bead roller fence , good idea to use sheet metal instead of steel bars, tubes or angle iron, I'm sure it does the job more than adequately, are you going to use magnet(s) to adjust/hold the fence or is it just a temporary solution ?
 
Thanks Ken. I felt like sheetmetal was going to be easier to keep the fence straight than trying to weld it up from parts. I had the whole vision for the fence except how to make the clamp mount. Lots of time I’ll have the beginning and the final details will become clear as I go. Not today :( Hopefully tomorrow? So the magnet was just to show it in place. Theres no magnet I’m aware of that could be good enough.
 
Back
Top