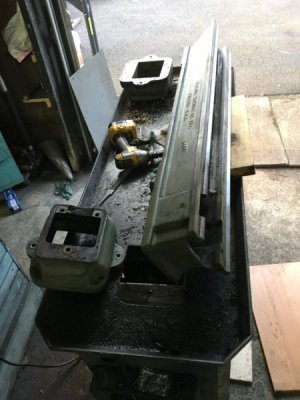
Before starting any further disassembly I would take lots and lots of pictures of the machine before you begin. Once you start the process I would take more pictures at each stage. I probably took over 100 pictures from start to finish of the process. Many times the same components should be photographed from several angles. It's easy to forget how a fastener, retainer, pulley or other component was oriented once it's laying on the floor. I've found the pictures a necessity to make sure everything goes back in place in the proper order and orientation.
As for the disassembly process, first I loosened the belt(s) to the spindle drive end of Jackshaft assembly. On mine there's a jackshaft assembly between the Worthington and the headstock. When the belts were lose I could rotate the jackshaft enough to ride the belt(s) from the head over the sheave. Then the headstock was free to be removed.
The headstock is held in place by 4 bolts coming up from the bed. The 2 in the front can be accessed by removing the sheet metal plate at the front of the casting between the bed ways. The 2 in the rear can be accessed by removing the large gear in the lower center of the drive, and the banjo to the lead screw. Once they are out of the way there are 3 bolts holding the gear cover to the headstock. When the cover is removed you'll be able to see the 2 bolts that come up through the bed to the headstock. You should be able to lift the headstock off the bed with the belt still around the headstock end of the drive.
At this time I would loosen and remove all the remaining belts. Those from the jackshaft to the Worthington drive should be next. Followed by those from the Worthington drive to the motor. When removing the belts I would label them with inner and outer position as well as spindle to jackshaft, jackshaft to drive, and drive to motor. They will have to be reassembled in the opposite order, and tightened spindle to jackshaft first, jackshaft to drive second, and drive to motor last.
Now the legs of the bed can be unbolted from the headstock and tailstock cabinets from inside the cabinets. You'll have to remove a couple drawers on the tailstock end and use a socket on an extension to get to the bolts. On my machine I could reach the bolts on the headstock end legs through the open door with an extension and a swivel socket.
Once the legs are unbolted from the cabinets you can turn the bed on its side and remove the legs. Again I believe there are 2 bolts holding each set of legs to the bed. On my machine there are 2 additional bolts holding the chip pan to the headstock cabinet. On your machine it looks like the bolts that hold the bed legs to the cabinets also hold the chip pan in place. I believe the tailstock end cabinet will now be light enough to transport with a refrigerator dolly.
To make the headstock cabinet lighter I would remove the jackshaft assembly first. If it's like mine it's mounted to 2 rods running lengthwise through the cabinet. The mounting plate is secured to the rods with set screws through each mounting block. The rods are secured to the cabinet with a shaft collar on each end. You'll have to loosen all the setscrews and slide the bar out of the gear train end of the cabinet. On mine I had to tap on the end of the bars facing the tailstock cabinet to get them to move freely. If you need to do this use a soft metal bar such as brass or aluminum to avoid mushrooming the end of the shafts. Also place some wood between the plate and the Worthington drive so the jackshaft assembly doesn't fall on the drive.
The Worthington drive is held in place in a similar manner. It can be removed using the same process. Just make sure to place a board between the motor and the drive . It will make sliding the assembly out much easier. To remove the drive on my machine I had to disconnect a stepper motor at the rear. Yours has the walking stick linkage that will have to be disconnected and removed.
The final piece to be removed is the motor. I would disconnect the wiring at the motor junction box. All the wires in mine were marked with metal collars. There was also a wiring schematic inside the junction box cover. If these no longer exist on your machine I would be sure to label all wires and take lots of pictures. The motor in my machine is held to the mounting platform with 4 bolts. 2 can be removed from the front of the machine through the open door, and the other 2 can be removed from the rear side of the machine. The motor was the heaviest component on my machine. I would again slide some wood under it and work it side to side until it's through the door.
View attachment 259792 View from rear of headstock cabinet. Note stepper motor drive for Worthington speed change rather than walking stick speed change.
View attachment 259793 Mounting for jackshaft and Worthington drive assemblies.
View attachment 259795 Worthington drive on bench.
View attachment 259797 View from operators position. Open cabinet door showing Worthington drive & motor.
View attachment 259794 Jackshaft assembly on bench.


