Shop made fly cutter question

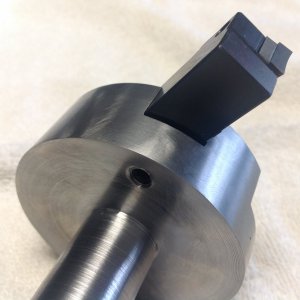
The design of mine appears to be different from the one you're making,
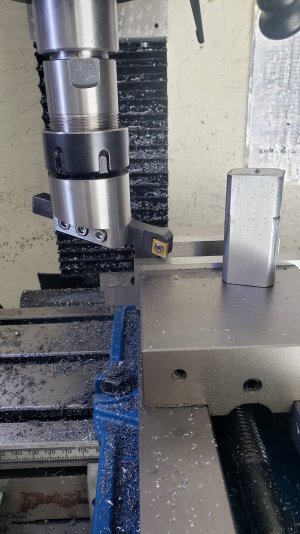
Not a huge deal, but wouldn't it be better to have the tool register on the side of the slot that's on center, with the set screws on the other side? The photos make it appear yours has the set screws on the side of the tool with the cutting edge. With the set screws on the other side, the width of the slot doesn't matter at all.
 
Perhaps in an ideal sense. I quite often go with "rigid enough". If I'm not going to do any heavy hogging, or it's move convenient for me, I might easily stick something up more than ideal and just take light cuts. Outside of a commercial shop where time is everything, in a hobby shop you just need to balance your setup with your material removal. Cutting a slot in a flycutter is hardly precision work.

GsT
I agree, not precision, but it's easy to forget, you can eat end mills plenty quick if the material is rattling back and forth. No rigidity has other effects than just precision. as mentioned the end mill, the bearings in the spindle, the vibration that can cause things to loosen, machine parts can fail, the lack of rigidity can cause the end mill to pull the part in such a way causing damage to vise, mill, spindle, etc. so it does bear mentioning.. not saying I wouldn't do it, but I would look for a way to lower it. I have an old bridgeport vise. I can't lower it like the op can. Wish I could.
 
Not a huge deal, but wouldn't it be better to have the tool register on the side of the slot that's on center, with the set screws on the other side? The photos make it appear yours has the set screws on the side of the tool with the cutting edge. With the set screws on the other side, the width of the slot doesn't matter at all.
Theoretically, you're right about location of the set screws, but there is a trade-off. The off-set and the flat surface on the cutting side allowed for better spread of the set screws. Locating the set screws on the other side would have been far more challenging and probably would have constrained me to use only two set screws instead of three. Targeting a very snug fit without the set screws - not 'press fit' snug, but by no means 'loose fit' has me right on top of the cutter being on center. Can't imagine I'm off center by more than a couple of thou or so. (And it works fine.)

Regards
 
Not a huge deal, but wouldn't it be better to have the tool register on the side of the slot that's on center, with the set screws on the other side? The photos make it appear yours has the set screws on the side of the tool with the cutting edge. With the set screws on the other side, the width of the slot doesn't matter at all.
Just re-read your post. The insert on the tool is definitely registered on the center line of the the cutter. Difficult to tell in the pictures. Here's another that might illustrate it a little more clearly:

IMG_1472.JPG

Regards
 
The insert on the tool is definitely registered on the center line of the the cutter.
I think your first reply was perfectly reasonable.

Set screws move, so I just thought they aren't the registration surface regardless — the other face is where the tool holder registers. If you always use the same width tool, then it simply doesn't matter (just cut the opposite face exactly one tool holder width away from center and make the slot wide enough for the holder to fit). If for some reason you expected to use different width tools, then you would want the face on the cutter side of the holder to act as the registration, not the tips of the set screws. Either way, the width of the slot (and the position of the face with the set screws) simply doesn't matter. A slot a few thou oversized or a hundred thou oversized would work the same -- it's the set screws trapping the tool against the opposite face that does the positioning.

Note that a slot for the set screws as @aliva suggests also eliminates the worries of buggering up an unhardened tool holder with the set screws, too. You can buy dog-point set screws, but I've faced the cups off of countless set-screws and turned down a dog-point countless times. Cup points are DESIGNED to cut into the material and raise a burr. It's another minor detail, but it's generally worth the time to at least file off the cup point and create a flat at the end of the screw if you expect to remove or reposition stuff frequently.

It bears saying, though, that like many here, I tend to over-think and over-engineer even the simplest tools like a fly cutter. Left to my own devices, I'd design it from my armchair with a tapered gib, dovetailed registration face, and special companion tool to really lock the cutter in place (right up until the point where I went into the shop and actually built something far simpler out of scrap that would likely look pretty much exactly like yours!).
 
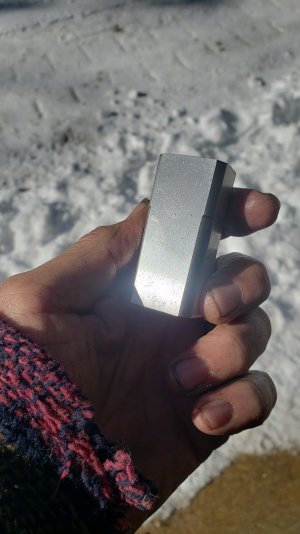
Thanks everyone for the input, I appreciate it very much. Got it all done and I have to say, I'm very happy for the outcome. Runs very smooth , no vibrations. Had to mill down the cap head screws to fit the countersunk holes but im very pleased. Cheers everyone
 

Attachments

  • 20240219_134059.jpg
    20240219_134059.jpg
    251.4 KB · Views: 28
  • 20240219_134013.jpg
    20240219_134013.jpg
    166.5 KB · Views: 28
Thanks everyone for the input, I appreciate it very much. Got it all done and I have to say, I'm very happy for the outcome. Runs very smooth , no vibrations. Had to mill down the cap head screws to fit the countersunk holes but im very pleased. Cheers everyone
All that white stuff in the background of your photo almost makes me feel guilty complaining about the wind and rain here!
 
Back
Top