-
Welcome back Guest! Did you know you can mentor other members here at H-M? If not, please check out our Relaunch of Hobby Machinist Mentoring Program!
You are using an out of date browser. It may not display this or other websites correctly.
You should upgrade or use an alternative browser.
You should upgrade or use an alternative browser.
Show us your restored lathe- before and after!
- Thread starter HMF
- Start date
- Joined
- Nov 28, 2010
- Messages
- 466
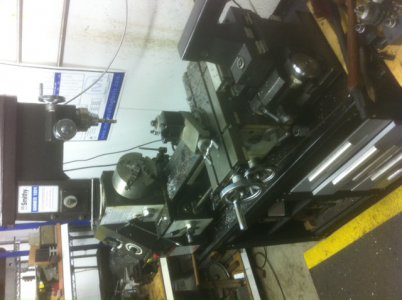
David, that is a Smithy, Granite 12X24 and the table is both a milling table and the cross slide for the QC toolpost and is common to Smithy lathe/mill combos. It makes for a very stable and useful bed setups for line boring. I could have done both ends of the gearbox from one setup had it need it. That small silver cylinder in the tee slot in one of the pictures has a square hole thru it but also has internal threads with a set screw to advance the cutting tool when boring. It really worked out quite well.
Patrick
Patrick
- Joined
- Nov 28, 2010
- Messages
- 466
Thanks Rick but I still have a ways to go on it. I'm waiting on a set of wicks for the spindle and I still have to press the bull gear off to remove the front bearing and clean the crud out from under it. Whoever worked on it before installed the bearing expanders incorrectly and had them pushing down on the bearings instead of pullin up on them. Then to loosen the bearings up so the spindle and bearings wouldn't overheat, they used a lot of shims under the bearing caps. Made quite a mess of them. Maybe I can get it sorted out when the wicks come in.
Pat
Pat
C
Cabro32
Forum Guest
Register Today
Hi Pat:
Thanks for taking the time to post the extra pictures of the line boring process. That is something I can make use of. I am really new to this stuff. Do you have a picture of the cutting bar? Looks like the cutter is set close to the right end of the bar, did you cut by moving the carriage left to right? Since you silver soldered the cutting tool into the bar, you made one cut only?
Thanks
Joe
- Joined
- Nov 28, 2010
- Messages
- 466
No, the sleeve is silvered into the bar at about a 45 degree angle and the HSS bit is adjustable by way of a set screw in the end of the sleeve. The toolbit is locked into position by a grub screw that is perpendicular to the bar and intersects the sleeve and bit locking it when tightened.
I still have the bar and I will take a picture of it tomorrow and post it.
Pat
I still have the bar and I will take a picture of it tomorrow and post it.
Pat
- Joined
- Nov 28, 2010
- Messages
- 466
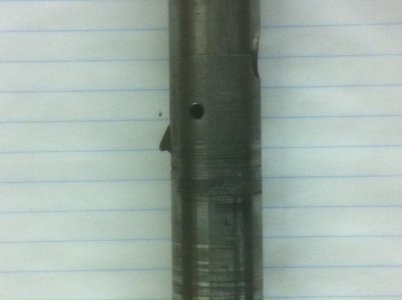
Here are some pictures I took of the boring bar this AM. The first picture is the bar and is 1" O1 tool steel and the toolbit is 1/4".
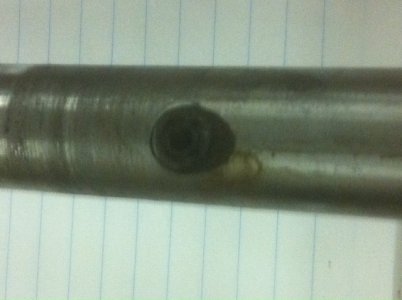
The second is the adjustment screw that extends the toolbit out of the bar.
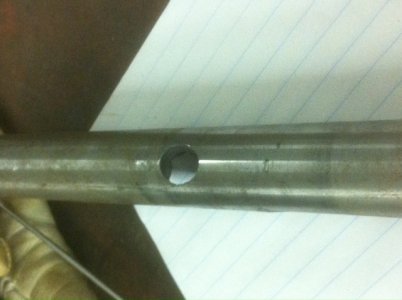
The next picture is the first hole I tried to drill thru the bar at a 45 degree angle. It was a PITA for sure.
And the last picture is my Smithy that I did the boring on. It has been cleaned up, just not recently.
If I can help some others with any info, let me know.
Pat


Last edited by a moderator:
C
Cabro32
Forum Guest
Register Today
Well thanks again Pat for taking the time to post more pictures. Thanks to you I learned how I can repair a 32 Ford gearbox that I though was junk. You and this site are just great. I do have another question. How much oversize did you make the bronze bushing and did you drive it in or freeze it or what? Also how do you determine bushing oversize for different diameters?
Joe
Joe

