The Stars Have Been In Alignment For Me This Week. Just Got My First Lathe, A D/r 11x36, 25-100

Picked up my spindle and pulley gear from the machine shop today. The pulley gear now runs smooth as glass on the spindle. The total to have the journal reground on the spindle and have the bushings reamed to fit was $220. I feel like it was worth it to have the spindle back to nearly "like-new" condition.

Now, once I get a chance to get some paint on the headstock casting, I can start reassembling things.
 
Tony, did you find a worm gear? I have called around but no luck yet....:thinking:
 
Yep. I got mine from Dick Triemstra. He had made some a while back and had one left. Scott Powell, from the Yahoo Group is making a batch, I believe. You might check with him. I was very pleased with the MCL-271 tumbler gear he made.

To make sure, you are talking about the MCL-166 worm gear, also called the clutch gear, which is bronze, yes? I also replaced the worm, which is the steel longitudinal gear the feed screw runs through. I got an excellent used one from Joe at Plaza Machinery.
 
I need the worm, I have a great clutch (worm) gear. I also need a compound gear, mine has razor sharp teeth now. I will contact Joe when I get a chance. Thanks. Tim
 
Well, this week I had to repair two vehicles and a washing machine, but I finally got back to working on the lathe today.

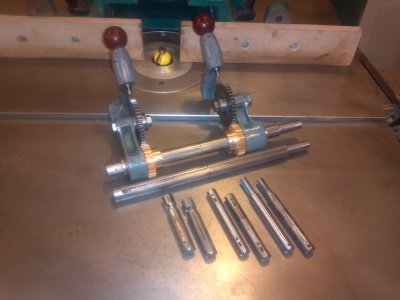
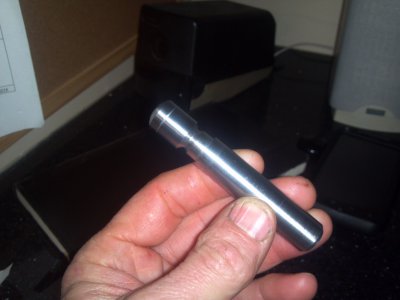
I finished the shafts I built to replace worn shafts in the apron and gear box. I got some use out of the Palmgren milling attachment I bought for cutting the keyways on the South Bend 9A. I am pleased with the way they came out. So pleased, in fact, that I have decided to replace three more shafts from the gear box, that I originally decided to leave alone. Might as well keep going while I'm at it, and not leave it half-done.

So, I have replaced the three worn shafts, the worm, the worm gear (clutch gear), the compound gear, and all the bushings in the apron, and when I get finished with the other shafts I intend to make, I'll have replaced all the shafts in the gear box, both tumbler gears, and all the bushings. I have also replaced the entire compound. Mine needed some parts and the T-slot had been broken and repaired, so I just bought a whole other compound that is in better condition all the way around, although I must say the old compound screw appears almost new.

Making headway, little by little.
2014-01-18 09.36.16.jpg2014-01-18 12.12.31.jpg2014-01-18_13-10-29_180.jpg2014-01-18_13-10-54_142.jpg2013-12-18_21-03-39_908.jpg2013-12-18_21-04-19_917.jpg2013-12-21 20.21.34.jpg

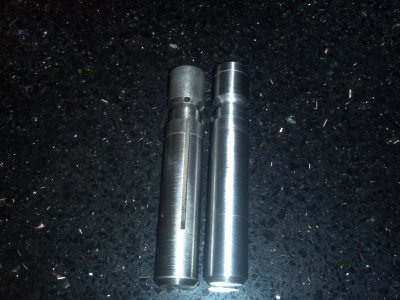
When I cut the keyway on the tumbler gear shaft, I had to do it in two operations. I cut the keyway from each end, meeting in the middle where the ring clip groove is. It had to be just perfect, though, because the right side tumbler has to mount from the left and slide past where they meet in the middle. Turned out perfect. I used a 3/16" carbide end mill to cut the slot. The slot has to be cut just a hair over 3/16" wide, to allow the key to slide easily, so it took several passes to get the depth, then another pass to take off another couple thou to widen the slot.

In the shot with all the shafts, the original are on the right and the new shafts on the left.

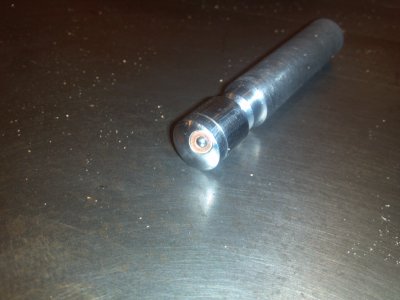
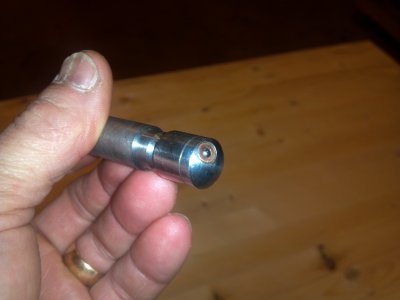
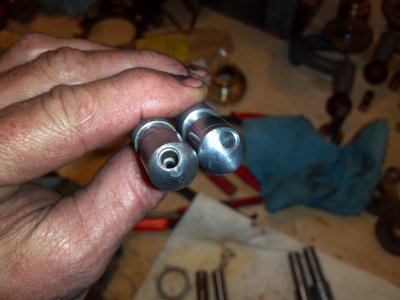
Also, you see a couple shots of the shaft that holds the apron compound gear. It has a ball oiler in the end. This was tricky to set up, as I mentioned in a previous post. I set it up in the milling attachment by chucking the drill bit in the headstock and using the old shaft to get the milling attachment set up at the proper height and angle. I ground a small flat on the domed end of the shaft at the proper angle for the drill, then fixed the shaft in the milling attachment, using a straightedge to get it set at the proper angle (the oiling hole penetrates the shaft at an angle, coming out on the opposite side of the shaft in the groove you see where my ring finger is). I got lucky and the 1/8" drill exited exactly where I wanted it to. Then I used a 1/4" brad-point drill bit to countersink the hole, using the 1/8" hole (I think it was 1/8", but might have been 3/32". I just used whatever fit in the hole in the old shaft) as a center, having left the shaft fixed in the milling attachment. After that, I used a 3/16" brad-point bit to drill the oil reservoir. I used a small punch to tap the original brass oiler out of the old shaft and pressed it into the new one for that original look. I had bought a replacement zinc-plated oiler from McMaster-Carr, but decided to try to re-use the original. Glad it worked. I like the look of the brass oiler better.

So, that's my fun for the day.

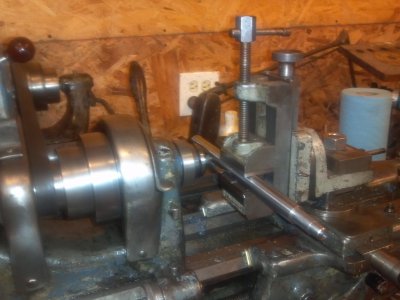
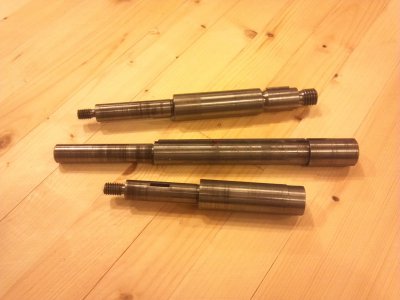
One of the shafts I'll be making next week has three diameters in the middle and different size threads on each end. Should be a fun and interesting challenge for me.
2014-01-18_13-47-00_831.jpg

2014-01-18 09.36.16.jpg 2014-01-18 12.12.31.jpg 2014-01-18_13-10-29_180.jpg 2014-01-18_13-10-54_142.jpg 2013-12-18_21-03-39_908.jpg 2013-12-18_21-04-19_917.jpg 2013-12-21 20.21.34.jpg 2014-01-18_13-47-00_831.jpg
 
Worked on degreasing the bed and chip pan of the DR yesterday. I further disassembled the vari-drive assembly and found I need to replace another shaft and appertaining bushings. Ordered the materials today. Also received the steel for the other three shafts I mentioned for the gear box. maybe I can get those done before the end of the week. Also found the aluminum sheaves for the large belts have some corrosion on them. I'll need to see if I can get that mitigated.

It's been so cold this week that I haven't even been able to get the workshop warm with the wood stove, so I haven't gotten a lot done this week.
 
Finished cutting the three shafts from the last picture above. I had to re-make one shaft, because I messed up the threaded end. My SB9A has a shop-built threading dial with no marks on it, and I keep bumping it and it disengages, so I lose track of where to engage the half-nuts. Tomorrow I'll try to cut the threads on the three threaded ends, as well as the keyways and oil grooves on all three. Two ends are threaded 5/16-18 and one is 1/2-13. I scribed a line on the top of the threading dial in place of number marks 1 and 3, so if I can keep it engaged I'll be able to cut those threads. If it keeps disengaging on me, I'll see if I can cut the threads by reversing the motor. I guess I'll eventually have to break down and buy a real SB threading dial.

Pics tomorrow.
 
I can guarantee it happened. Just haven't gotten around to the pictures yet. Maybe tomorrow.

I got the threaded ends of the two shafts cut today. Came out ok, thankfully. I still need to cut the keyways and I'll be done with the shafts and will then turn my attention to installing the bushings. Some of them are going to have to be turned down on the OD just a hair.
 
Hey Tony, we are still waiting on pics of your progress! Tim
 
Back
Top