Thread Choice On Larger Diameter

Bob is steering you good. My suggestion is 16 tpi.
Try to cut the female threads first and then cut the male threads for the fit you want. Sneak up on final dimensions of male threads by using the female part for trial fits. Go slow, it is easier to take a tad more off than to add a tad back on.
 
Rather than just make and toss threaded parts, why not look up (aka increasing knowledge base) all the detail of thread gages, both plug and ring. Practice on making them until you make some acceptable gages, both ring and plug. When you get done, you will have a set of tools when you finish, rather than just stubs of thread. Just an idea.
 
Thanks for your reply Bob. I have down the basics already. I have a thread dial and I will be cutting a relief groove in the work. I have some more advanced questions though.
I will plan on 20 TPI to keep the depth of cut lesser. 16 TPI is a little deep.
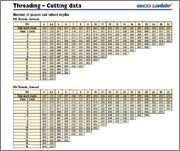
So based on this table:
threadcut.jpg

I would want a DOC of 0.033". Simple. Well only if you use the cross slide for feeding. I usually use the compound set at 29 deg.
Am I correct in assuming that I can advance the compound 0.033 / Cosine 29 deg or 0.038" total? This equates to 1.15 x the DOC. Since this is not a standard bolt/nut size I will not have good way to check for accuracy except to cut it right and then machine the mating part to fit.
R

Tony- You posted while I was typing! Yes, great idea.
R
 
Last edited:
Robert, your calculation is correct for using the compound. Be sure to sneak up on the final dimension, because there is always some flex in the part, the tooling, and the machine. Note that it is .033" for external threads. .030" for internal threads. There is also a range for meeting various accuracy classes of threads. All those dimensions have a maximum and minimum size, and it is different depending on the thread class. For hobby machinists, often times cutting to fit is good enough, and it can result in better fits. As Tozguy said, sneak up on it and test the fit with the mating part. That is not acceptable in a production environment, but in your home shop, you make the rules...
 
If I were just practicing the cut, and the tool pullout, I would not be concerned about the measured pitch diameter. But threading is a basic lathe operation and all machinists should become proficient at it. And for that, there is no substitute for spindle time and practice. Once you are comfortable with the cutting part of threading, start on accuracy. Learn to measure each element. You will need a few new tools, and learn a few new techniques. It will take time and patience, but you will have a grasp on something that not many home machinists ever learn properly. You can make gages and using them, make parts years down the road..............and guess what? They will mate up properly! What a concept!
 
OK...now you got me started...
So I cut the thread as described. I started with a cylinder of exactly 0.750". I set the compound to 29 deg and I made multiple passes totaling 0.043" (on the compound.) No issues and the thread looks good. Problem is its the wrong size somehow!
I used the 3 wire method to measure the pitch diameter. I mic it at 0.767" using .037" wire. I know that wire is not perfect but its darn close and should work.
When you put those numbers in this equation:
E=M-3G- (.86603/N) that gives a pitch diameter of .613

http://www.threadcheck.com/technical-documents/thread-measuring-wire-formulas.pdf

That is not even close to what it should be. (approx .712 - .718)
Am I using the correct equation? Am I making a math error? Is there a better way to verify the thread without a gauge? I will cut another one tomorrow just to verify I did not make a machining mistake. Any thoughts on this?
Robert

To calculate it another way: M (measurement over wires)= .750 + .111 - 1.5155/20 = .785. In other words I should be measuring .785 over the wires if I cut the thread right. Looks like I cut it too small somehow since I measure .767. Hard to believe its off by 20 thou.
R

Edit again:
OK I'm an idiot. I was all focused on the measurement issues when the basic error I made was in the first paragraph! The depth of cut should have been .033 + .005. I added the .005 twice and cut to .043. That accounts for 10 thou of the issue right there. Doh....
R
 
Last edited:
Post some pics here for educational purposes if you wish. I have just enough experience threading large diameters to be dangerous.
Sounds like 20 TPI would be a good choice. I will first make a test plug with a threaded OD and try to get it perfect. Then use that to test the internal threads.
I need to make or buy an internal threading tool.
R
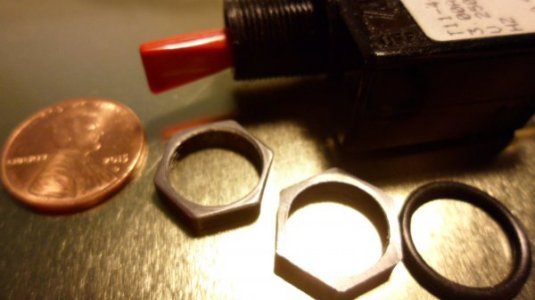
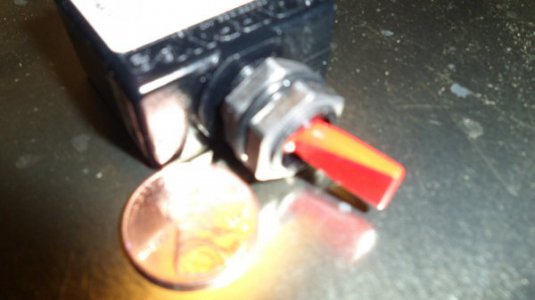
No pics of the machining, just the finished product. The first try came out really nice until on the final spring pass I engaged the feed lever instead of the half nuts, did not notice, ruined the threads, followed by some not very nice words. Senior moment... So, started over, the work went much more quickly the second time. They fit well, a little tight, but I was not able to test the fit until they were finished. The switch is plastic, so the threads conform to the steel nuts. 1/2"-32 threads, 9/16" hex, used 5/8" O-1 drill rod.
SAM_1409.JPG SAM_1413.JPG
 
I just started using a lathe this year, and started with trying to do threads. I'd be doing fine [putting lathe in reverse instead of releasing half nut, as I was doing metric threads], thread looks ok, then get close to finished, trying to do tiny cuts, but it would take a huge cut. Restart from scratch, does it again.

Turned out the shear pin for the thread screw had sheared. There was still enough friction to drive the carriage mostly ok, but sometimes momentum would shift the whole threadscrew over a bit. And then the thread would get wiped out.

But I managed to figure it out, with the help of people here. Then when I made my lawnmower blade grinder, it was no problem making the left-handed metric thread and nut to hold the grinding wheel on.
 
Nice work Bob. Those look factory!
I will re-make my plug gauge tomorrow morning (after coffee.) This time I am going to measure using the 3 wire technique and just shoot for 0.785". I learned a lot tonight in a very short time. Mostly I learned to write stuff down. I am considering a chalk board for a backsplash on the lathe!
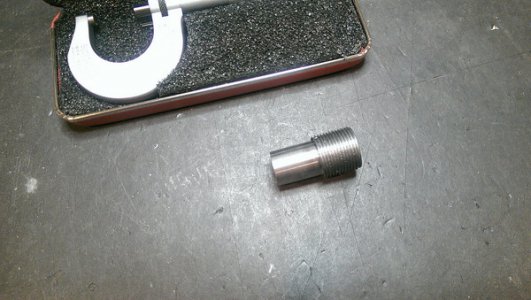
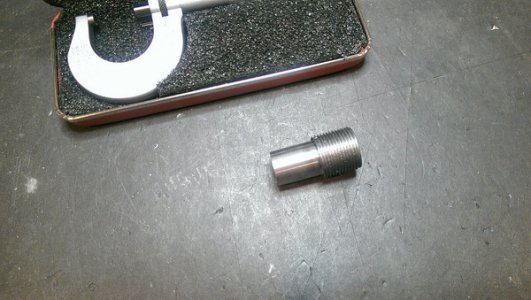
Here is the trashed gauge that now will become a gauge for 1/2-28!
26519658173_d63a800ca5_h.jpg
R

I keep a couple of smaller note books in the workshop dedicated to writing working notes on, they come in very handy for many tasks, including threading :) they are a bit grubby now but thats why their dedicated to living in the workshop.

Stuart
 
Back
Top