- Joined
- Feb 2, 2013
- Messages
- 3,627
I have 2 versions of the Unimat, a SL1000, and a DB200.
i have enough Emco tooling and accessories to make one of them useful as a lathe as well as a mill/drill
which is great if i want to use both of them in the same location, but i was hoping to separate the pair and use them apart.
that means double tools and accessories to make them both effective.
my SL100 came with a tool post, but by DB200 did not
i shopped around on ebay and found a few for around $50 by the time shipping is calculated.
some were not Emco, some were- for the same price.
i decided to construct my own from unknownium i had sitting in the corner
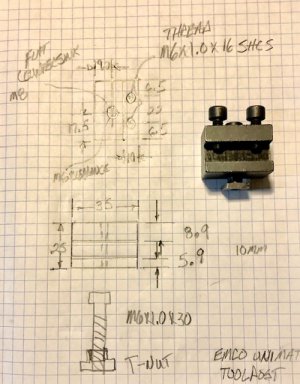
first came the Emco tool post, i needed to reverse engineer its dimensions as follows:
so i cut a oversized slug of the hot rolled unknownium-
(the slug had evidence of mill scale, leading to my speculation of the hot rolled material)
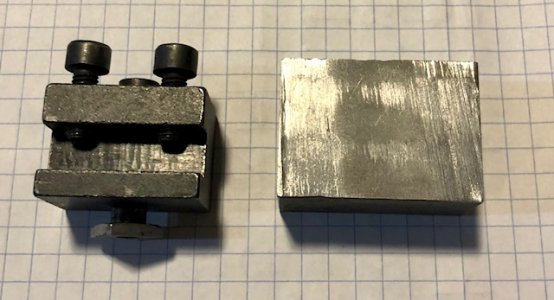
i decided to go with a slightly thicker tool post, in thought that rigidity would be positively influenced by more mass.
the sides, top and bottom, were fly cut on the BP mill
the tool slot was milled to 10mm square like the OEM post
Drilled on the BP mill, and tapped by hand
lapped 6 sides to 180 grit, deburred
gun blued
i was able to replicate the tool post with a finer finish at the shop for around $15 to $18
most of the costs associated to the M6x1.0 HHCS hardware, and the bottle of gun blue solution.
no animals, especially this one, were harmed in the making of this device
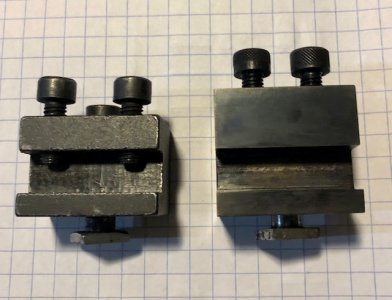
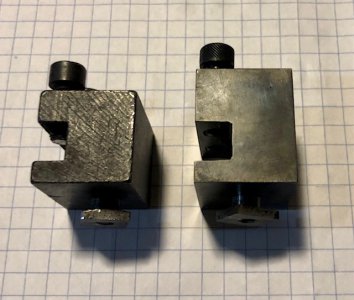
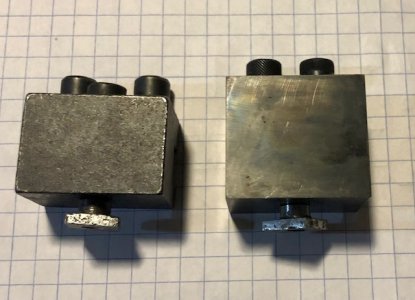
the Emco post lacked QC as far as appearance was concerned, but is fully functional
i trust my take will function as intended. i'll give a report as to how i did soon.
i'll be taking the shop made tool post to be used with the DB200 at the shop,
the SL1000 will stay in my home shop.
there are more shop made copies to come for the Unimat
Stay tuned!
i have enough Emco tooling and accessories to make one of them useful as a lathe as well as a mill/drill
which is great if i want to use both of them in the same location, but i was hoping to separate the pair and use them apart.
that means double tools and accessories to make them both effective.
my SL100 came with a tool post, but by DB200 did not
i shopped around on ebay and found a few for around $50 by the time shipping is calculated.
some were not Emco, some were- for the same price.
i decided to construct my own from unknownium i had sitting in the corner
first came the Emco tool post, i needed to reverse engineer its dimensions as follows:

so i cut a oversized slug of the hot rolled unknownium-
(the slug had evidence of mill scale, leading to my speculation of the hot rolled material)

i decided to go with a slightly thicker tool post, in thought that rigidity would be positively influenced by more mass.
the sides, top and bottom, were fly cut on the BP mill
the tool slot was milled to 10mm square like the OEM post
Drilled on the BP mill, and tapped by hand
lapped 6 sides to 180 grit, deburred
gun blued
i was able to replicate the tool post with a finer finish at the shop for around $15 to $18
most of the costs associated to the M6x1.0 HHCS hardware, and the bottle of gun blue solution.
no animals, especially this one, were harmed in the making of this device


the Emco post lacked QC as far as appearance was concerned, but is fully functional
i trust my take will function as intended. i'll give a report as to how i did soon.
i'll be taking the shop made tool post to be used with the DB200 at the shop,
the SL1000 will stay in my home shop.
there are more shop made copies to come for the Unimat
Stay tuned!


