-
Welcome back Guest! Did you know you can mentor other members here at H-M? If not, please check out our Relaunch of Hobby Machinist Mentoring Program!
You are using an out of date browser. It may not display this or other websites correctly.
You should upgrade or use an alternative browser.
You should upgrade or use an alternative browser.
Using three pin gauges to extend measurement range
- Category Charts, Tables & Calculations
- Thread starter Winegrower
- Start date
Oh man, you have to love the internet. Found it: http://www.ambrsoft.com/TrigoCalc/Circles3/Tangency/Tangent.htm
I guess Descartes figured this out for himself a long long time ago.
I guess Descartes figured this out for himself a long long time ago.
One more comment. I collect wrist pins from ICE pistons as they are hardened and very tight toleranced for roundness, cylindricity, and diameter. A 3.4" pin along with my .250 to .500 pin gage set extends my measurement capability to 1.250". A 1.000" and 1.250" pin extend the measurement capability to 1.750" holes.
I have gage pins up to .500 by 0.001 steps minus up to .0002. I had to run the #s on the site given by Wingrower. Running for the greatest variability of my pins (from full size to full undersize for all 3 pins) I get .00088" diameter max. variation. So the maximum size hole I could measure by the 3 pin method is 1.07306 with a possible 1.07218 result. Using the two pin method I can only get to 0.999 ( +.0000 to - 0.0004 max variation)
Hope I ran the #s correctly.
This exercise assumes a lot about my ability to handle and feel the fit of the pins.
Hope I ran the #s correctly.
This exercise assumes a lot about my ability to handle and feel the fit of the pins.
Well, this has been fun. Looks like as RJ said, you can fine tune the target diameter to tenths by careful selection of the three pins. And Larry$ can indeed use his half inch gauge pins for up to an inch range. You can roughly double the size range available.
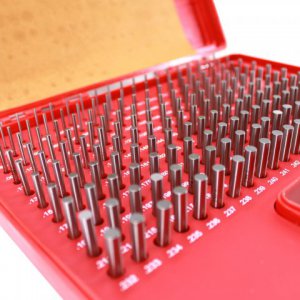
When I posted in the "What did you buy today" thread about getting a pin gauge set, there were comments from Larry42, RJSakowski and Doug Grey that using multiple pins could extend the range of the set to larger diameter holes. This seemed interesting, because the basic set I got included pins from 0.061" up to a maximum of 0.250"
Here's the set:
But RJSakowski and Doug Grey added drawings showing how three tangent pins can be circumscribed by a larger circle tangent to each of the three pins:

This was apparently first observed by Descartes long ago, who showed that...get this...the sum of the reciprocals of the 4 radii is equal to twice the sum of the squared reciprocals of the radii. Who knew? http://www.ambrsoft.com/TrigoCalc/Circles3/Tangency/Tangent.htm
So in the machining context, given three gauge pins, you can solve for the diameter of the larger hole they fit.
The attached spreadsheet shows calculations for given any three arbitrary pins finding the larger surrounding hole.
But how to know the right three pins to try? The spreadsheet also calculates the larger hole assuming three adjacent pins, 0.001" apart, are chosen. The range of the measurements is at least doubled.
Additionally if you add a much larger known diameter pin, you can extend the range to significantly beyond the basic set, and improve the resolution as well. The spreadsheet shows the incremental resolution achieved with the given pin set.
Overall, with a 0.061" to 0.250" pin gauge set, which cost me about $55, and four additional pins, which I had, or you could make, 0.375, 0.500. 0.625 and 0.750, you can measure up to over an inch with 0.001" resolution.
That seems pretty cool to me. Thank you Descartes and HM posters.
Here's the set:

But RJSakowski and Doug Grey added drawings showing how three tangent pins can be circumscribed by a larger circle tangent to each of the three pins:

This was apparently first observed by Descartes long ago, who showed that...get this...the sum of the reciprocals of the 4 radii is equal to twice the sum of the squared reciprocals of the radii. Who knew? http://www.ambrsoft.com/TrigoCalc/Circles3/Tangency/Tangent.htm
So in the machining context, given three gauge pins, you can solve for the diameter of the larger hole they fit.
The attached spreadsheet shows calculations for given any three arbitrary pins finding the larger surrounding hole.
But how to know the right three pins to try? The spreadsheet also calculates the larger hole assuming three adjacent pins, 0.001" apart, are chosen. The range of the measurements is at least doubled.
Additionally if you add a much larger known diameter pin, you can extend the range to significantly beyond the basic set, and improve the resolution as well. The spreadsheet shows the incremental resolution achieved with the given pin set.
Overall, with a 0.061" to 0.250" pin gauge set, which cost me about $55, and four additional pins, which I had, or you could make, 0.375, 0.500. 0.625 and 0.750, you can measure up to over an inch with 0.001" resolution.
That seems pretty cool to me. Thank you Descartes and HM posters.
Attachments
Last edited:
I could not resist getting a gauge pin set…0.061 to 0.250 covers a good range that snap gauges can’t.
Edit: these are minus sets, no bigger than the stated diameter, no smaller than two tenths under.
View attachment 387075
I can remember dozens of times I needed a bigger pin and didn't have one. I could have used this trick every time, and never thought of it. Thanks for sharing this.
I suppose the small pin could be any size. Even if it never touches the hole, it'll keep the other two aligned with each other and and side by side. A minus .251" pin and a minus .249 pin would be perfect to gauge a half inch hole!
I just bumped into this very useful thread.
To make use of the three pin method as simple as possible, I found the linked page. The page includes a link to a calculator which does the math for you.
 holecalc.com
To make use of the three pin method as simple as possible, I found the linked page. The page includes a link to a calculator which does the math for you.
Hole Calc - Measure Bores with Three Pins
Hole calc provides calculators to help machinists, craftspeople, engineers and designers measure any bore diameter using three gage pins.
Here's a spreadsheet, for those who must tinker. I posted it in another thread but it was buried in the discussion. Make a copy and edit to your heart's content. It's no better than the calculators except that you can see the formulas. BE careful not to choose a too-small 3rd pin (D3).

 docs.google.com
I was wondering HOW SMALL of an adjustment you can get using 3 pins. Turns out, it depends on the size of the pins.
The technique I am imagining is that you 2 gage pins that are very close to half the hole's diameter. Use a 3rd pin as a feeler gage.
For the hole that is 2.1549" in diameter, if you try pins in 0.001 inch increments, the gage diameter of those pins increases by about 4 10ths per thou.
a
Smaller holes can be measured in smaller increments. A hole measuring about 1 inch in diameter uses smaller pins (0.500 and 0.499, for example). These pin diameters (well, their curvatures) multiply through the equation so the smaller pins means smaller increments in gage diameter. For a 1" hole, the increments are 2 tenths. Similar for a 0.5" hole.
For large holes, gage blocks with cylindrical ends might be more practical. I wonder if you could roll 3 pins around in a hole, feeling for tight spots... It's fun to think about but I should probably be working on something else.
Gage pin tuples - Public
Sheet1 Enter Pin gage diameter,(Mathematicians Pin gage,love radii),Curvature Circle,"D",Adjustment,D,R,K 1,1.000,-0.0002,0.9998,0.4999,2.0004 2,1.000,-0.0002,0.9998,0.4999,2.0004 3,1.000,-0.0002,0.9998,0.4999,2.0004 Solving for,Interior Circle (pos),Circumbscribing Circle (neg),Example: diam...
I was wondering HOW SMALL of an adjustment you can get using 3 pins. Turns out, it depends on the size of the pins.
The technique I am imagining is that you 2 gage pins that are very close to half the hole's diameter. Use a 3rd pin as a feeler gage.
For the hole that is 2.1549" in diameter, if you try pins in 0.001 inch increments, the gage diameter of those pins increases by about 4 10ths per thou.
a
Smaller holes can be measured in smaller increments. A hole measuring about 1 inch in diameter uses smaller pins (0.500 and 0.499, for example). These pin diameters (well, their curvatures) multiply through the equation so the smaller pins means smaller increments in gage diameter. For a 1" hole, the increments are 2 tenths. Similar for a 0.5" hole.
For large holes, gage blocks with cylindrical ends might be more practical. I wonder if you could roll 3 pins around in a hole, feeling for tight spots... It's fun to think about but I should probably be working on something else.
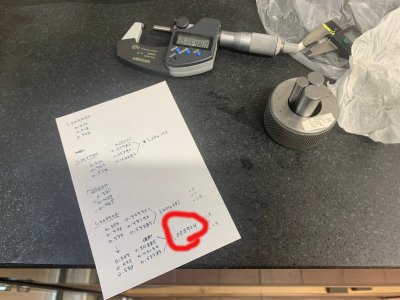
This has been quite theoretical for me so I picked up a used 1.0060 bore-setting gage on weebay. I found the spreadsheet useful for understanding the concept and guess-and-check type operations. However, I wanted explore the entire space of possible sizes. I was hoping that I could make a gage that is better than a tenth. With some effort, I was able to construct a set of pins that measured 1.00,6051
Couldn't do it in a spreadsheet so I turned to perl. Just looping through all the possibilities, it finds certain weird cases that are not physically possible. To test of a pin combination is real, I take one of the radii and increase it by 0.001. If the calculated gage diameter increases, I'm in the range of realistic possibilities. It also helps to set the smallest pin to a reasonable size. For a 1-inch bore, I started with 0.350 for the smallest pin. There are many possible choices that get you close. The gage diameter is right of the arrow. I've allowed combinations that are within a tenth of nominal (1.006,0 +/- 0.000,1)
I checked the last one. This assumes -0.000,2 on the pins' diameters. When I assembled the gage with my particular pins, the gage diameter was 1.006,051 which did not fit in the bore. The pins were closer to -0.000,1. Recalculating with 0.349 instead of the .350 pin, the gage diameter was 1.005,904 and it was a very close sliding fit.
Couldn't do it in a spreadsheet so I turned to perl. Just looping through all the possibilities, it finds certain weird cases that are not physically possible. To test of a pin combination is real, I take one of the radii and increase it by 0.001. If the calculated gage diameter increases, I'm in the range of realistic possibilities. It also helps to set the smallest pin to a reasonable size. For a 1-inch bore, I started with 0.350 for the smallest pin. There are many possible choices that get you close. The gage diameter is right of the arrow. I've allowed combinations that are within a tenth of nominal (1.006,0 +/- 0.000,1)
# ./pin_tuples.pl
0.350000 0.353000 0.636000 --> 1.005939 1.006498 0.000558
0.350000 0.365000 0.628000 --> 1.005937 1.006427 0.000490
0.350000 0.368000 0.626000 --> 1.006068 1.006541 0.000473
0.350000 0.372000 0.623000 --> 1.006001 1.006454 0.000453
0.350000 0.376000 0.620000 --> 1.006013 1.006446 0.000433
0.350000 0.380000 0.617000 --> 1.006099 1.006513 0.000413
0.350000 0.385000 0.613000 --> 1.006068 1.006458 0.000390
0.350000 0.391000 0.608000 --> 1.005972 1.006336 0.000364
0.350000 0.397000 0.603000 --> 1.006004 1.006344 0.000340
0.350000 0.404000 0.597000 --> 1.006029 1.006342 0.000313
0.350000 0.405000 0.596000 --> 1.005909 1.006219 0.000310
0.350000 0.412000 0.590000 --> 1.006091 1.006376 0.000285
0.350000 0.413000 0.589000 --> 1.005991 1.006273 0.000282
0.350000 0.423000 0.580000 --> 1.006068 1.006319 0.000251
0.350000 0.424000 0.579000 --> 1.005992 1.006240 0.000248
0.350000 0.425000 0.578000 --> 1.005918 1.006164 0.000245
0.350000 0.438000 0.566000 --> 1.006062 1.006274 0.000212
0.350000 0.439000 0.565000 --> 1.006011 1.006221 0.000210
0.350000 0.440000 0.564000 --> 1.005961 1.006169 0.000208
0.350000 0.441000 0.563000 --> 1.005913 1.006118 0.000206
0.350000 0.463000 0.542000 --> 1.006091 1.006256 0.000166
0.350000 0.464000 0.541000 --> 1.006067 1.006231 0.000165
0.350000 0.465000 0.540000 --> 1.006043 1.006206 0.000163
0.350000 0.466000 0.539000 --> 1.006021 1.006183 0.000162
0.350000 0.467000 0.538000 --> 1.005999 1.006160 0.000161
0.350000 0.468000 0.537000 --> 1.005978 1.006138 0.000160
0.350000 0.469000 0.536000 --> 1.005958 1.006116 0.000158
0.350000 0.470000 0.535000 --> 1.005939 1.006096 0.000157
0.350000 0.471000 0.534000 --> 1.005920 1.006076 0.000156
0.350000 0.472000 0.533000 --> 1.005902 1.006057 0.000155
I checked the last one. This assumes -0.000,2 on the pins' diameters. When I assembled the gage with my particular pins, the gage diameter was 1.006,051 which did not fit in the bore. The pins were closer to -0.000,1. Recalculating with 0.349 instead of the .350 pin, the gage diameter was 1.005,904 and it was a very close sliding fit.

Last edited:

