2015 POTD Thread Archive

My basement laundry room floor has a drain in the center but the throw rug was covering it, allowing the water to build up somewhat. The majority of damage was caused by water pouring out of the heat ducts in the ceiling of the basement, from every outlet, plus the edge and end joints of the sheet metal, especially over the drywalled ceiling.


That is a bit of a bugger , can you get "Blow out valves " fitted to the incoming water point inside your home , fitted immediately after the shut off valve.. We can get then here in the UK .
All mains pressure water lines laid in the garden , in a garage or to an external water point have to be fitted with these by law . When the pipe / hose is severed or it blows off the connection union nipple , the water pressure being suddenly free to fast flow moves a piston over the outlet port of the valve which cuts off the water till the severed or severely pipe is repaired .

Fitting them inside your home or garage also attracts lower insurance premiums...

They are magic IMO ,well worth fitting...... especially if you live in condo's
 
That is a bit of a bugger , can you get "Blow out valves " fitted to the incoming water point inside your home , fitted immediately after the shut off valve.. We can get then here in the UK .

I couldn't find any reference to "blow out valves" with google. I would have thought that Lowes or Home Depot would carry them but they don't list it.

All mains pressure water lines laid in the garden , in a garage or to an external water point have to be fitted with these by law . When the pipe / hose is severed or it blows off the connection union nipple , the water pressure being suddenly free to fast flow moves a piston over the outlet port of the valve which cuts off the water till the severed or severely pipe is repaired .

These might work for a completely free running tap but in my case, the filter was split half way around the plastic case, maintaining some back pressure akin to a tap only partially opened. What happens if you open a tap fully or have a hose hooked up without a nozzle to wash your car, or fill a kiddie pool, does the valve shut off the water?
 
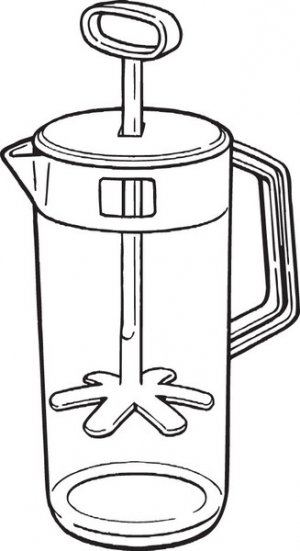
Projects like this is why we spend thousands of $$ on tools and equipment and countless hours honing our skills to a fine edge. All to spend 3 hours in the shop fixing a $15 RubberMaid blender for a friend. I get paid in cheeseburgers for this kind of work, really good ones! Hmmmm....I need to make a cardboard sign....''Will work for food'' :grin:

01-3064-01-WHI_33672-00_c.jpg

The problem is that the rubber plunger thing falls off of the rod due to a really poor design, so ''yeah I can fix that'' So rather than just putting a SS screw in the end of the thing, I decide to make a whole new plunger assembly out of SS. I had a piece of 0.025 SS shim stock for the foot, a 5/16 SS rod out of a printer, and some 0.125 SS for the handle.

I didn't get all of the pictures I should have, none showing the finished product.

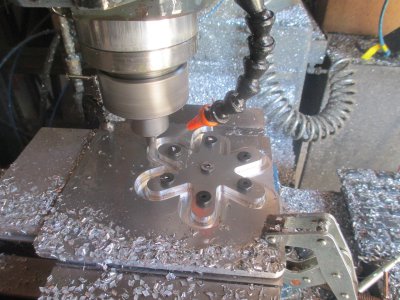
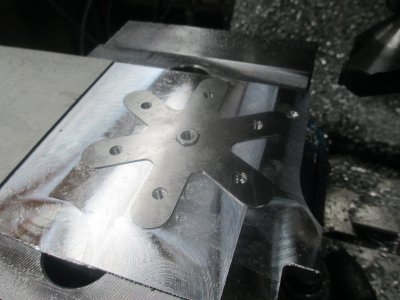
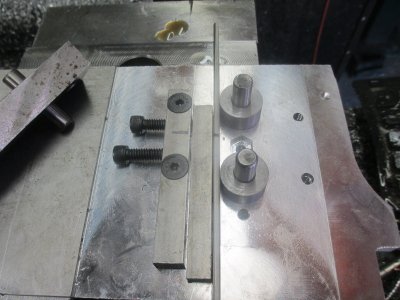
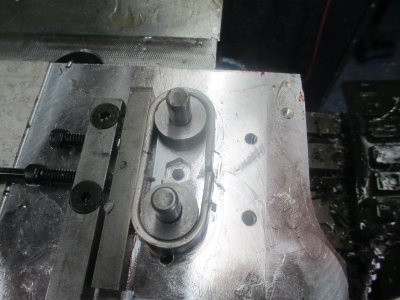
So over to the mill to cut out the foot. To cut out the 0.025 piece, I sandwiched the SS between 2 chunks of aluminum.
IMG_0320.jpg

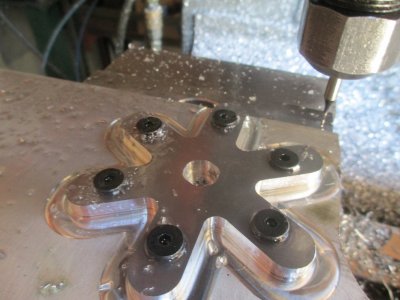
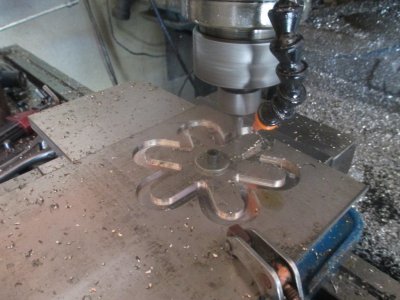
Now I need to cut out the center into a 1/4-20 nut shape so I can weld in the nut later. I clearanced the pocket to get clearance for the tiny end mill I wanted to cut the shape with. That's a 0.045 end mill.

IMG_0323.jpg

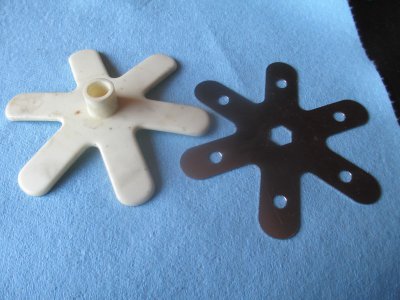
And here is the new foot and the old one.

IMG_0327.jpg

I pocketed the fixture to hold the nut at the right height for use as a welding fixture. So next over to the welding table.
IMG_0328.jpg

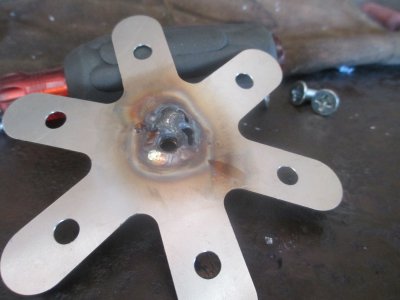
This a a poor picture but what is shows is that I made it half way around the nut just perfectly then I burned a hole in it. DO NOT drink a pot of coffee before trying to precision TIG weld!!!! :confused::mad:

IMG_0344.jpg

OK, off to plan B. Make a new one out of some of the 0.125 SS plate. Drill &tap the center hole for 1/4-20.

IMG_0342.jpg

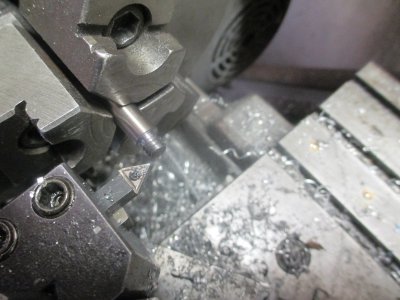
Thread the end of the rod for 1/4-20. I normally would not use a carbide insert tool for threading this but I couldn't find my fishtail to grind another out of HSS. Had to eyeball the alignment. Need to find that fishtail, probably fell down behind the lathe.

IMG_0332.jpg

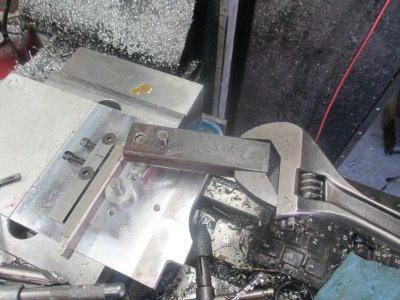
Now for the handle. First add a bending jig to the original fixture.

IMG_0333.jpg

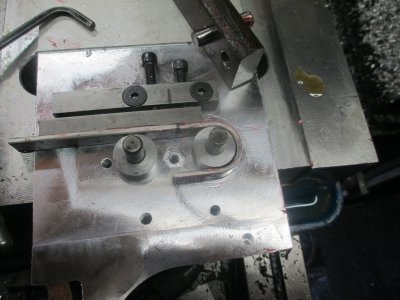
Now the bending

IMG_0337.jpg

Half bent
IMG_0338.jpg

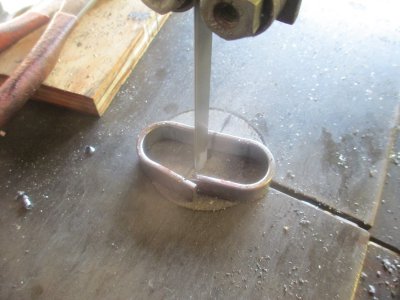
Trim the excess length
IMG_0339.jpg


Finish the bend

IMG_0340.jpg

That was the last picture. The next operation was over to the welding table again and weld the handle onto the shaft. I didn't screw that one up. My friend was happy with result, and I get food! :encourage:
 
Last edited:
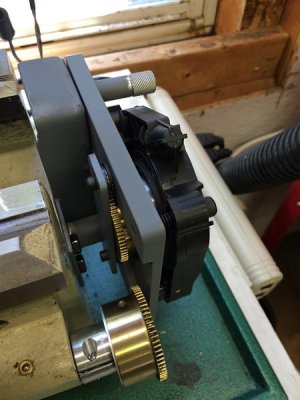
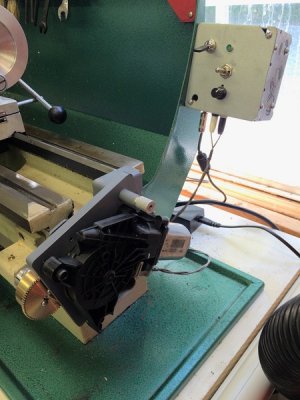
Not today, but yesterday, I finally finished a powered lead-screw mod for my G0602 lathe...

5BDA16B2-DCDE-4C6A-B8A9-FC1AA9160D03_zps7arcvtok.jpg

9172EF27-6D51-47A9-88D6-548759A74FAC_zps7qwimfzr.jpg

I've been wanting to build one of these for quite a while. I hate having to switch gears to switch between threading and cutting...
 
John,
In the auto stop there is a piston & spring assembly , when you open a tap the piston moves on the spring , so long as there is not a massive surge in the water that would suggests a broken pipe the piston moves back allowing water to pass. If there is little or no back pressure in the line it also seals.

Obviously it depends of the suddenness of the flow starting . If you open a tap in the normal way the piston does not operate so I guess it depends on how sudden the pressure reduction happened for the incoming pressure to operate the piston.

If in a sound water line , when you turn the tap off , a small hole with a jiggle pin in the valve face allows pressures to equalize & the vave to reset
 
Last edited:
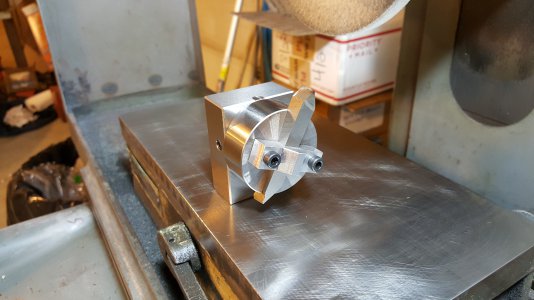
Made a tool bit grinding fixture, I have to put an angle into the base I think to get side clearance. It's a mix of materials, the square is A36, the round is 4140 tgp, clamp is 6061
View attachment 109281
This, I like . I think this will become my object of desire for the next couple of nights. I don't have "much trouble" grinding my own, but will make use of one of these jigs for threading tools.
 
Back
Top