- Joined
- Feb 8, 2014
- Messages
- 11,144
A long boring job, rough out the pocket the gear case for my Z-axis CNC conversion. Not really very interesting.
I should have used a bigger end mill to rough it out, took a long time, but I used what I had. It took about 1 hour per pass, at 0.125 deep and 6.5 IPM, 1600 RPM with a 0.5 roughing endmill. I think it would have taken more depth, but I didn't want to chance breaking a $35.00 endmill. Using WD-40 in my home brew mist coolant system, the red pressure tank, just visible on the left. I'll do a write up on the coolant system one of these days. WARNING: Do not pressurize flammable liquids with air, it can explode!! (like I'm doing here, but then I'm half crazy anyway.)
The nice thing was: No chatter, even when profiling at the full depth of about 1 1/4 inches to finish out the inside. I had my spindle rebuilt by C & M PRECISION SPINDLE, INC. I am very happy with the job they did.
Converting a perfectly good piece of aluminum into chips
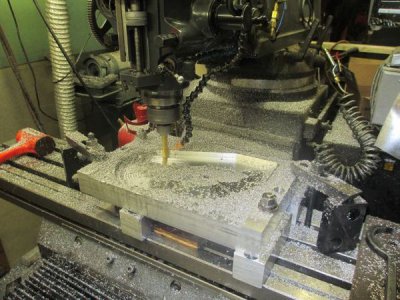
After pocketing to depth, I took a light cut around the outside profile to check the position of the clamps, don't want to run the cutter into them.
An interesting visual effect in the pocket bottom, it looks rough in the picture, but it is as smooth as a baby's behind.
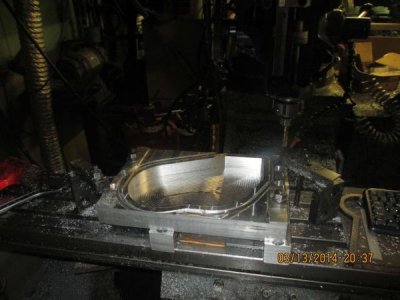
Next is to pocket the shaft holes..... stay tuned for more!
I should have used a bigger end mill to rough it out, took a long time, but I used what I had. It took about 1 hour per pass, at 0.125 deep and 6.5 IPM, 1600 RPM with a 0.5 roughing endmill. I think it would have taken more depth, but I didn't want to chance breaking a $35.00 endmill. Using WD-40 in my home brew mist coolant system, the red pressure tank, just visible on the left. I'll do a write up on the coolant system one of these days. WARNING: Do not pressurize flammable liquids with air, it can explode!! (like I'm doing here, but then I'm half crazy anyway.)
The nice thing was: No chatter, even when profiling at the full depth of about 1 1/4 inches to finish out the inside. I had my spindle rebuilt by C & M PRECISION SPINDLE, INC. I am very happy with the job they did.
Converting a perfectly good piece of aluminum into chips

After pocketing to depth, I took a light cut around the outside profile to check the position of the clamps, don't want to run the cutter into them.
An interesting visual effect in the pocket bottom, it looks rough in the picture, but it is as smooth as a baby's behind.

Next is to pocket the shaft holes..... stay tuned for more!


