-
Welcome back Guest! Did you know you can mentor other members here at H-M? If not, please check out our Relaunch of Hobby Machinist Mentoring Program!
- Forums
- THE PROJECTS AREA
- PROJECT OF THE DAY --- WHAT DID YOU DO IN YOUR SHOP TODAY?
- Project of the Day Mega-Thread Archives
You are using an out of date browser. It may not display this or other websites correctly.
You should upgrade or use an alternative browser.
You should upgrade or use an alternative browser.
2014 POTD Thread Archive
- Thread starter Smudgemo
- Start date
- Joined
- Apr 6, 2011
- Messages
- 2,082
Cannonball Run: Well we're Southbound and down, loaded up and truckin', we're gonna do what they say can't be done...!hew:
I thought that was from Smokey and the Bandit. :thinking:
-Ron
- Joined
- Feb 8, 2014
- Messages
- 11,144
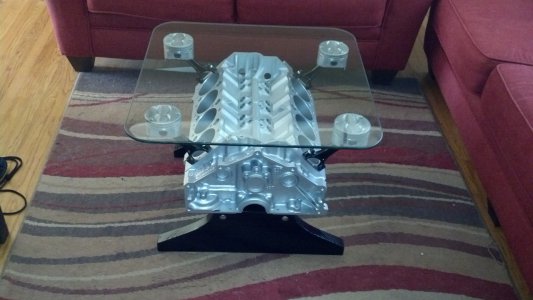
New coffee table for the house, fairly simple build. Only machining required a male 7/16-20 to 3/8-16 adaptor to bolt the pistons to the block.View attachment 75012
Now that is a nice coffee table. What is the 1/4 mile time?
- Joined
- Jan 21, 2013
- Messages
- 147
That's a right nice table design. First iv seen with the pistons and rods holding up the glass. Iron or aluminum? Or should I ask how many people do you need to move it?
Master of unfinished projects
Master of unfinished projects
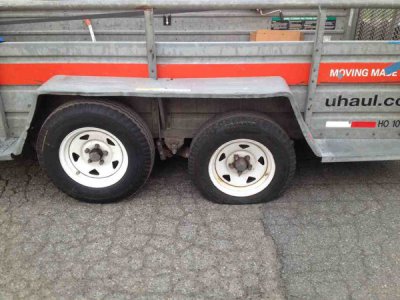
A friend with a 2 axle trailer was helping me pickup a 3000 lb machine. One of the tires was in bad shape and blew out on the way home. We stopped and looked at what used to be a tire, did some head scratching, then winched that end of the axle up with a big strap to remove load from the tire remnants and avoid damaging the rim. Finished the trip on 3 wheels without issue.
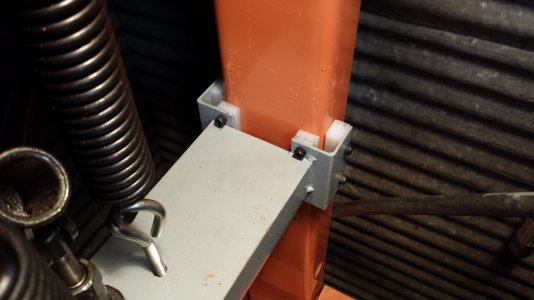
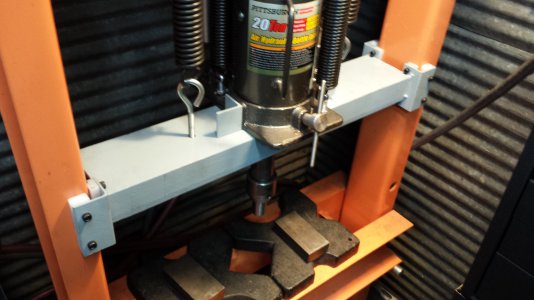
I recently picked up the 20 ton air over hydraulic bottle jack to replace the original one on my Harbor Freight 20 shop press. Anyone that has one of these presses knows that the "jack plate" that the jack sits on and has the ram welded to it is **** poor at actually keeping the ram straight. I also have the older orange version that's fully welded together and is pretty out of square. I believe the newer gray ones are bolted together and have several other improvements.
First I had to grind off some welds since the ram was actually welded to the jack plate out of plumb. I heated it up with a torch and wacked it into square. Then I removed the "guides" from the end and made new ones with some mounting holes. I spaced them further out so I could sandwich pieces of UHMW plastic between them and the uprights. I also welded on some small pieces of angle to keep the jack base from sliding around. In the original design the jack just sits on the jack plate. Now it glides up and down on the supports very tightly, no wiggle and perfectly plumb.
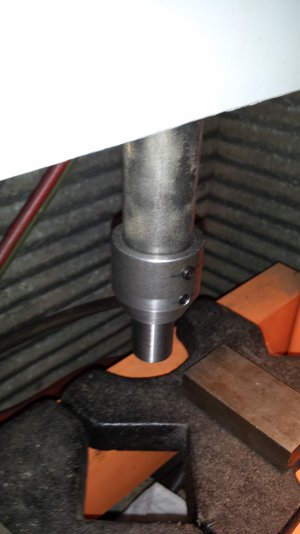
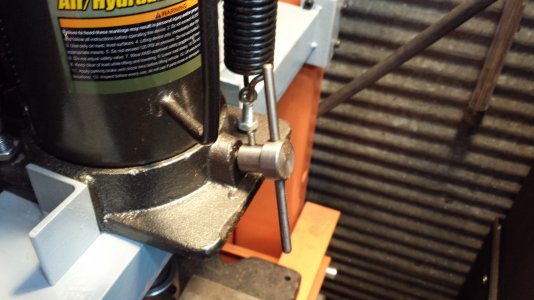
I've also added the T-handle to the front of the jack release valve for quick operation. I also turned a collar for the ram so that I can eventually swap different size press punches and accessories.
I need to get some more material for the next round of improvements.


for the next round of improvements.
View attachment 75020View attachment 75021View attachment 75022View attachment 75023[/QUOTE]
Can't wait to see what you do to the anvil part of the press to make it more useable.
View attachment 75020View attachment 75021View attachment 75022View attachment 75023[/QUOTE]
Can't wait to see what you do to the anvil part of the press to make it more useable.
- Joined
- Dec 17, 2012
- Messages
- 745
I need to get some more material for the next round of improvements
Nice job, specially the plastic sandwiches!
If you add a dial indicator to measure the flexure of the beam under the anvil you can even know how many tons you are actually using. But get one with a lot of decimal places… your beam don't have the span of a bridge.
Bridgeport vise crank
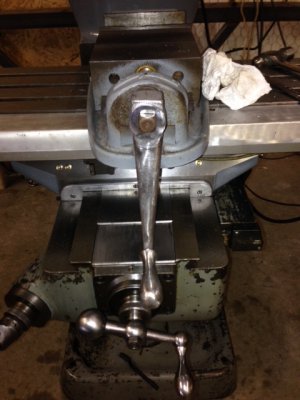
I found some old crank handles that look like they came off of some type of farm implement. I didn't get a crank with my Bridgeport vise, so, I made the 1/2 inch threaded hole into a 3/4 inch square hole, and now I have a crank for my vise. Problem was that I didn't have a 3/4 inch square broach, so, it took a lot of filing with a hand file.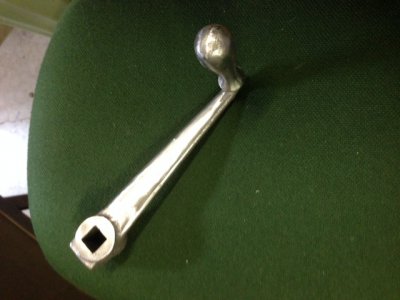


I found some old crank handles that look like they came off of some type of farm implement. I didn't get a crank with my Bridgeport vise, so, I made the 1/2 inch threaded hole into a 3/4 inch square hole, and now I have a crank for my vise. Problem was that I didn't have a 3/4 inch square broach, so, it took a lot of filing with a hand file.


