2014 POTD Thread Archive

I had planned to make a hand crank for the lathe. I still will, but I was too impatient to wait for the metal to arrive. There are 4 holes behind the registration boss on the spindle. They are there to facilitate removing the chuck, but they work well for rotating the chuck. I started out using them and the biggest hex key that would fit. It was hard to hit the back hole reliably, so I degenerated to using the jaw screw holes on the chuck. The chuck holes work fine with a round or hex bar. Do not use the chuck key to do the rotation. The jaw invariable loosens, the part shifts, and the thread is ruined. I will be making a crank even though I intend to convert to 3ph VFD. It really helps with threading and tapping.

I don't know about a spindle lock. One would be nice. Something would have to be fabricated since the G0602 doesn't have back gears. A fellow bamboo rod maker has a disk with holes in it mounted to his 7X lathe. It accepts a pin from a block on the top of the head. I have also seen crude index plates mounted on the back of 7X spindles.

Larry


Aloris makes a threading tool that cuts from left to right while running your lathe in reverse. This eliminates the concerns of threading to a sholder. You could probably rig up something that would allow you to do the same thing with your existing tool if you turn it upside down.
 
I had planned to make a hand crank for the lathe. I still will, but I was too impatient to wait for the metal to arrive. There are 4 holes behind the registration boss on the spindle. They are there to facilitate removing the chuck, but they work well for rotating the chuck. I started out using them and the biggest hex key that would fit. It was hard to hit the back hole reliably, so I degenerated to using the jaw screw holes on the chuck. The chuck holes work fine with a round or hex bar. Do not use the chuck key to do the rotation. The jaw invariable loosens, the part shifts, and the thread is ruined. I will be making a crank even though I intend to convert to 3ph VFD. It really helps with threading and tapping.

I don't know about a spindle lock. One would be nice. Something would have to be fabricated since the G0602 doesn't have back gears. A fellow bamboo rod maker has a disk with holes in it mounted to his 7X lathe. It accepts a pin from a block on the top of the head. I have also seen crude index plates mounted on the back of 7X spindles.

Larry
Thanks for the details. Sounds like there wasn't any secret sauce that I was missing... darn!

FYI, In the past I've had luck using a large adjustable wrench slipped over a jaw; quarter turn, then reposition. I was just hoping there was a simple way to plug into the rear of the spindle or something like that... thanks again.
 
I don't have anything that I have machined lately as I am machineless at the moment. I sold my Smithy 3-in-1 a couple of weeks ago and I am awaiting my new PM lathe and mill which should arrive in the near future. I have been re-arranging the shop in between paying jobs over the past couple of weeks in preperation for the new equipment.

Space is at a premium so I have been moving equipment around. I had a square cart next to my solvent tank ever since I built my shop in 1995. I actually built the cart for use at work but when things got to cramped at work with the addition of a few more mechanics I got permission to take it home as it was just built from scrap at work anyhow.

The caster wheels were junk by the time I brought it home 19 years ago but I wasn't concerned as I wasn't planning on rolling it around. I wanted it next to my solvent tank to put parts on while they were drying off after washing in the tank and some storage underneathe on the shelf. I also picked up a granite block a few years ago from a yard sale but unfortunately I have had so much crap stored on top of it that I didn't use it much. I used it mainly for lapping motorcycle cases or cylinder heads.

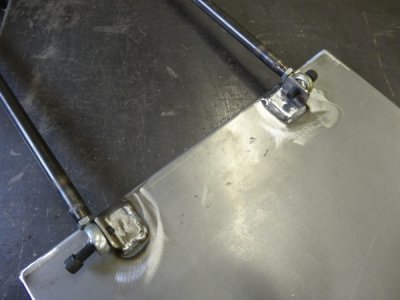
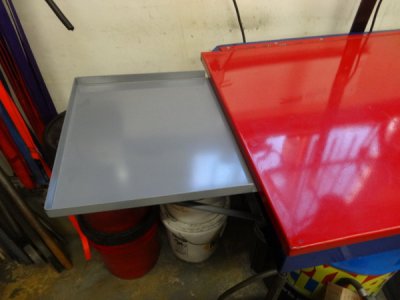
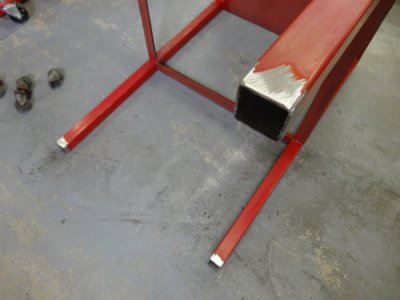
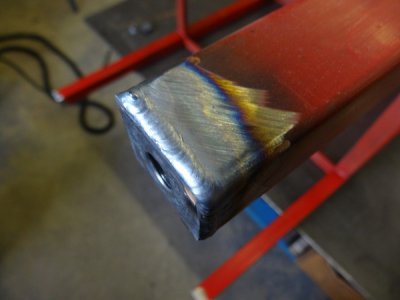
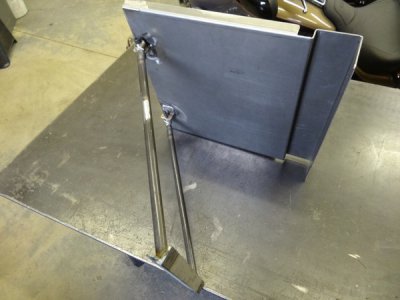
I decided to use the cart to put next to my new mill when it shows up and then I had to come up with an idea for put parts on after washing them in the solvent tank. I had a local sheet metal company bend up a small shelf out of 12-gauge P&O and then cut an old wheelie bar that I had hanging on the wall from a drag quad. I held on to it because I didn't want to throw away the welded bungs or rod ends on the 4130 chromoly. I finally found a use for it.
54svgw.jpg

2dilp55.jpg

Fabrication completed, bead blasted, painted and installed.
211vxhs.jpg

Now moving on to getting some new casters on that old cart and getting it ready to load up with toolbox for machining tools, granite plate and storage of machining accessories. I purchased some new casters from McMaster Carr. Nothing special just standard run of the mill 3" casters with a 290 pound capacity each.

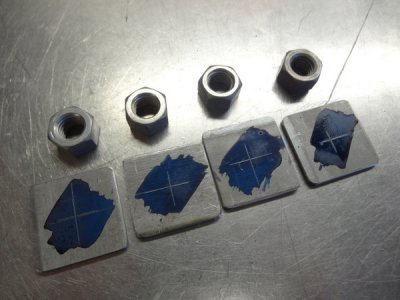
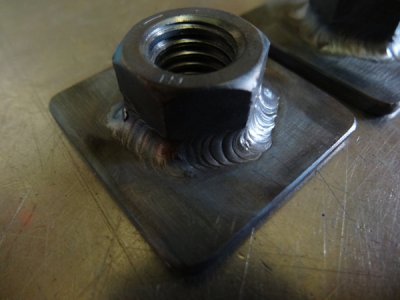
I cut some 1/8" P&O to weld the 1/2"-13 nuts to. The nuts I threw in a small container of muriatic acid to remove the zinc coating prior to welding. Blued and scribed then center punched the plates prior to drilling.
2eghguw.jpg

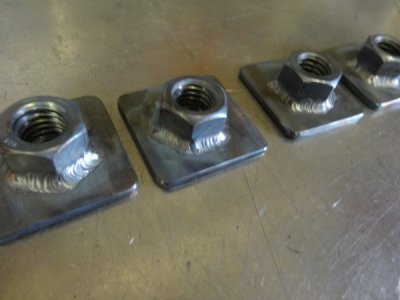
TIG welded and ready to cut the old casters off of the cart and weld on.
2mm8k1v.jpg

2m5jijc.jpg

Old worn out casters cut off of the legs.
2rot8ap.jpg

New nut plates welded into place.
2898wo7.jpg

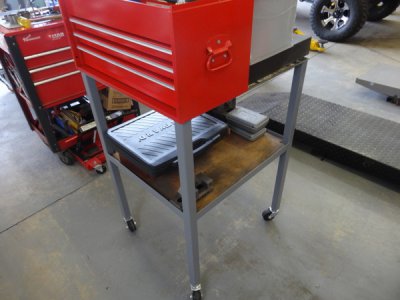
Fresh coat of Machinery Gray paint and loaded up.
i52avk.jpg

At least it will have nice new casters which roll so much easier. This will sit right next to the mill and can easily be rolled out of the way when sweeping up.

Mike.
 
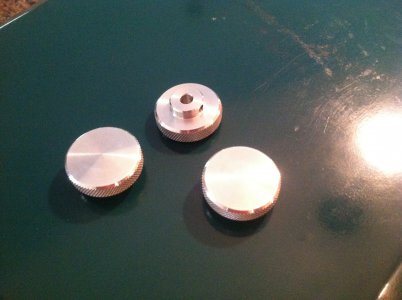
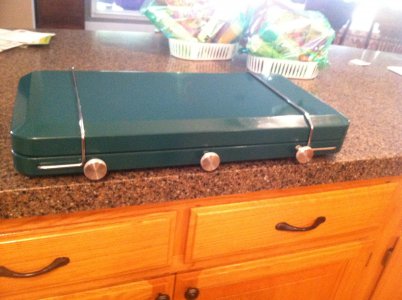
My son-in-law has a camp stove that needed new burner knobs. Knocked these out in about 2 hours. He's a happy camper. Pun intended.

IMG_0296.JPG

IMG_0297.JPG

IMG_0296.JPG IMG_0297.JPG
 
Nice knurly knobs.... What did you make them out of?

Also, Zmotorsports, nice looking welds. Very clean.


Today, I was home sick from work. So I found time to play.

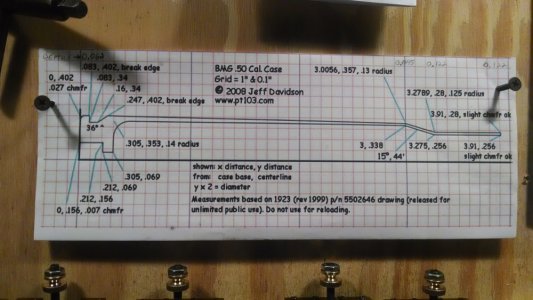
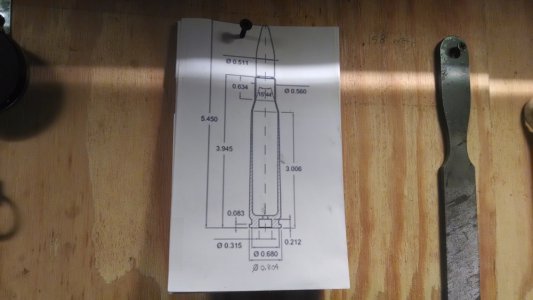
I took these:
BulletTime2.jpgBulletTime3.jpg

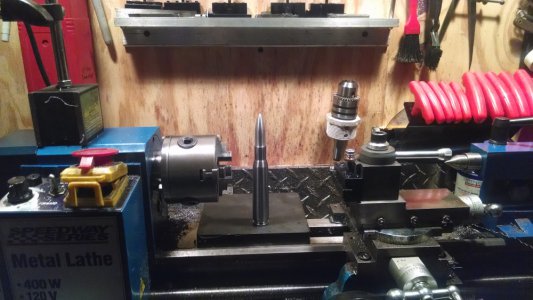
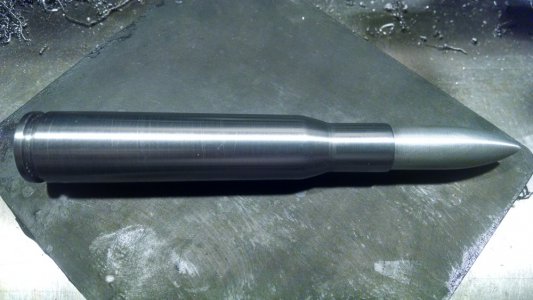
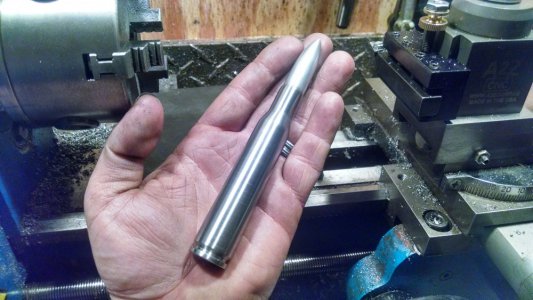
and some steel bar and aluminum rod and made this:
BulletTime1.jpgBulletTime5.jpgBulletTime4.jpg

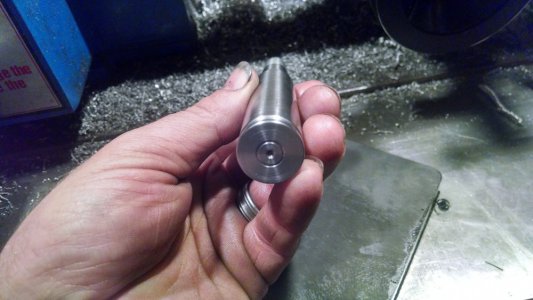
The steel "shell" is drilled to 7/16", and the .50 cal aluminum "bullet" is turned down to be a very tight press fit.

One thing I forgot to account for is leaving room for my center drill hole.
BulletTime6.jpg

So, it wound up being a "misfired" BMG 50 cal.

Overall, this project was just practice to see if I could follow schematics.
It's not dead on, but all the tolerances are within about .010"... I'm happy with it.

I am going to find some brass round bar (7/8"x4") and some copper (1/2"x2") and make a realistic one. :thumbsup:
Also want to pick up an alpha-numeric punch set...

BulletTime2.jpg BulletTime3.jpg BulletTime1.jpg BulletTime5.jpg BulletTime4.jpg BulletTime6.jpg
 
I spent the day moving machines to a friends place for sale, making room for the Sheldon Shaper I was SUPPOSED TO pick up today. I do believe there is some reason I am not meant to pick it up today, after a treacherous day trying to get the place ready.

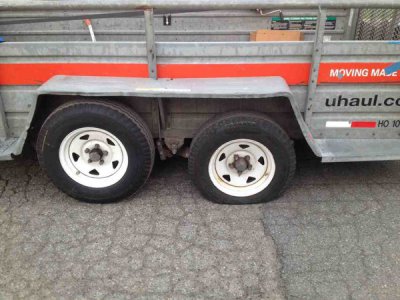
But I had to accept some kind of fate, when after the crazy day, and still successful rearranging of the evening to pick up the shaper AGAIN, this happened (see below)

:D hah hah hah!

Sometimes you gotta just smile, shake the dust off your pants, and go home! Hah hah:

agypaqud.jpg


New plans for this coming week!

Bernie
 
It's a U-haul... I'da kept going. Lol...

I was absolutely going to! As a matter of fact I did, but I certainly wasn't going to put 1500 pounds of shaper in the back with a bad tire! Hah hah...

Then the guys rescheduled the pickup of the shaper, so I followed through with the "roadside assist" so I might get a refund on my rental. This is how long it took to get that done!

e3u2y6a5.jpg


Bernie
 
Nice knurly knobs.... What did you make them out of?

Also, Zmotorsports, nice looking welds. Very clean.


Today, I was home sick from work. So I found time to play.

I took these:
View attachment 74840View attachment 74841

and some steel bar and aluminum rod and made this:
View attachment 74842View attachment 74843View attachment 74844

The steel "shell" is drilled to 7/16", and the .50 cal aluminum "bullet" is turned down to be a very tight press fit.

One thing I forgot to account for is leaving room for my center drill hole.
View attachment 74845

So, it wound up being a "misfired" BMG 50 cal.

Overall, this project was just practice to see if I could follow schematics.
It's not dead on, but all the tolerances are within about .010"... I'm happy with it.

I am going to find some brass round bar (7/8"x4") and some copper (1/2"x2") and make a realistic one. :thumbsup:
Also want to pick up an alpha-numeric punch set...

Knobs are aluminum.
 
Back
Top